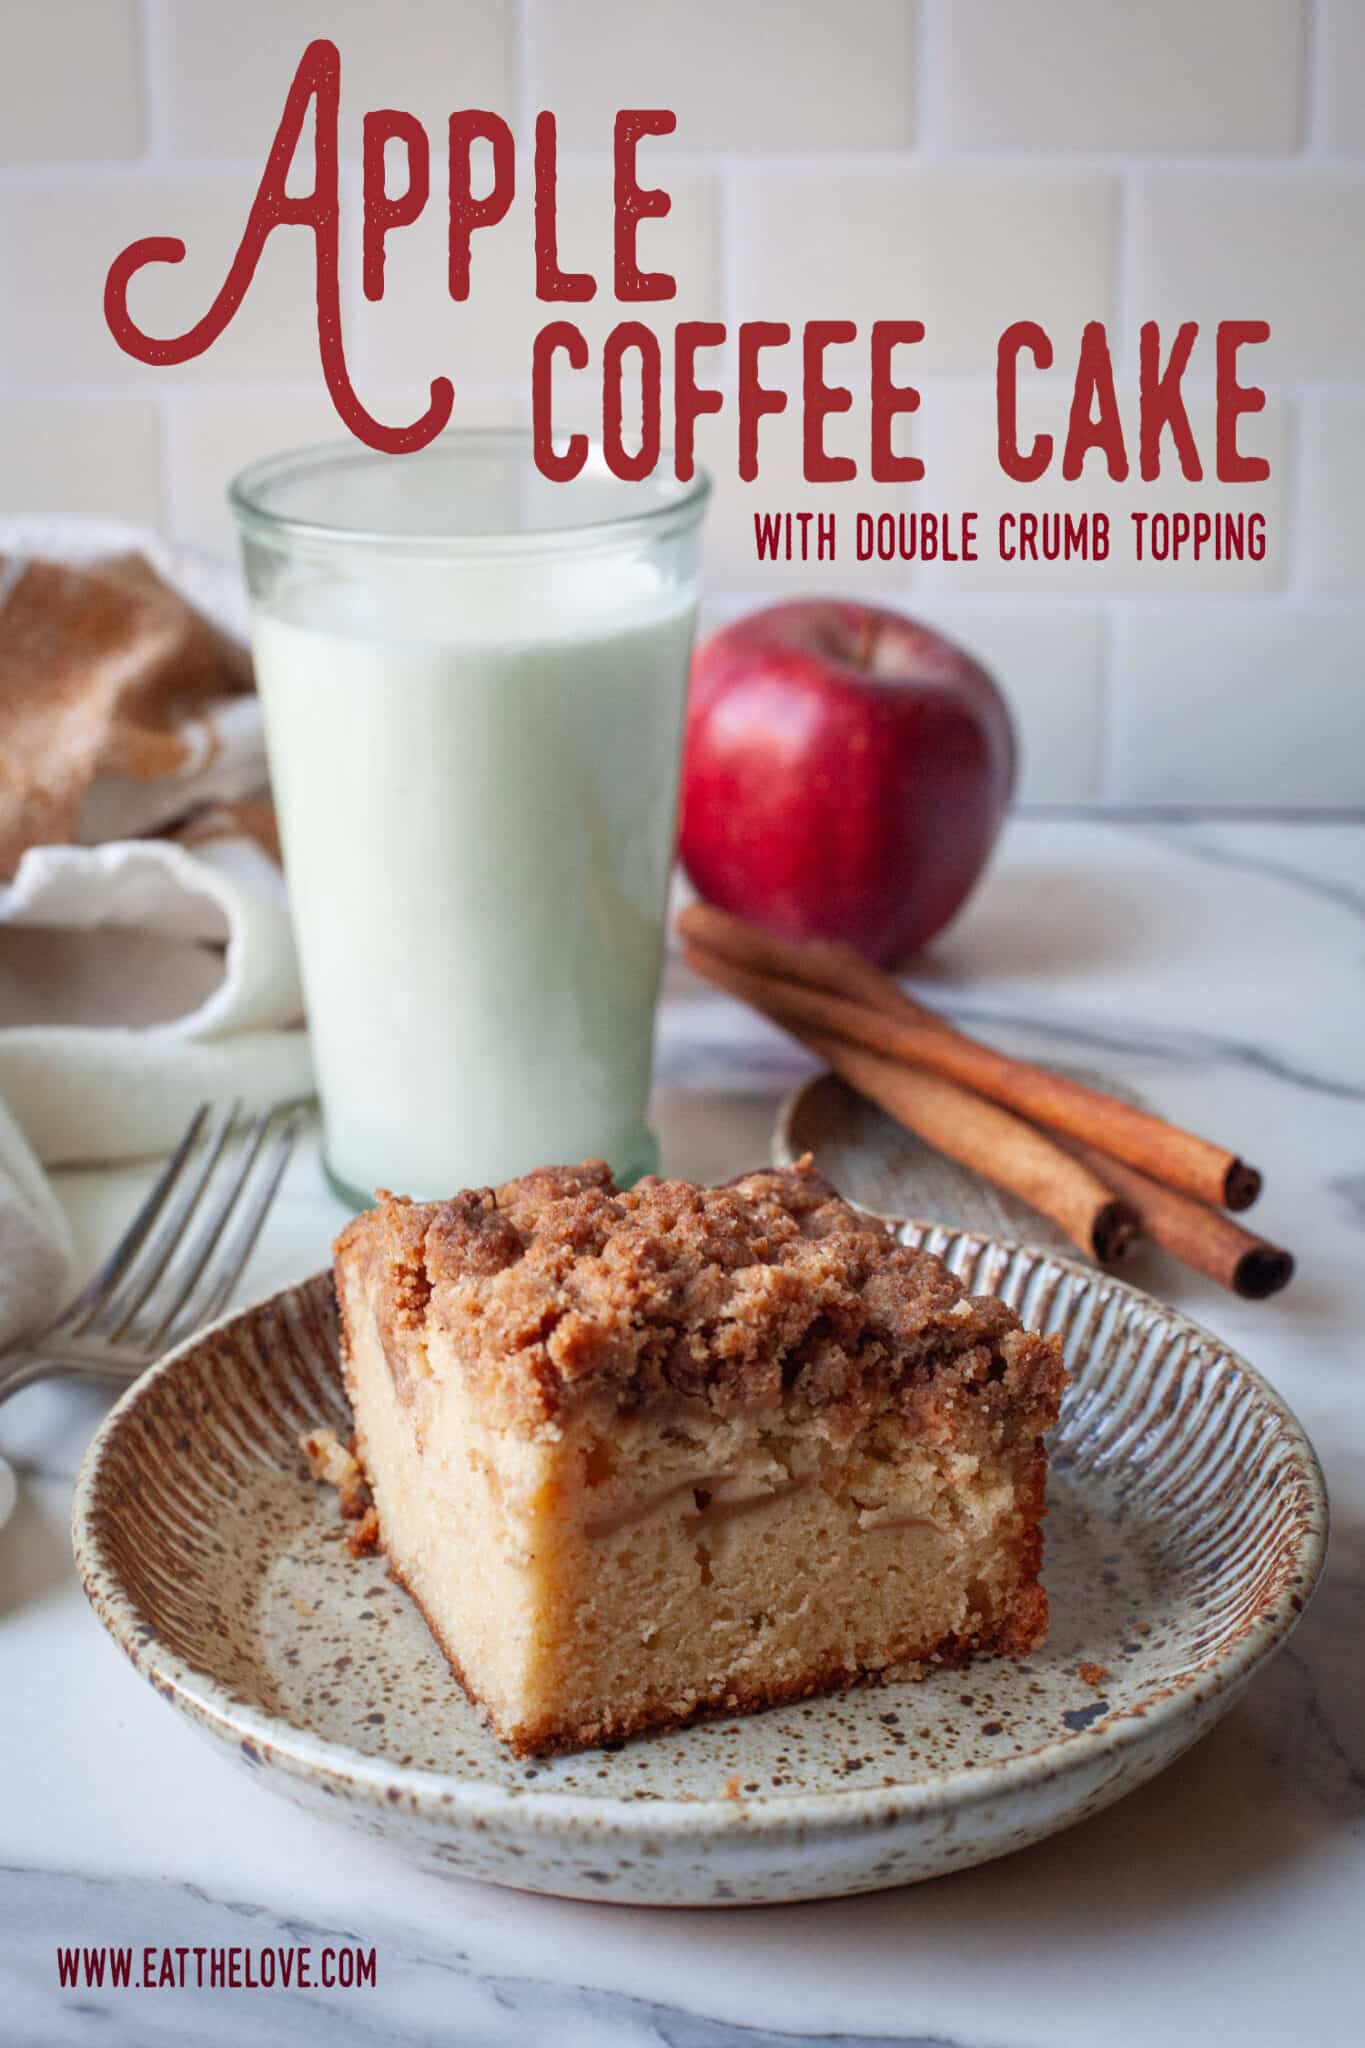
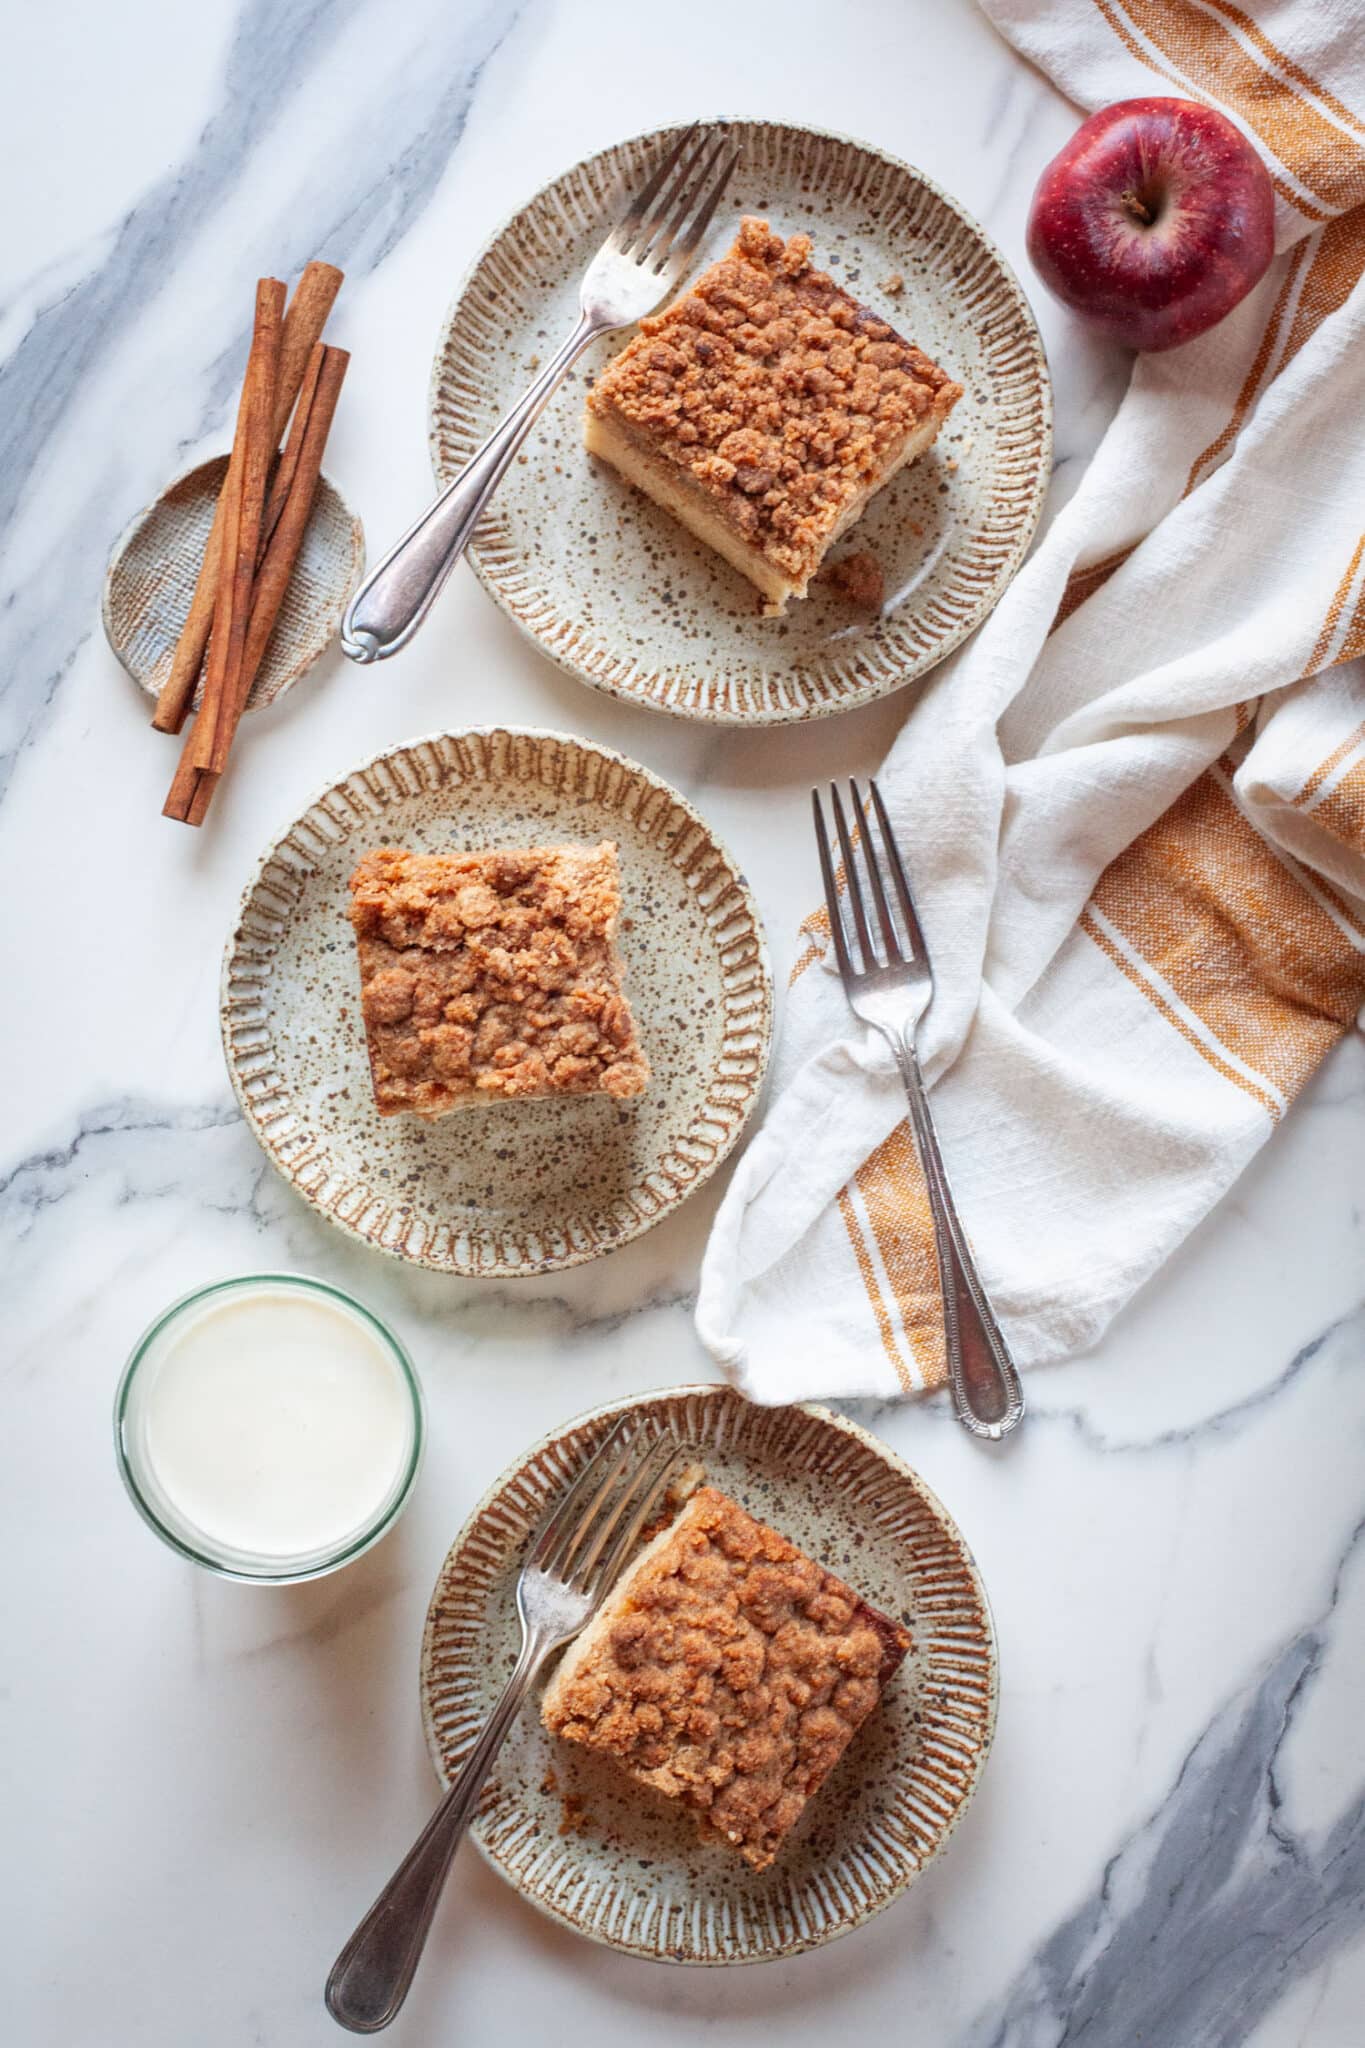
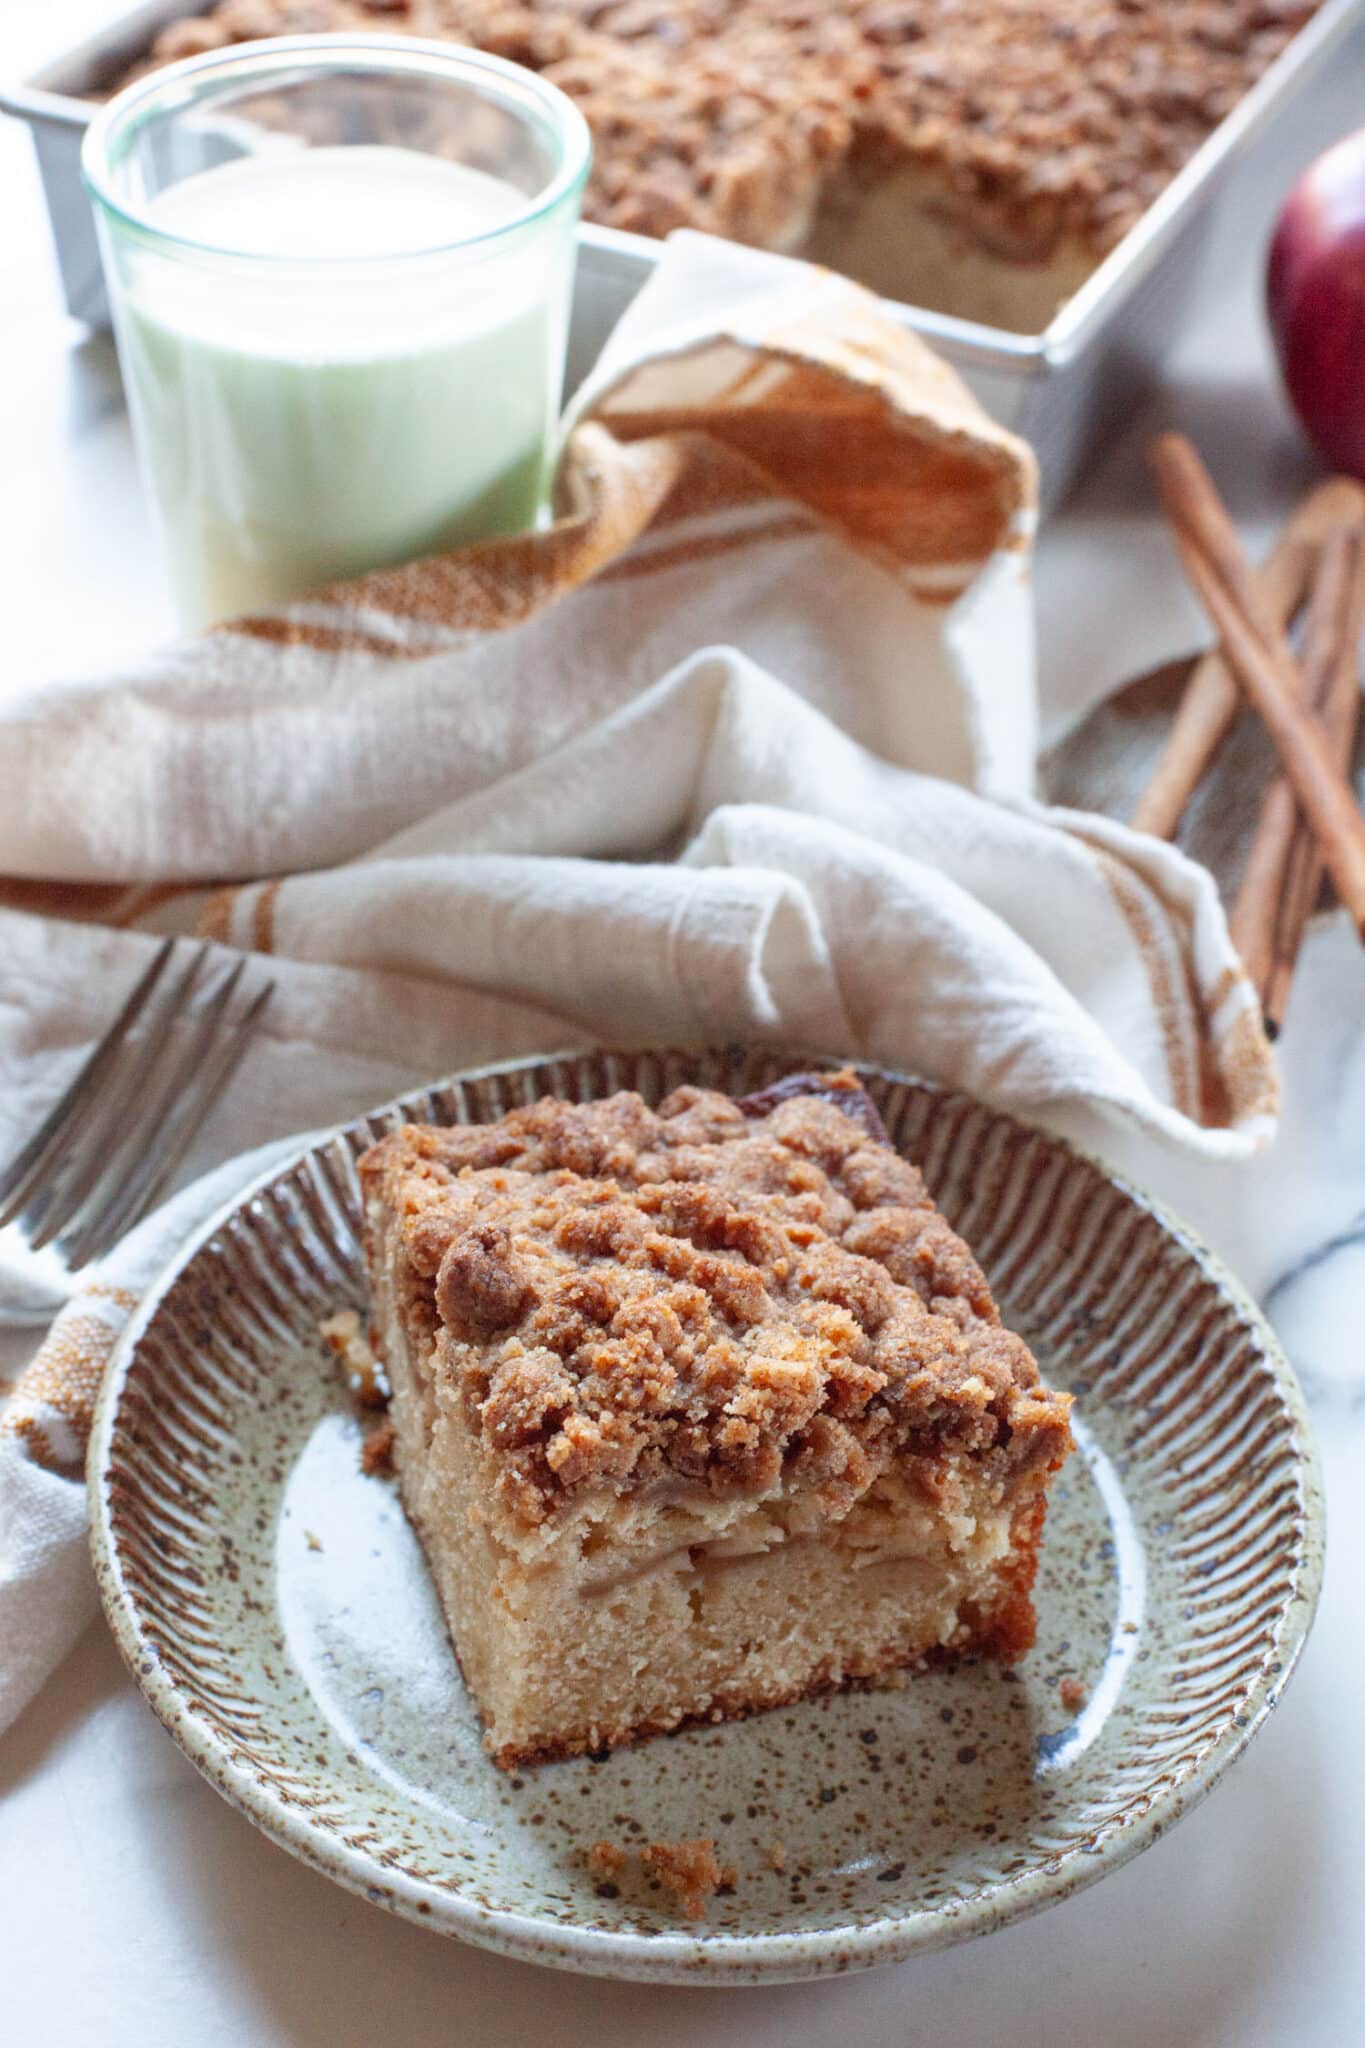
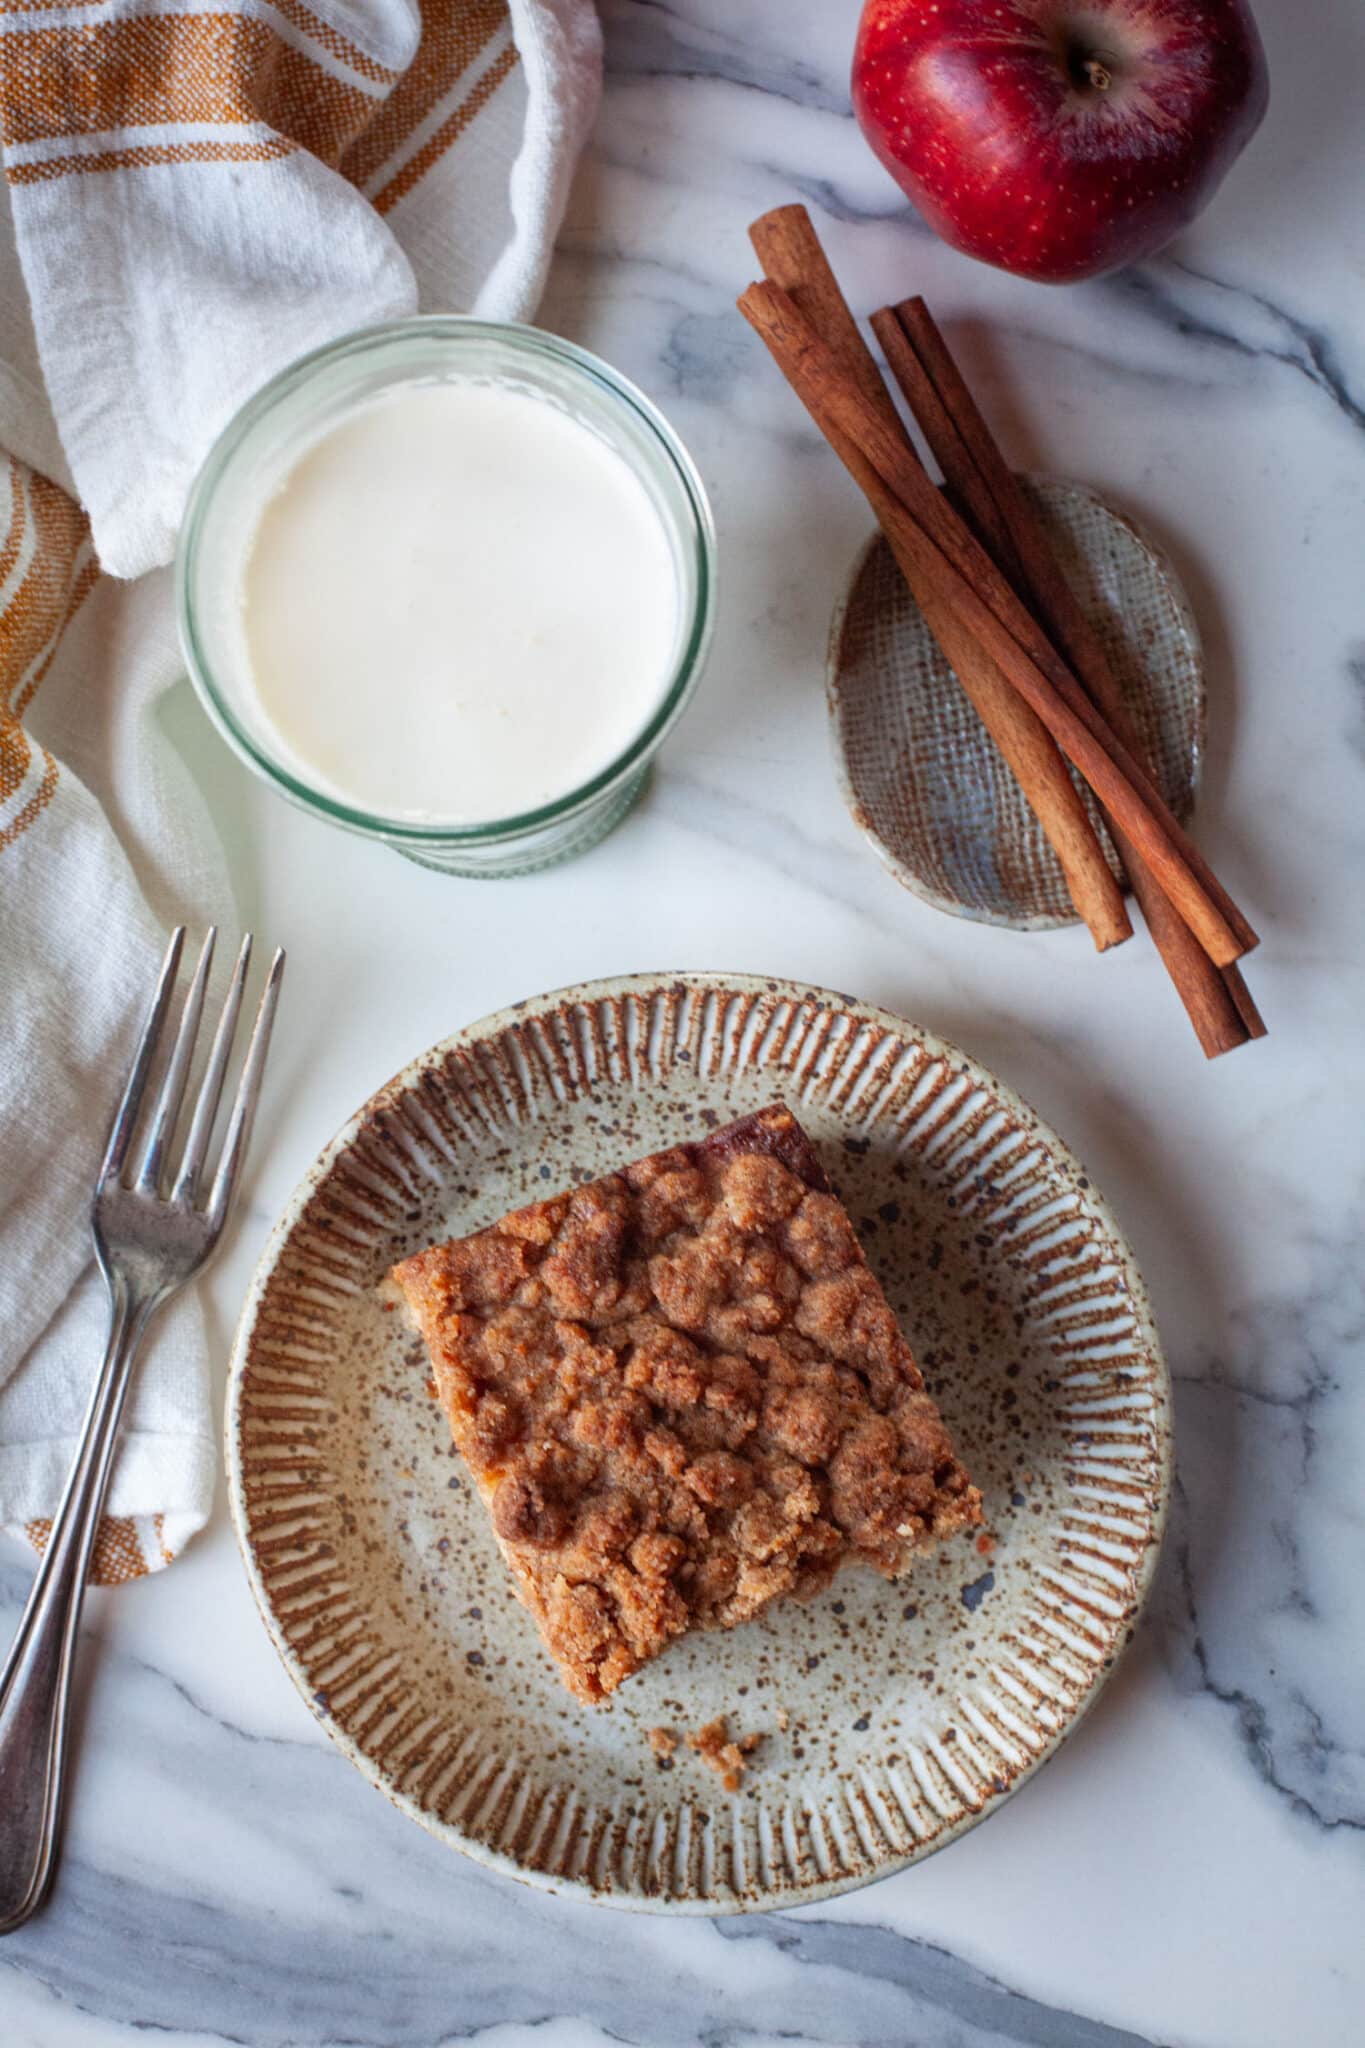
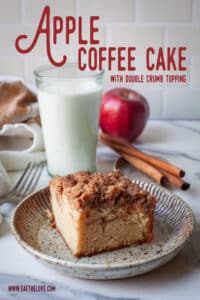
This apple coffee cake is rich and buttery, with a layer of tender apples and a double layer of cinnamon crumb topping!
This post was sponsored by Real California Milk. I was compensated for this post and developing this recipe. However, all opinions below are my own. To find more recipe inspiration visit the Real California Milk website.
I’m not going tell you the ideal wintery flavor because I refuse to pick between pumpkin, gingerbread, peppermint, seasonal fruit like pomegranates, apples, and pears. But I do have a fondness for apples that knows no bounds. This is clearly evident with my various apple recipes, including apple cider donuts, apple fritters, apple bread, apple Brown Betty, apple fig cobbler with eggnog biscuits, apple and berry cobbler with strawberry cinnnamon swirl biscuits, spice apple berry cobbler, and the numerous apple pie recipes like fried apple hand pies, apples slab pie with prunes, tarte tatin, apple and cranberry pie with almond butter, and my open-faced brown butter spiced apple pie. When it comes to apples, I’m a fan!
But despite having a number of coffee cakes on here (cinnamon streusel coffee cake, blueberry cream cheese coffee cake, pumpkin coffee cake, Mexican Chocolate Corn Coffee Cake, Swedish blueberry cake, Earl Grey blueberry coffee cake) I’ve never shared my apple coffee cake. It has a plush and buttery coffee cake layer, a soft (not crunchy) apple filling, and a double layer of crumb topping that makes ideal for a fall and winter snack. Though honest, I make it anytime, because apples are easily available all year round. One bite and you’ll understand why!
How Do you Make this Coffee Cake
This coffee cake is basically three recipes combined into one. And though it looks complicated, with a lot of steps and ingredients, it comes together fairly fast.
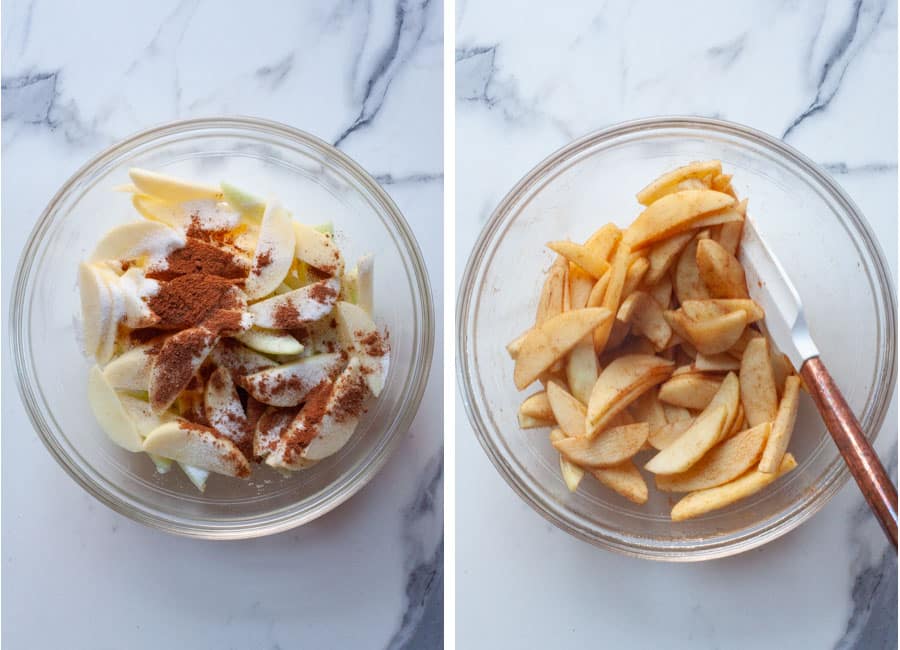
The first think you need to do is peel and then slice apples. Place them in a microwave safe bowl, toss them with a little bit of sugar, cinnamon and nutmeg, then cover with a plate. Cook for a few minutes in the microwave until they start to look a little transparent and have softened a bit, and liquid has started to be release. The apples don’t have to be fully cooked, but this ensures they aren’t crunchy and hard in the cake. Set aside to cool.
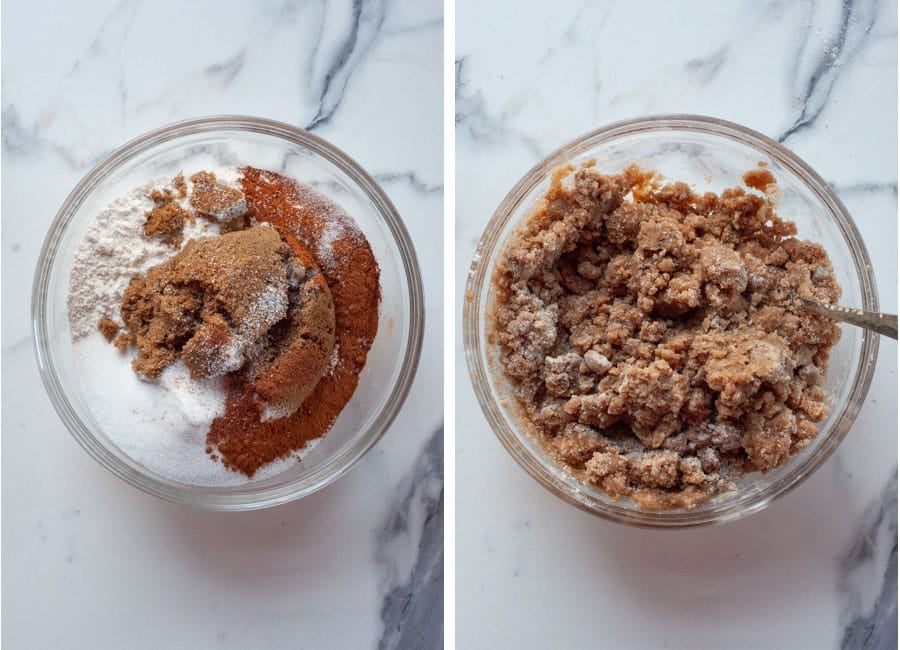
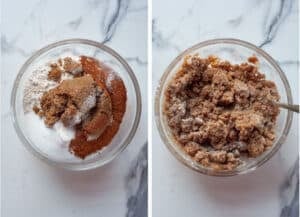
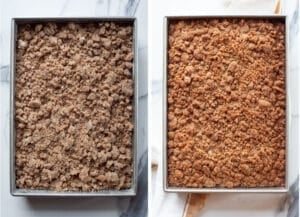
Then make the crumb topping by tossing together brown sugar, white sugar, cinnamon, nutmeg, salt, and flour in a bowl. Drizzle melted butter over it, tossing until crumbs and chunks form. Place in the fridge while you make the cake batter.
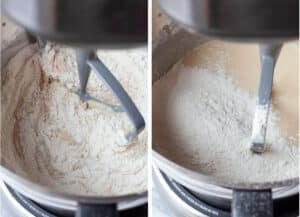
Make the cake batter by creaming butter, white sugar, brown sugar, vanilla, baking powder, baking soda and salt together in the bowl of stand mixer. Add in three eggs, one at a time. Scrape down the sides between additions. Pour in the liquid at the bottom of the apples (reserving the apples for later, then add the sour cream, half the flour, then milk, then the rest of the flour, again scraping down between additions.
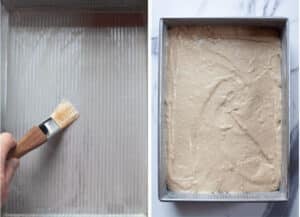
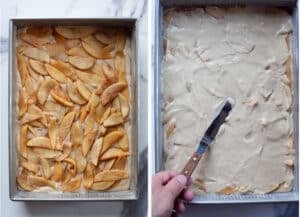
Pour most of the cake batter and spread it out in a buttered 9 x 13 x 2-inch pan, reserving about 1 cup of the batter. Layer the apples over the batter, then spread the remaining batter over the apples.
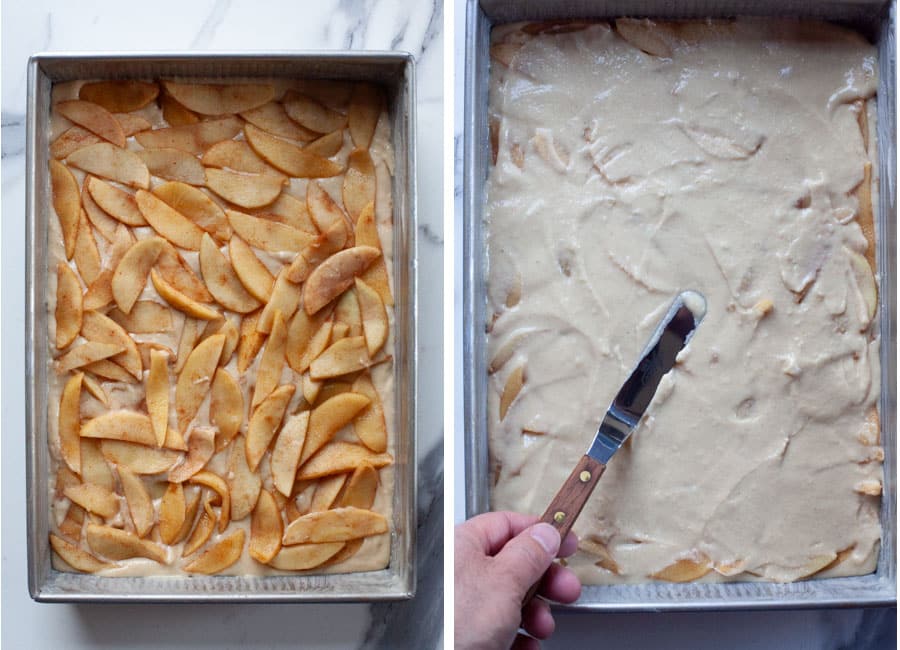
Sprinkle the top with the crumb topping, breaking up and super large chunks (but leaving some of it chunky because that’s what makes it good!). There’ll be a LOT of crumb topping, but it’s totally what makes this cake!

Bake and then let cool in the pan for 30 minutes before serving.
Sour Cream and Butter is the Answer to a Tender Crumb
This recipe uses Real California Milk sour cream and butter, along with milk in the batter. All of them play a role in making this the best coffee cake you’ve had.
Sour cream is a thickened dairy product that is made by fermenting regular cream with a lactic acid bacteria culture. Sour cream acts as a tenderize because of the high fat content. And because sour cream is slightly acidic, it reacts with the baking soda in the recipe, creating lift and a better texture. If you don’t have sour cream, you can substitute whole milk Greek-style yogurt in its place but the cake won’t be quite as rich in flavor.
The butter in the cake not only give richness and flavor the cake but it also helps keep the cake tender by inhibiting gluten forming. Creaming the butter with the sugar aerates the batter, as well as evenly distributed the baking powder, baking soda and vanilla. Finally, vanilla has a lot of fat-soluble flavor molecules. Adding it into the step in the beginning with the butter means you get a boost of vanilla flavor.
I always look for the Real California Milk seal when I buy my dairy products. It ensures that I’m getting quality ingredients, made with milk from family-run dairy farms in California. And it’s not just milk, butter and sour cream that carries the seal. You can find it on everything dairy, from yogurt, ice cream, cheese, and more.

A Note About the Apples
You’ll notice in this recipe that I pre-cook the apples in the microwave slightly. This is to give them a jump start in cooking, so they aren’t crunchy in the final coffee cake. But I also drain them a bit, as the apples have a lot of juice, and cooking them with the batter raw might lead to a slightly soggy cake underneath the apples.
If you don’t have a microwave or are feeling lazy and want to skip this step, it’s fine to just layer the apples raw on top of the cake batter. Just keep in mind that the cake will be slightly more moist underneath the apples.
As for the type of apple to use, I always recommend picking a variety of apples as I like the complexity that tart apples like Granny Smith and sweet apples like HoneyCrisp add to any baked good. But my biggest advice is to just eat one of the thin slices of apple before using it in any baked good. If the apple tastes mealy or doesn’t have any flavor, it’s not going to improve in cooking. Use a different apple to use in your cake or pie!
Storing This Cake
This cake stores at room temperature anywhere from 5 to 7 days. Store it at room temperatures, making sure the cake is covered by plastic wrap or aluminum foil. I don’t recommend storing it in the refrigerator though, as that will dry it out.
You can, however, freeze the cake for longer storage. Slice the cake into individual pieces, then place it on a baking sheet in the freezer. Once the cake slices are frozen solid (about 2 hours), move them to a resealable Ziploc freezer bag or a plastic storage container, placing pieces of parchment or wax paper between each piece to prevent them from freezing together. To thaw, just leave it out on the counter for a day or two. Frozen coffee cake can last up to 3 months in the freezer.
More Fall and Winter Cake Recipes
If you like this apple coffee cake, check out these other fall and winter cake recipes.
- Pumpkin Layer Cake
- Guinness Stout Chocolate Cake
- Gingerbread Stout Cake
- Manhattan Cocktail Bundt Cake
- Swedish Tea Ring
- Swedish Blueberry Cake
- Butternut Squash Olive Oil Cake with Brown Sugar Glaze
- Peppermint Texas Sheet Cake
Apple Coffee Cake with Double Crumb Topping
Ingredients
Apple layer
- 3 to 4 medium-sized apples any variety (about 600 g)
- 2 tablespoon white sugar
- 1/2 teaspoon ground cinnamon
- 1/4 teaspoon ground nutmeg
Crumb topping
- 2 1/2 cups all-purpose flour 315 g
- 1 cup packed dark brown sugar 220 g
- 1/2 cup white sugar 100 g
- 1 tablespoon ground cinnamon
- 1/4 teaspoon ground nutmeg
- 1/2 teaspoon kosher salt
- 1 cup Real California Milk unsalted butter 225 g or 2 sticks
Cake batter
- 3/4 cup Real California Milk unsalted butter at room temperature 170 g or 1 1/2 stick
- 1 1/2 cups white sugar 300 g
- 1/4 cup packed dark brown sugar 65 g
- 1 tablespoon vanilla extract
- 2 1/4 teaspoon baking powder
- 1/2 teaspoon baking soda
- 1 teaspoon kosher salt
- 3 large eggs
- 3/4 cup Real California Milk sour cream 200 g
- 3 1/2 cups all-purpose flour divided, 490 g
- 1 cup + 2 tablespoons Real California Whole Milk 270 g
For pan
- 1 tablespoon Real California Milk unsalted butter
Instructions
- Prep the apples by peeling, coring and then slicing them into 1/4-inch to 1/2-inch thick slices. Place in a large microwave-safe bowl. Toss with the sugar, cinnamon, and nutmeg to coat. Microwave on high for 3 minutes, or until the apples start to look slightly translucent, are flexible, and have started to exude liquid. They don’t need to be cooked completely. Set aside to cool.

- Melt the butter in a medium dish or glass measuring cup in the microwave. Make the crumb topping by placing the flour, brown sugar, white sugar, cinnamon, nutmeg, salt in a large bowl. Stir with a whisk to combine and break up the brown sugar. Drizzle the melted butter over the dry ingredients, tossing with a fork, until all the butter has been absorbed and clumps form. Place in the refrigerator (no need to cover it) while you make the cake batter.
- Preheat the oven to 350°F.Make the cake batter by placing the butter, white sugar, brown sugar, vanilla, baking powder, baking soda, and salt in the bowl of a stand mixer fitted with a paddle attachment. Cream the ingredients together until a fluffy paste forms and clings to the side of the bowl.
- Scrape down the sides and bottom of the bowl. Beat in the eggs, one at a time, scraping down the sides and bottom between additions. Add in the sour cream and any residual liquid at the bottom of the apples (it should be about 2 tablespoons), making sure to reserve the solid apple slices for later. Mix, again scraping down the sides afterwards.
- Add in about half the flour, then the milk, then the rest of the flour, making sure to scrape down if you see the batter sticking on the sides or bottom. I like to scrape it down right at the end, to make sure there’s not any thicker batter paste on the sides or the bottom, then mix for another 10 to 15 seconds to make sure everything is combined evenly.
- Melt the butter in a small dish in the microwave. Brush the sides and bottom of a 9 x 13 x 2-inch pan with the melted butter. Pour most of the cake batter into the pan, leaving about 1 cup or so in the bowl, spreading the cake batter evenly in the pan.
- Sprinkle and place the apples slices over the cake batter evenly. Drizzle the remaining cake batter over the apple slices and spread it evenly over the apples. Don’t worry about if there are some apples still peeking through. You just want enough cake batter to help anchor the apples into the cake.
- Take the crumb topping out of the fridge and sprinkle it over the top of the cake, breaking up any super big chunks with your fingers. But leave some of the crumb topping chunky, as that’s what makes it awesome! It will seem like an extreme amount of crumb topping but don’t stress, that’s also what takes this cake to the next level.Bake in the oven for 65 to 75 minutes or until a toothpick comes out clean from the center and the crumb topping is golden brown. If you have an instant read thermometer, the middle inside of the cake should read 200°F to 205°F.
- Let cool in the pan for 30 minutes before serving.


Nutrition
Pin it for Later!

Leave a Reply