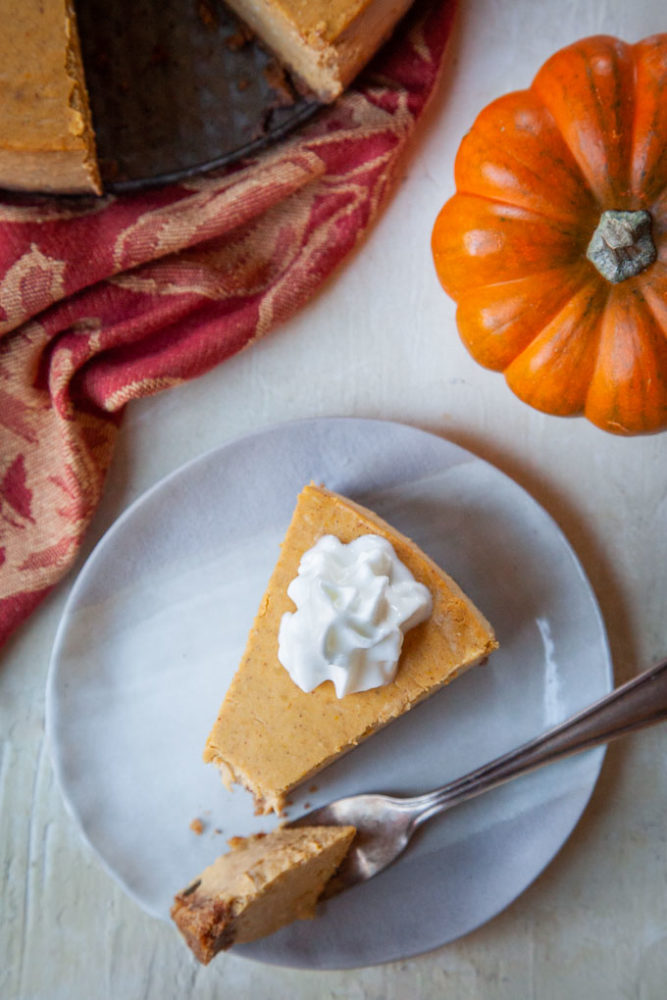
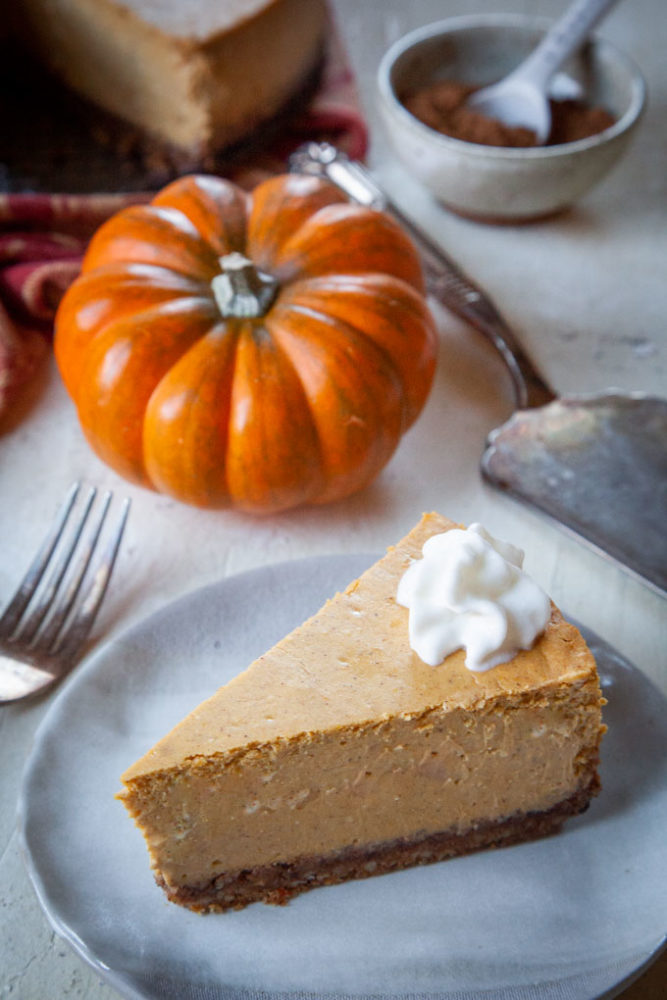
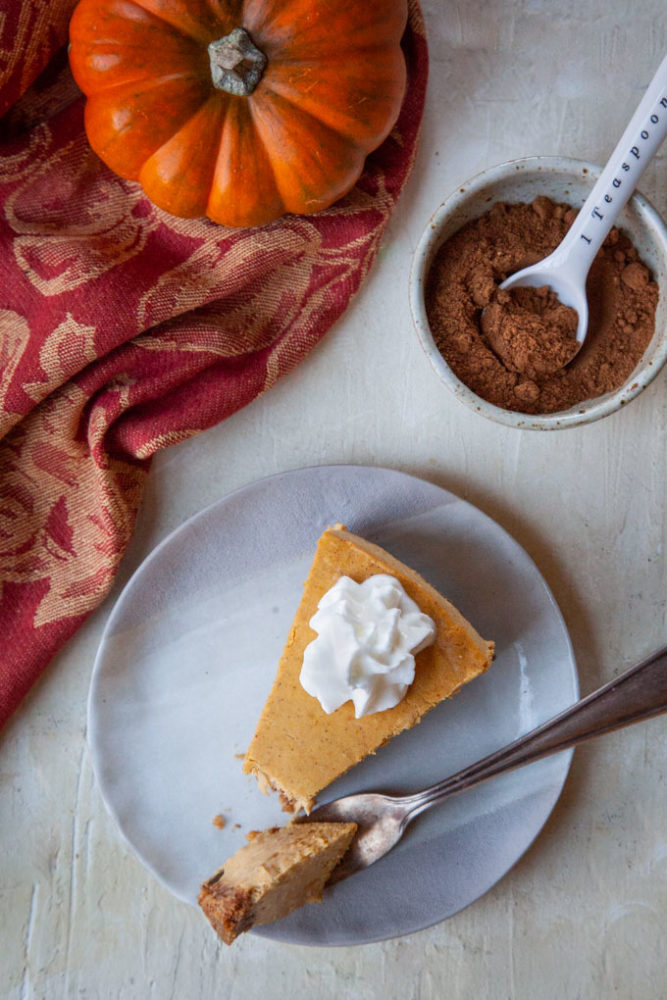
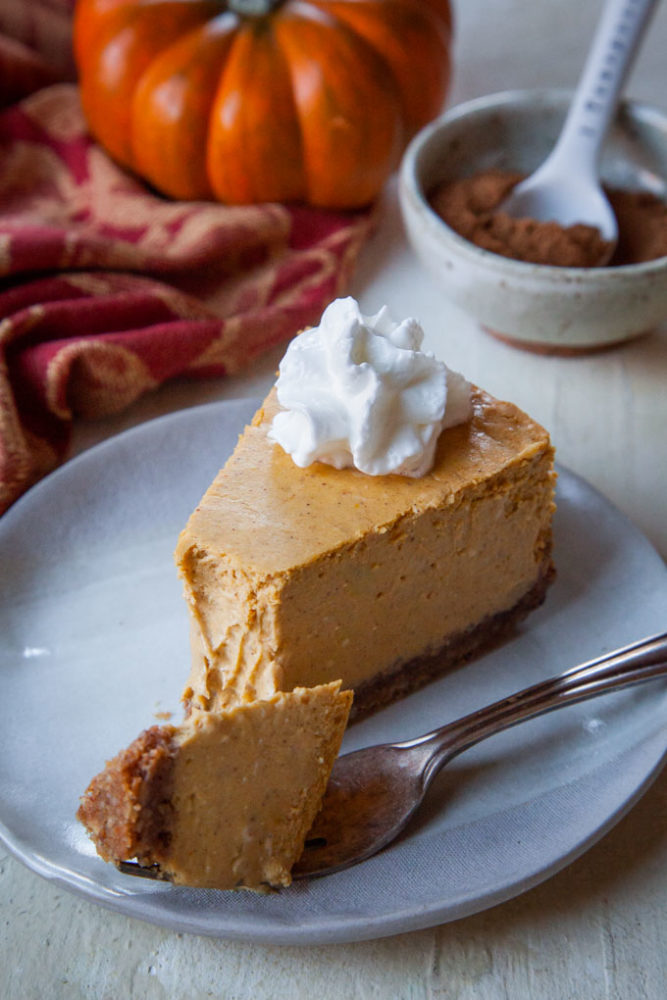
This smooth and creamy pumpkin cheesecake has pumpkin pie spice blend in the pecan and graham cracker crust a well as the filling.
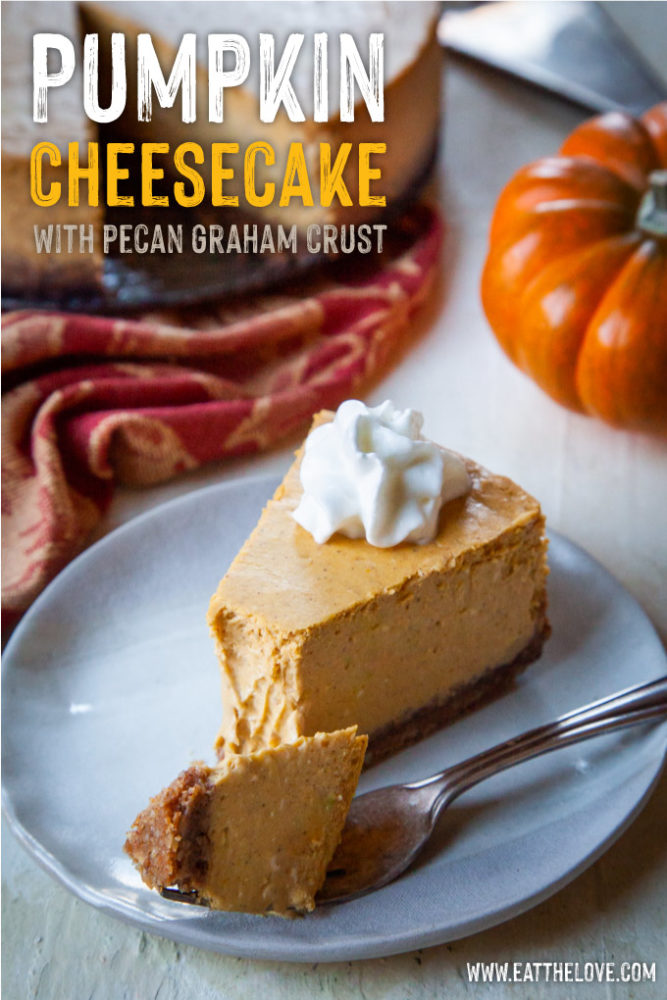
Lately I’ve been serving up pumpkin cheesecake annually for Thanksgiving. It’s not that I don’t love pumpkin pie. It’s that after serving various different pumpkin pies, including my pumpkin tart, my chocolate pumpkin pie, and my caramel pumpkin pie for 20+ years after our annual Thanksgiving dinner, it’s nice to make a change! This pumpkin cheese is rich and creamy, without being overly heavy. It has a generous amount of wintry pumpkin pie spice and is a family favorite even for folks who skip the classic pumpkin pie.
How do I make pumpkin cheesecake?
Making a pumpkin cheesecake seems daunting but it’s not. Just keep in mind that you need to make it a day ahead of serving, as it needs to sit in the refrigerate to chill and set up.
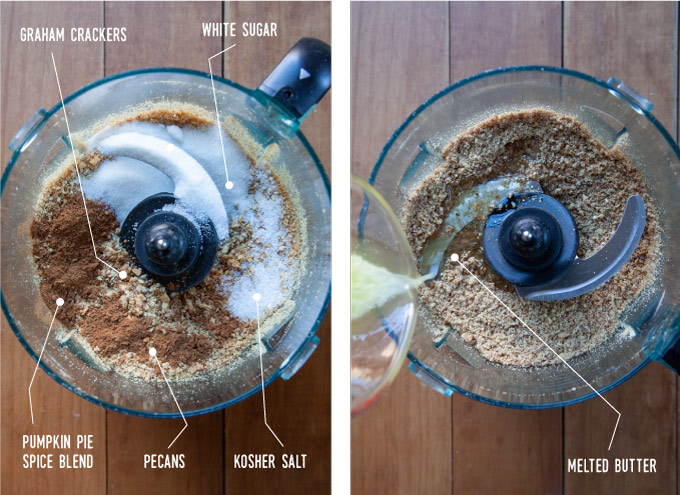
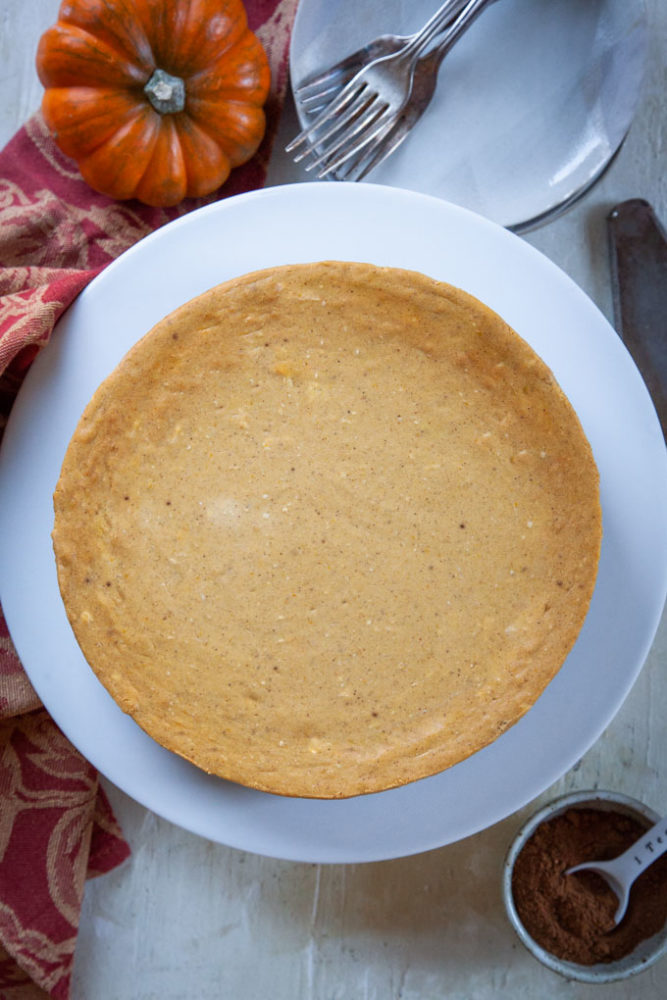
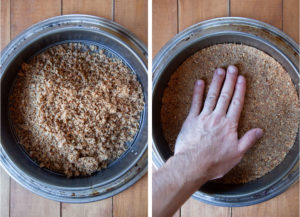
First make the pecan graham cracker crust. Crush all the crust ingredients, pecans, graham crackers, sugar, pumpkin pie spice and a touch of salt in a food processor. Then drizzle with melted butter and pulse a few more times to combine. Press moist crumbs into the bottom of a springform pan. Bake for a little bit.
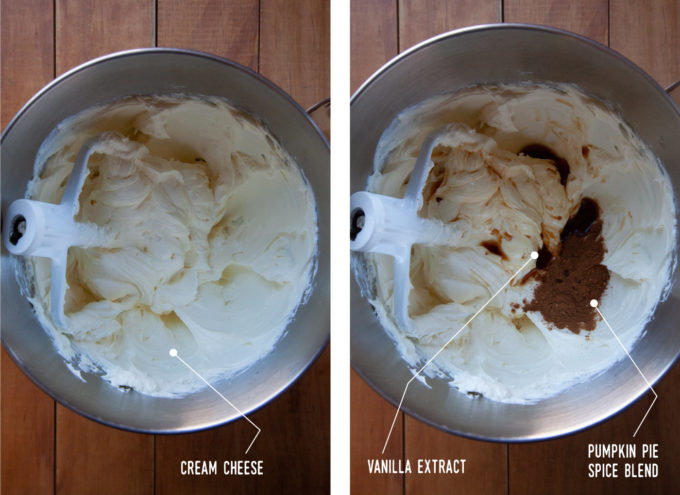
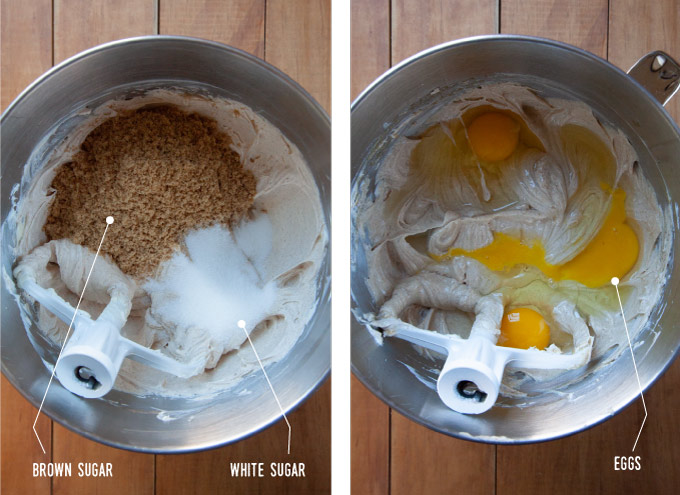
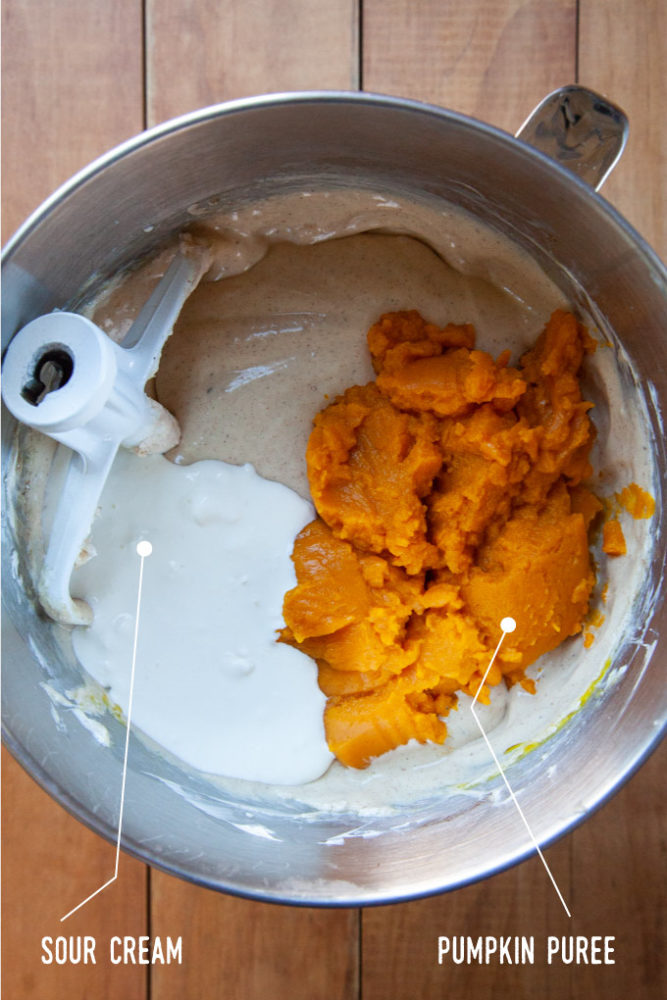
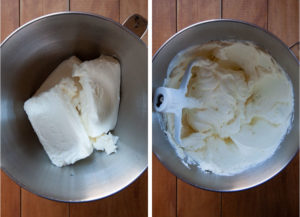
Then make the filling by using room temperature cream cheese and eggs, along with some vanilla, more pumpkin pie spice, white and brown sugar, some sour cream and pumpkin puree.
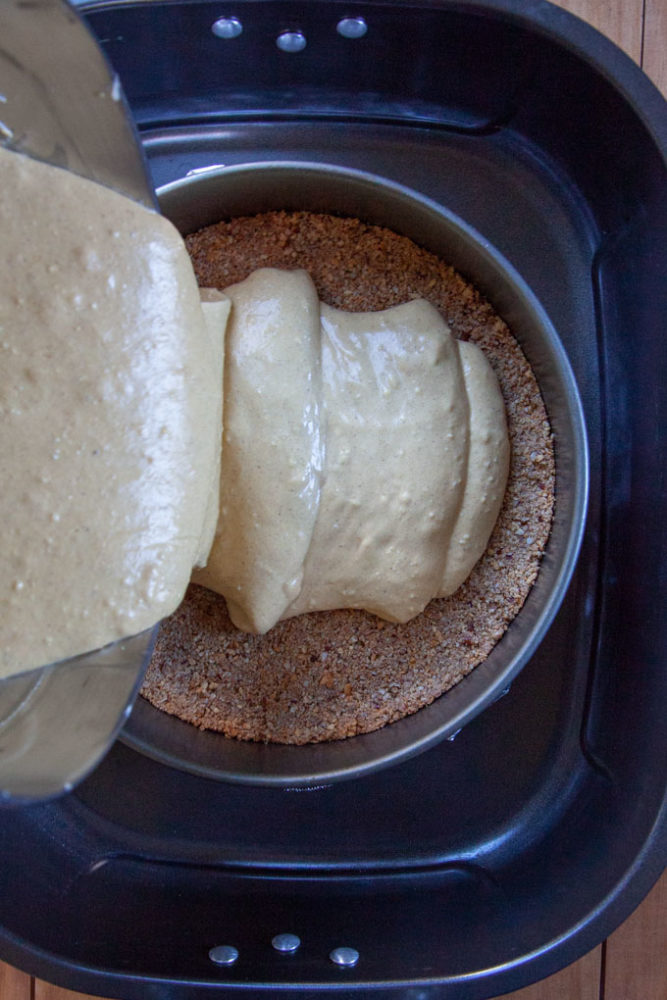
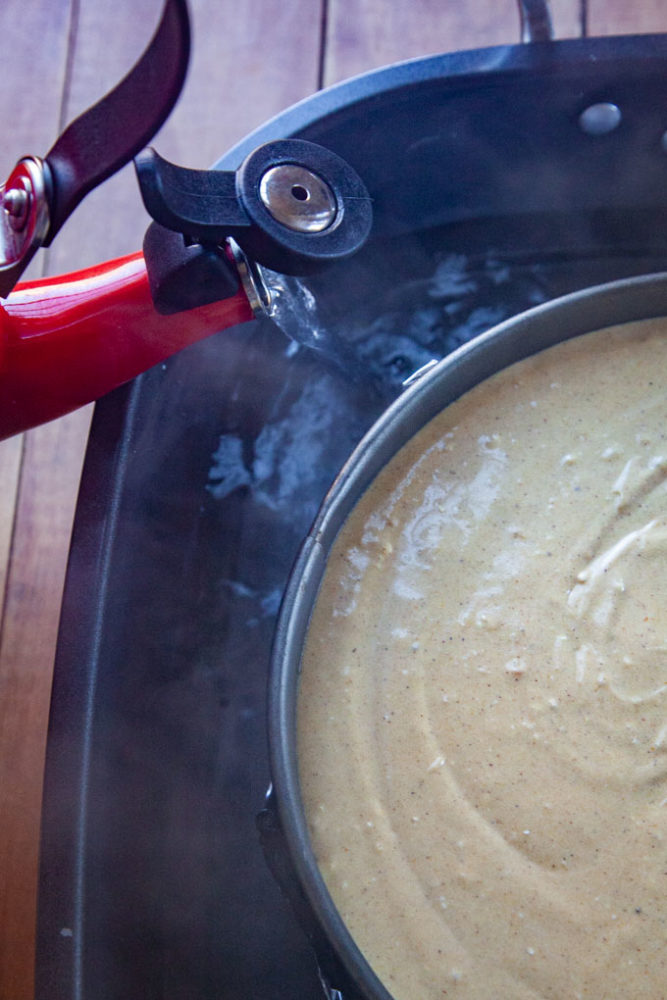
Pour filling into the springform pan and bake in a water bath. Once done, cool for a bit in the oven, take it out and cool to room temperature and then refrigerate overnight before serving.
What is a water bath and why do I need to use it?
A water bath is exactly what it sounds like. You place the cheesecake pan inside a large roasting pan, and then you pour boiling water around the cheesecake pan into the roasting pan. Then you bake the cheesecake in the pan with the water around it.
It sounds fussy to do but a water bath has multiple functions in making a cheesecake. First it keeps the baking slow, allowing for the center of the cake to cook fully without the edges of the cake baking too fast. Liquid water will only get to 212°F before it evaporates. So, the edges of the cheesecake don’t over heat.
Secondly the evaporated water from the bath keeps the oven environment moist, leading to a moist and creamy cheesecake. The steam also helps create a more even temperature inside the oven, so you don’t get a high risen edge and a sunken middle of the cheesecake.
Finally, as you cool the cheesecake in the oven, the heat capacity of the water is higher than the heat capacity of the air in the oven. This means the water will cool down slower once the oven has been turned off. Quick heat changes can makes the cheesecake crack. With a water bath, the cheesecake will cook slowly, and cool down slowly, both of which help prevent cracks.
How do I prevent cracking in cheesecakes?
One of the biggest issues with cheesecake is the cracking that can occur on the top of the cheesecake. Reasons why cheesecake might crack include:
- Parts of the cheesecake cooks faster than other parts. This could be a hot spot in the oven or you have the oven that runs too hot or has hot spots.
- The cheesecake cools too fast, which causes stress on the custard filling, as the cooling part shrinks faster than the warm part.
- Overbaking will also create cracking, with the outer rim of the cake more firm while the inside center still creamy and soft. This difference in texture will have the custard filling separating from each other, causing cracks.
Using a water bath helps with this issue. The slow baking and slow cooling prevents extreme temperature changes that will cause the cracking. Cooling the cheesecake in the oven with the door cracked slowly for an hour also helps prevent cracks. And finally making sure to stop baking the cheesecake when the middle part (about 2 to 3 inches from the center) is still wobbly will prevent overbaking.
But if ALL ELSE FAILS and your cheesecake still cracks, don’t worry. It happens to everyone and it will still taste fantastic. That’s all that matters! Just serve it with a big dollop of whip cream over the cracks and no one will know the difference.
What is a springform pan? Can I use something else?
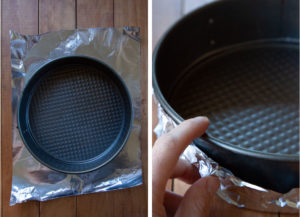
A springform pan is a pan with removable sides. It allows you release the cheesecake from the pan without flipping it over. If you plan on making cheesecakes, a springform pan is worth investing it. However, don’t trust ones that claim to be “leakproof”. As the pan gets used, it starts to warp slightly and will start to leak. This is why I always wrap aluminum foil around the bottom of the pan.
If you don’t have a spring form pan, you can still bake a cheesecake! Just use a 9-inch cake pan that is at least 2-inches tall, preferably 3-inches tall. This is to accommodate the cheesecake rising.
You can serve the cheesecake directly in the pan. But if you want to remove it, I recommend oiling the bottom and the sides of the pan. Then line the bottom with parchment paper and the sides with a strip of parchment paper. If your pan is 2-inch tall, I recommend the strip of parchment paper go higher than pan itself to help contain any cheesecake that might rise higher than the pan when baking. The parchment paper makes it much easier to remove it from the pan! Keep in mind that cheesecake is perfectly fine to serve in the pan itself though.
Can I substitute the pecans or make the crust nut free?
Yes! If you don’t like pecans or don’t have any on hand just substitute an equal amount any sort of nut for the pecans. These include:
- Walnuts
- Hazelnuts
- Pistachios
- Almonds
- Cashews
- Macadamia nuts
- Peanuts
Or if you’re avoiding nuts or are allergic to nuts, but still want a crunchy nutty flavor to the crust, consider substituting the same amount of:
- Cacao nibs
- Pumpkin seeds
- Sunflower seeds
- Rolled oats
You can also just skip the nuts and add in an additional sleeve (9 to 10) graham crackers in place of the pecans.
How do I get my cream cheese and eggs to room temperature?
One of the most frustrating things about cheesecake is the lumps in the cream cheese! I always suggest using room temperature cream cheese as it will blend more smoothly without lumps. Obviously, the easiest way to get room temperature cream cheese is to leave the cream cheese out for a couple of hours on the counter top.
But if you are in a rush or forget to do this, just place the cream cheese, still in its aluminum foil unsealed, in a large bowl with hot water from the tap. Do this before preheating the oven or making the crust. Once the crust is in the oven to bake, drain the water (it will have cooled a bit) and refill the bowl with more hot water. By the time the crust is finished baking, the cream cheese should have warmed up enough to be at roughly room temperature and lump free.
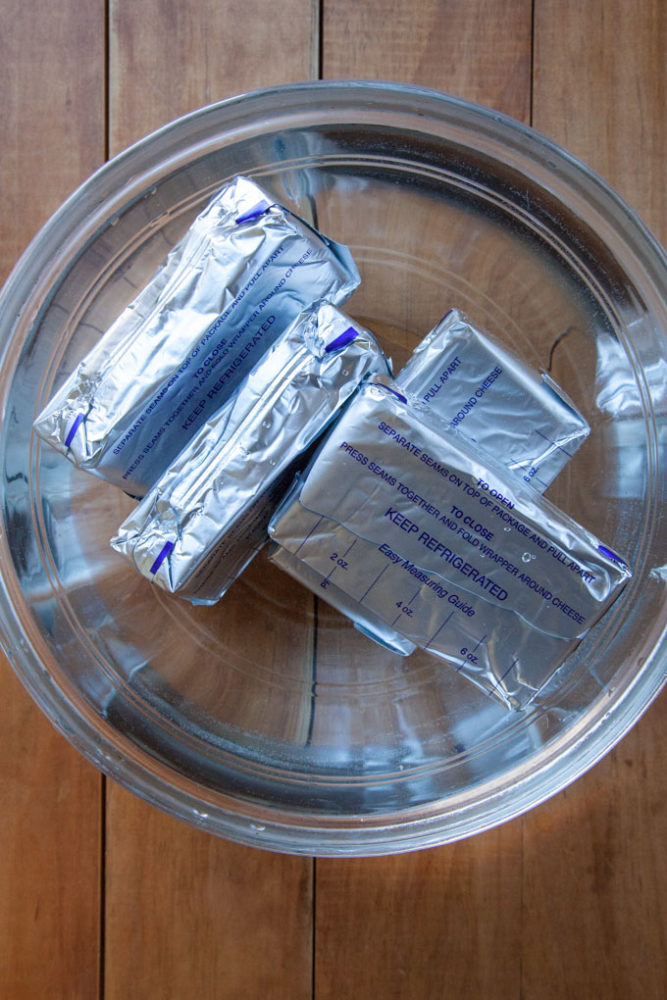
You can use this trick to warm up eggs to room temperature too! Just place them in a bowl of hot water from the tap while you make the filling. By the time you need to add them to the filling, they will also be warmed up to room temperature.
What is pumpkin pie spice and can I substitute for it?
Pumpkin pie spice blend is a blend of warm wintery spices that you can buy at most grocery stores and online! Various brands have different ingredients in the blend but most brands have a primary ingredient of cinnamon with additional ingredients including ginger, nutmeg, cloves and allspice. You can either make your own homemade pumpkin pie spice or substitute 1/2 teaspoon cinnamon, 1/4 teaspoon ground ginger, 1/8 teaspoon nutmeg, and 1/8 teaspoon ground cloves for every 1 teaspoon of pumpkin pie spice needed in the recipe.
But if you don’t have all those ingredients, just use all cinnamon for the pumpkin pie spice blend in the recipe. The cheesecake will still taste great, just not as complex in flavor and dimension.
Frequently Asked Questions
This cheesecake is best stored in the refrigerator, tightly sealed under aluminum foil or plastic wrap.
Refrigerated, the cheesecake should be consumed within 5 days.
Yes! Cheesecake can be frozen. You can freeze the entire cheesecake as is if you’d like. Just freeze it on a baking sheet until solid, about 3 hours, then wrap tightly with plastic wrap and move to a giant resealable Ziploc bag for storage. Or store in a large airtight container. The cheesecake should keep for up to 2 months. Thaw overnight in the fridge.
You can also freeze individual portions. Just slice up the cheesecake and store in an airtight container. This is great if you want to thaw out an individual slice of cheesecake for yourself and not a whole cake.
If you like this pumpkin cheesecake check out these other pumpkin desserts:
- Pumpkin Coffee Cake with Pecan Streusel Topping
- Pumpkin Snickerdoodles
- Pumpkin Spice Latte Bread
- Pumpkin Chocolate Chip Cookies with Streusel Topping
- Pumpkin White Chocolate Cheesecake Bars
- Pumpkin Cheesecake Brownies
- Marbled Pumpkin Chocolate Bread
And also check out these other cheesecake recipes.
- Chocolate Strawberry Cheesecake
- Carrot Honey Cheesecake
- Eggnog Cheesecake with Gingersnap Crust
- Sweet Potato Cheesecake with Gluten Free Crust
- Lemongrass and Rhubarb Cheesecake
- Chocolate Caramel Cheesecake
Pumpkin Cheesecake with Pecan Graham Cracker Crust
Equipment
- 9-inch springform pan
Ingredients
Crust
- 1 cup pecans 110 g
- 9 to 10 graham crackers, broken in half 135 g or about 1 sleeve
- 2 tablespoons white sugar
- 1 teaspoon pumpkin pie spice blend
see note above - 1/2 teaspoon kosher salt use 1/4 teaspoon if table salt
- 6 tablespoons unsalted butter melted
Filling
- 4 bricks (8 oz each) cream cheese, room temperature 2 lbs or 905 g,
see note above about bring cream cheese to room temperature - 1 tablespoon pumpkin pie spice blend
see note above - 2 teaspoon vanilla extract
- 3 large eggs
- 1/2 cup white sugar 100 g
- 3/4 cup packed dark brown sugar 165 g
- 1/4 cup sour cream
- 15 ounces pumpkin puree not pumpkin pie filling, 425 g
To bake
- Boiling water for water bath
Instructions
- Preheat the oven to 350°F. Place a 9-inch springform pan on top of a piece of aluminum foil. Gather the foil up about 1 inch up the side of the pan to help seal the bottom in case there is any leakage and to help prevent the water from seeping into the pan when you bake the cheesecake.

- Place the pecans in a food processor and process until they are broken down into small bits, roughly the size of unpopped popcorn kernels.
- Add the graham crackers and process again until they are broken down into crumbs and the pecans are about half the size that they were. Add the sugar, pumpkin spice and salt. Pulse a couple of times to blend. Then drizzle in the melted butter, pulsing while you do, until the entire crumb bottom is moist, and looks like wet rough sand.
- Dump the crumbs into the bottom of a 9-inch springform pan. Press down with your fingers and the palms of your hand, spreading out the crumbs until a flat layer has covered the bottom of the pan.Place the pan on a rimmed baking sheet or pizza pan and then bake in the oven for 10 minutes. The top of the crust should look slightly drier but don’t worry too if there isn’t much difference in the way the crust looks after baking. Let cool on a wire rack while you make the filling. Keep the oven at 350°F temperature.
- Make the filling by placing the room temperature cream cheese in the bowl of stand mixer fitted with a paddle attachment. Mix the cream cheese on medium low speed until the cream cheese is smooth, creamy and clings to the side of the bowl. You want to make sure there are no lumps in the cream cheese, as it will be difficult to get those lumps out later.
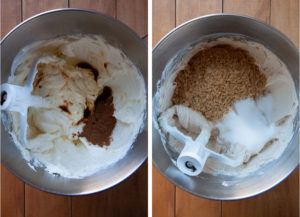
- Add the pumpkin spice and vanilla extract and mix to incorporate, about 10 seconds on medium low speed. Scrape down the sides and add the brown sugar and white sugar to the bowl. Mix to incorporate, about 30 seconds, then scrape down the sides again.
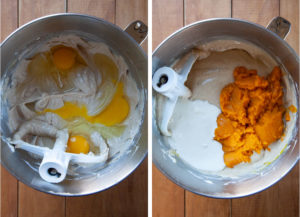
- Repeat with the eggs, adding them all at once, then the sour cream and pumpkin puree together, making sure to scrape down the sides of the bowl after each addition and mixing.
- Pour and scrape the filling in to the pan with the crust. Smooth the top of the filling out with a butter knife or offset spatula and then tap the pan gently on the counter to settle the filling and make sure there are no air bubbles.Place the entire pan in a large roasting pan, then pour the boiling water into the roasting pan, being careful not to get any in the cheesecake. Pour until the water is about halfway up the side of the cheesecake pan.Bake in the oven for 60 to 65 minutes or until the edge of the pan looks set but the inside of the cheesecake is still a little wobbly. Once done, turn off the oven and crack the door slightly. I like to put the handle of a wooden spoon in-between the door and the oven to do this. Let the cheesecake sit in the oven as it cools for 1 hour. This will help the cheesecake cool slowly so it is less prone to cracking.Once the hour is up, remove the cheesecake from the oven and then remove it from the water bath. Place on a wire rack to cool completely, about 2 to 3 hours. Once it has completely cooled (you can’t feel any warmth at all from the underside of pan), cover the cheesecake with foil and refrigerate for 6 hours or overnight. Serve cold or let the cheesecake warm up slightly for an hour on the counter before serving.


Dennis Collado says
The cake is so yummy. I love eating it while playing basketball superstars which is awesome.