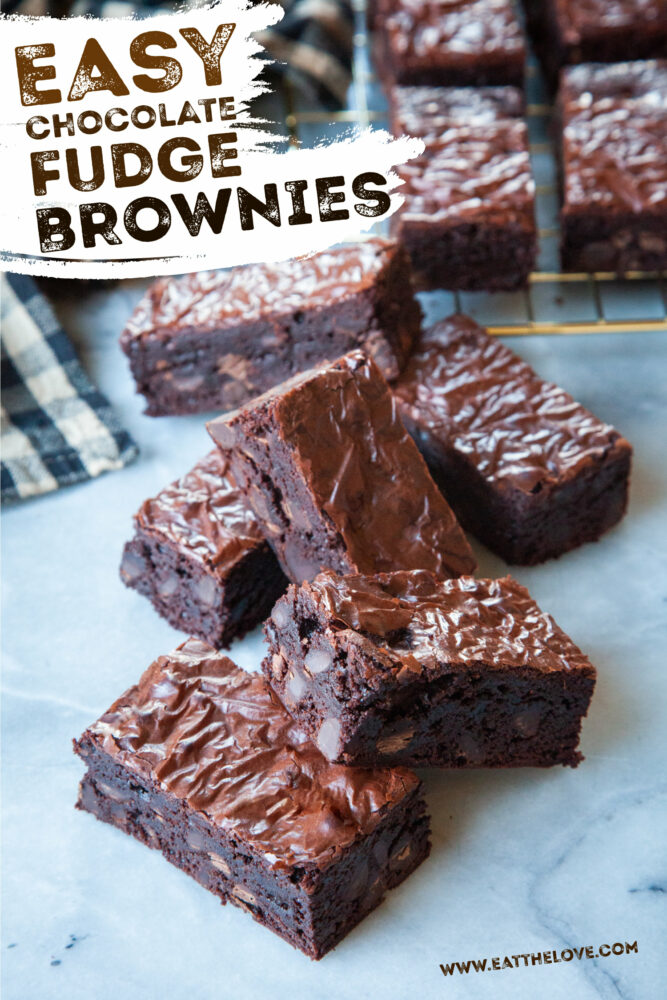
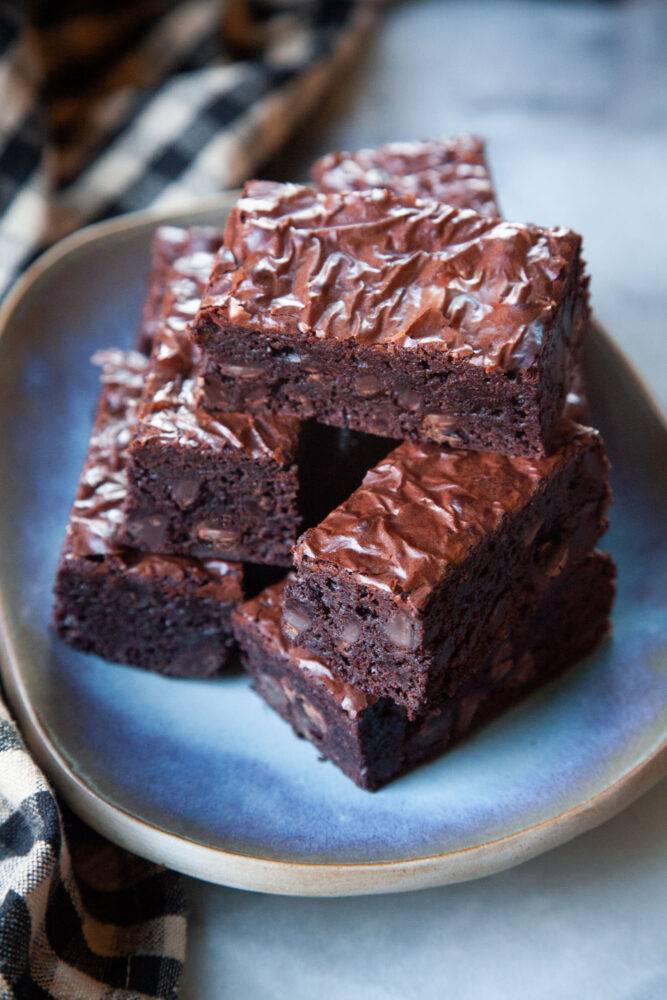
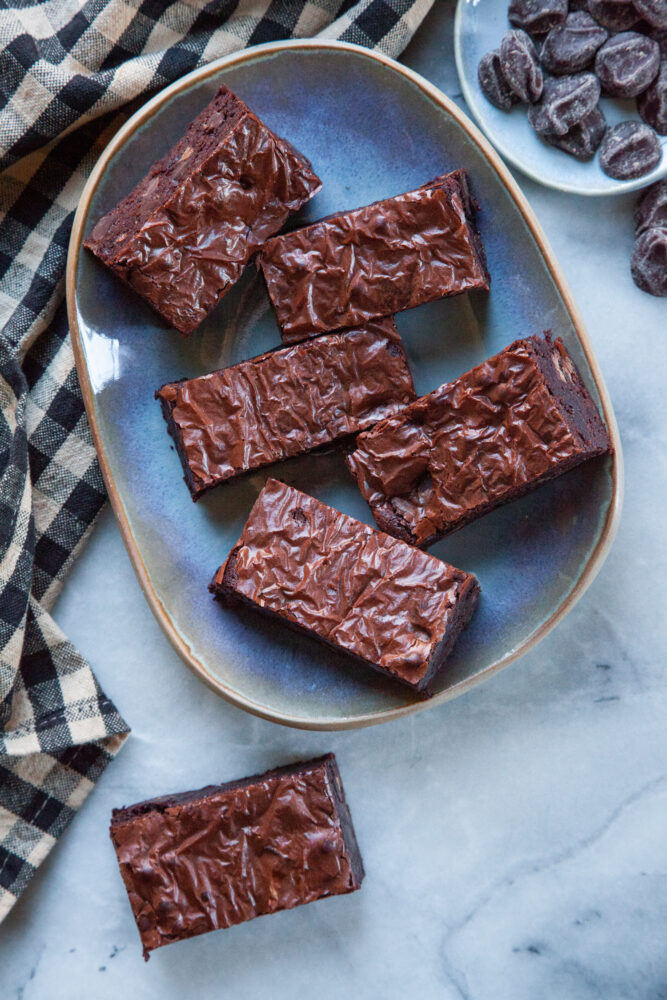
These easy fudge brownies are made in one bowl and come together quickly. They are chewy, fudgy and intensely chocolatey!
Ahhh brownies. I realized that I have shared quite a few brownie recipes, like my Neapolitan cheesecake brownies, my rye brownies with caramel, my peppermint cheesecake brownies, and my pumpkin cheesecake brownies here on this blog. But one thing I haven’t ever shared is a straightforward fudge brownie recipe. Which is a shame because that’s one of those classic recipes that everyone needs.
And though I’ve tried tons of fudge brownie recipes, it took me a LONG time to really develop a recipe that I adored and wanted to share. So, I started making batch after batch of brownies. It’s a tough gig! ButI really wanted to dive in deep, tweaking the recipe to make it the best fudge brownie recipe ever. A brownie that was deeply rich and chocolate-packed, worthy of the name “fudge brownie.” I wanted it dense but not gummy, chewy and fudgy, and almost sensual in texture. Finally, I developed this easy fudge brownie recipe that you can make in one bowl!
How to make fudge brownies
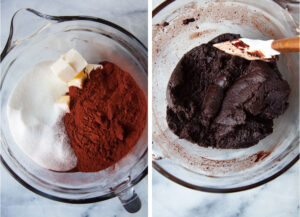
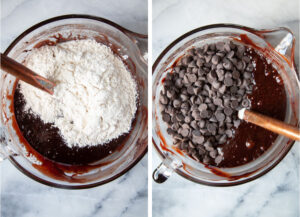
These fudge brownies are super easy to make and only require one bowl or a large pot. First place butter, sugar and cocoa in a large microwave safe bowl. Cook in the microwave until the butter is melted and the sugar and cocoa are dissolved. Stir in the vanilla, salt, instant coffee, and baking powder.
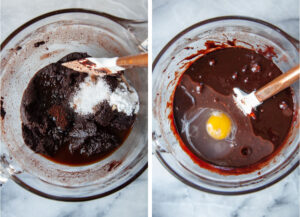
Add the eggs, one at a time. Fold in the flour and then the chocolate chips. Pour into a prepared pan and bake!
How do you get that shiny brownie top?
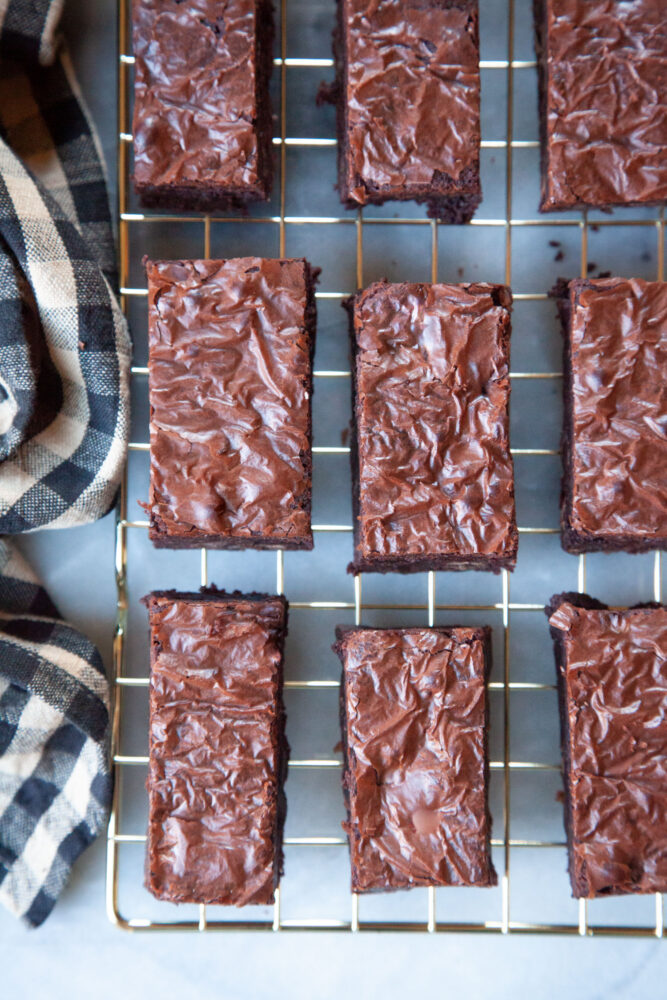
Everyone seems to love the shiny brownie top you get from a box mix. But not every homemade brownie has it. This recipe is designed to have that coveted shiny topping, which is a chocolate meringue that sits on top of the brownie after it bakes. Here’s how I achieved it.
- Melt the butter: Unlike cakes or cookies that often have you mixing sugar with solid butter to get a creamy mixture, melted butter in this brownie batter helps dissolve the sugar. Make sure the butter is warm enough to dissolve the sugar a much as possible. Warmer butter dissolves sugar easier than cool butter.
- Dissolve the sugar: Adding the sugar and cocoa together and dissolving them in the melted butter helps create the meringue topping.
- Mix in the eggs one at time: Make sure to really beat and mix in each egg before adding the next egg. Ideally you want your batter to be smooth and not grainy. The more dissolved the sugar, the more you’ll get the meringue topping.
- Add the chocolate chips: Solid chocolate chips helps encourage the meringue to form on top.
- Resting for 1 or 2 minutes: Let the pan of brownie batter rest for a minute or two before placing it in the oven. You’ll notice that the batter settles a bit and the top of it starts to look glossy. A shiny gloss batter makes a shiny gloss top!
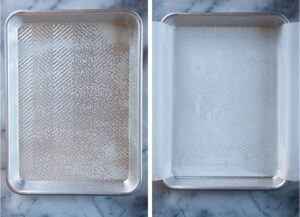
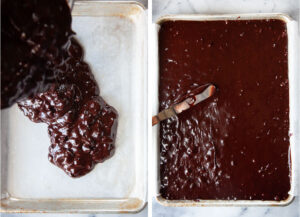
- Use a quart-sheet pan: I tested this recipe using a conventional baking pan, with higher 2-inch sides, as well as a shorter quarter sheet pan. I found the quarter sheet pan, which is only 1-inch deep, gave a more even shiny top over the conventional baking pan. The brownies were delicious from both pans so don’t worry if you don’t have a quarter sheet pan. But if you do, I suggest you try baking these brownies in them!
Can I use regular cocoa and not Dutch-process cocoa?
This recipe is designed for Dutch-process cocoa. This is cocoa powder that has been alkalinized to remove some of the natural acidity found in cocoa beans. The alkalizing process darkens the cocoa and also makes it easier to dissolve in liquid.
If you only have regular cocoa, you can use the same amount, just swap out the 1/2 teaspoon baking powder with 1/4 teaspoon baking soda. The acidity in the regular cocoa will react with the baking soda and give rise to the brownies. Expect the brownies made with regular cocoa powder to slightly more cakey, less rich tasting, and lighter in color than the brownies made with Dutch-process cocoa.
Customize these brownies
These brownies can be adapted to your own taste. Here are few suggestions:
- Use your favorite chocolate chips: Though I strongly suggest adding the chocolate chips to help with the shiny crackly top, feel free to use dark bittersweet chocolate chips, semi-sweet chocolate chips, milk chocolate chips or even white chocolate chips. Or try using a different flavored chip like butterscotch, peanut butter or mint chip. You can also use a mix of chocolate chips if you want. Or omit the chocolate chips all together!
- Use chocolate chunks: Try chopping chocolate instead of using chocolate chips. You can often get higher quality chocolate in bars instead of as chips, so pick one that you really enjoy eating out of hand.
- Add nuts: Add in 1 cup of chopped nuts like walnuts, pecans, pistachios, macadamia nuts or hazelnuts to these brownies.
- Add cacao nibs: If you are allergic to nuts but still want the crunch and texture of nuts, try adding 1 cup of roasted cacao nibs. They add a nutty texture, as well as more chocolate flavor to the brownies.
- Brown the butter: To give these brownies an extra layer of caramelized flavor, brown the butter by melting 1 cup and 1 tablespoons of butter in a skillet, cooking until the milk fats have turned golden brown. Pour into a heatproof bowl, making sure to scrape out and add in all the golden-brown milky bits, and proceed with the recipe, stirring the sugar and cocao powder into the hot butter. Continue to stir until the butter has cooled down a bit before adding the eggs, otherwise you’ll end up with cooked scrambled eggs in your brownies.
How to store these brownies
These brownies improve with age, becoming more rich and fudgy in a day or so. Store the brownies in an airtight container or under a cake dome at room temperature for up to 3 days. You can also store the brownies in the refrigerator in an airtight container for up to 5 days. You can eat the brownies directly from the fridge if you’d like. They are even more dense and fudgy! Or leave them on the counter for an hour to warm up to room temperature.
If you like these easy fudge brownies, try these other chocolate recipes:
- Bakery Style Chocolate Chip Cookies
- Chocolate Banana Bread
- Hot Chocolate Cookies
- Chocolate Salted Caramel Cookies
- Double Chocolate Chip Muffins
- Reverse Chocolate Chip Cookies, pan-banging style
- Chocolate Crackle Cookies
- Marble Rum Cake
- Monster Cookies
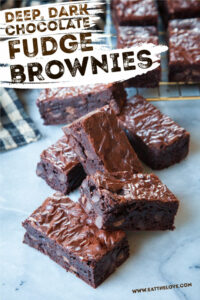
Easy Fudge Brownies
Ingredients
- 1 cup unsalted butter 2 sticks or 225 g
- 2 cups white sugar 400 g
- 1 cup Dutch-process cocoa 110 g
- 1 tablespoon vanilla extract
- 1 teaspoon kosher salt
- 1 teaspoon espresso powder or instant coffee optional but recommended
- 1/2 teaspoon baking powder
- 4 large eggs refrigerator cold
- 1 1/4 cups all-purpose flour 175
- 2 cups chocolate chips or chopped chocolate 340 g
Instructions
- Preheat the oven to 350°F. Spray a 9 x 13 x 1-inch quarter sheet pan with cooking oil, then line the bottom and sides with parchment paper. You can also use a more conventional 9 x 13 x 2-inch pan, spraying with cooking oil and lining with parchment paper in a similar manner. See the headnote above for the difference in baking between the two.

- Place the butter, sugar and cocoa powder in a large microwave safe bowl. Cook the mixture for 1 minutes, then stir. Cook in 30 seconds bursts, stirring between each cook cycle, until the butter is completely melted and warm. Stir vigorously once the butter is melted, to dissolve the sugar and cocoa powder as much as possible. The mixture might look a little pasty or grainy. That’s ok.You can also heat and cook the butter, sugar and cocoa powder in a large pot on the stove if you don’t have a microwave or don’t wish to use it.
- Add the vanilla, salt, espresso powder (if using) and baking powder to the bowl and stir to incorporate. Add the eggs, one at a time, mixing thoroughly to incorporate. Try to get the mixture nice and shiny and glossy.
- Add the flour and fold it in until there are just a few streaks of flour left. Add the chocolate chips and continue to mix and fold them in, until evenly distributed and all the flour is absorbed.
- Scrape the brownie batter into the prepared pan. Let it sit for 1 or 2 minutes, or until the top of the brownie batter has a glossy sheen to it. Then place in the oven and bake for 23 to 27 minutes or until a toothpick inserted in the middle in few places comes out clean (you want to check a few places in case your toothpick hits a chocolate chip). Try not to overbake the brownies.Let rest in the pan until cool enough to touch, about 20 minutes. Then grab the edges of the parchment paper and move the entire brownie to a wire cooling rack. Cool completely, remove parchment paper, cut and serve.
the backrooms says
I’m really happy that you share how to make chocolate at home. This dish looks so delicious
Octordle says
I’m glad I found this web site, I couldn’t find any knowledge on this matter prior to.Also operate a site and if you are ever interested in doing some visitor writing for me if possible feel free to let me know, i am always look for people to check out my web site.
Joann Michael says
This is one delicious dish! I’m constantly looking for new bar recipes to test. This one is just out of this world delectable!!