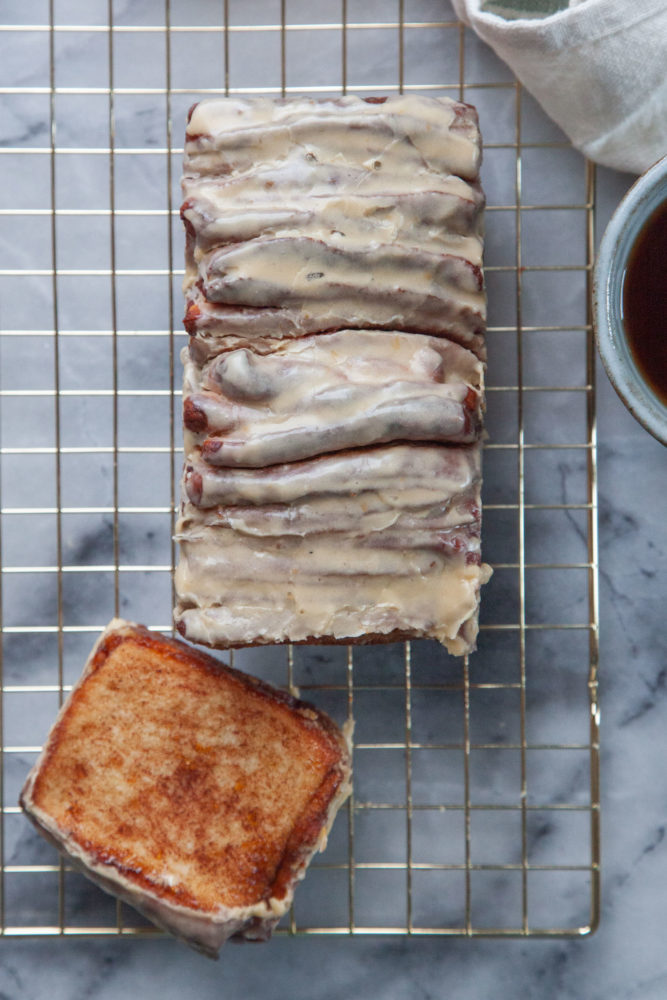
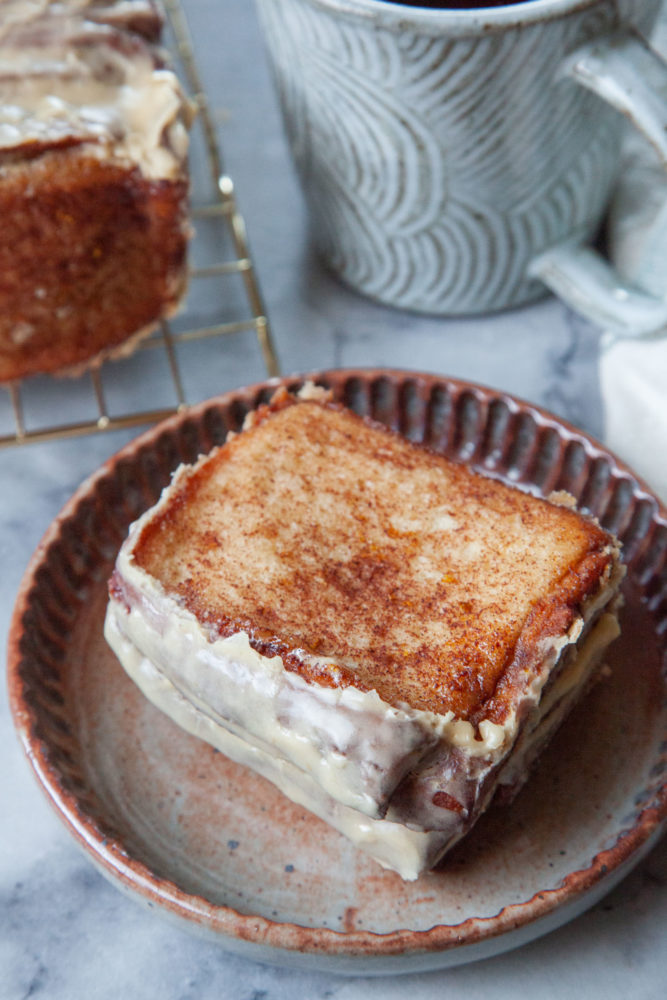
This cinnamon pull apart bread is as fun to eat as it is to make, with layers of dough and cinnamon orange filling in between.

If you’ve never made or had pull apart bread, it’s as fun to eat as it is to make! Layers of dough get sandwiched together between sugar sweet spiced packed filling. It’s a little like classic cinnamon rolls, Swedish cardamom knots, or even a little bit like my pumpkin star bread but easier to make, with a higher filling to dough ratio. If you’re a cinnamon roll fanatic that loves the cinnamon filling, this bread might be the ideal treat for you! I’ve added an optional touch of orange zest to the filling to give it a slight holiday season vibe, but if you’re not a fan of orange or you want a classic cinnamon filling, feel free to omit that!
How to make pull apart bread
Making pull apart bread is fairly easy to make, especially if you are familiar with making cinnamon rolls or other enriched yeasted breads like my apricot yeasted bread or cranberry spiral bread. I use a tangzhou method, similar to the one you find in my wool roll bread, because I know it takes me a few days to work my way through the loaf and the added tangzhou helps keep the loaf from going stale.
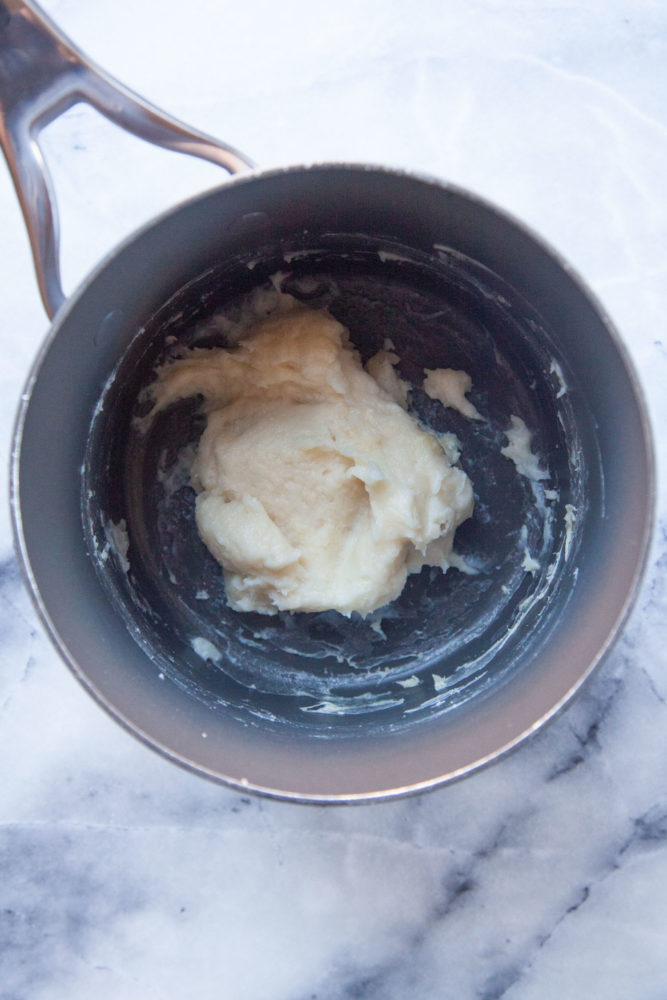
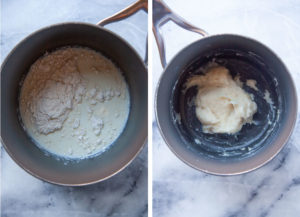
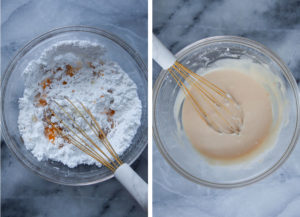
Make the tangzhou by placing milk and a small amount of flour in a pan. Whisk and cook the flour and milk until a thick paste forms.
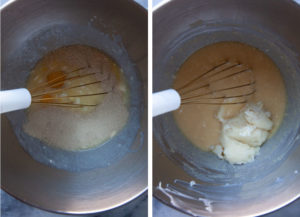
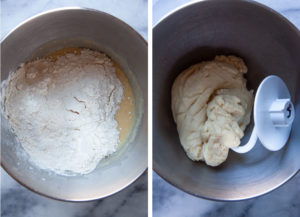
Then place room temperature eggs, honey, melted butter and salt in the mixing bowl of a stand mixer. Add the yeast and stir to dissolve. Add the tangzhou and whisk to bread up. Add the flour and knead for 4 minutes with the dough hook.
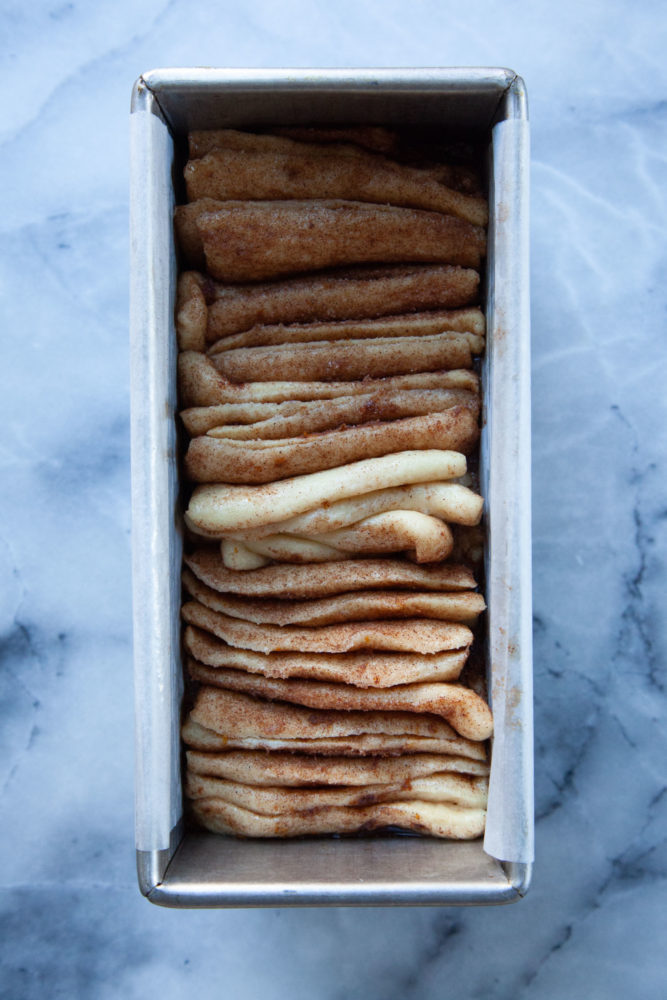
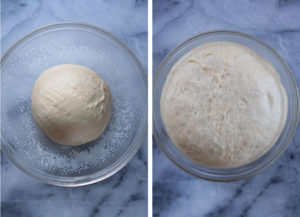
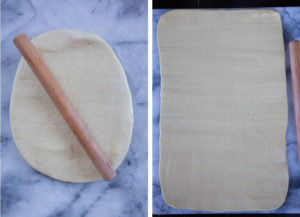
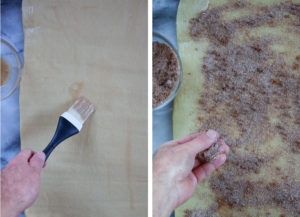
Let the dough rise until double in size and then roll it out to large rectangle. Brush melted butter all over the dough, then sprinkle with the filling made of cinnamon, brown and white sugar, orange zest and a pinch of salt. Cut the dough into strips, then stack the strips on top of each other. Then cut the strips into squares and tuck the squares into a loaf pan fitted with parchment paper. Cover and let rise again until puffy and double in size. Then bake!
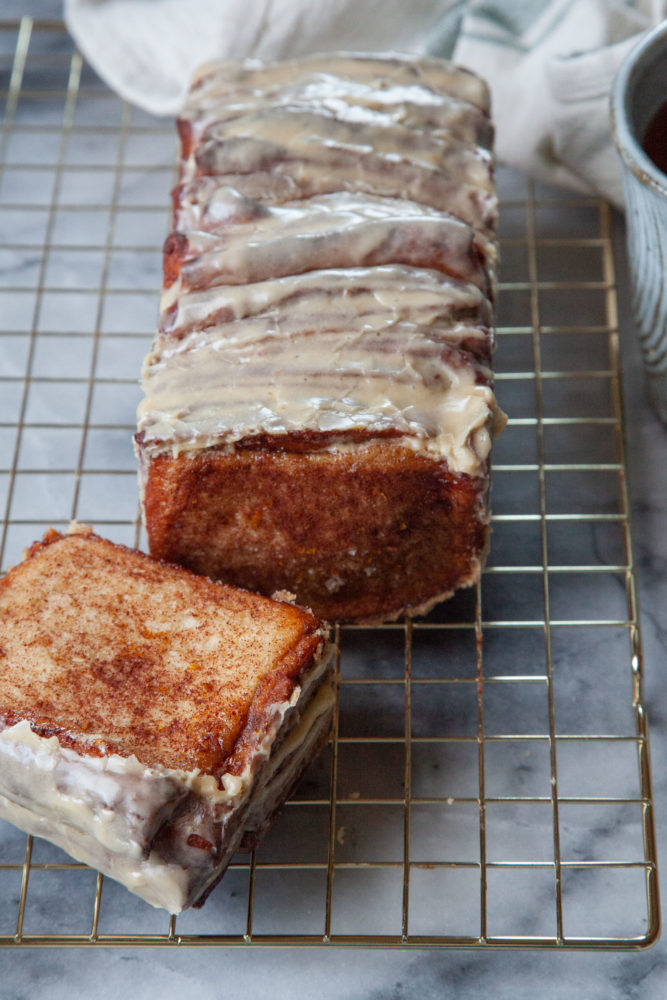
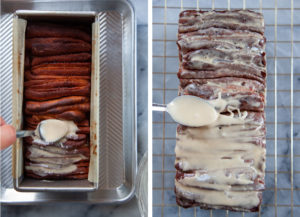
Once baked, spread a glaze made of powdered sugar, orange juice, melted butter, and vanilla over the still warm loaf, and let cool slightly. Then remove the loaf from the pan with the parchment paper and drizzle and spread the remaining glaze over it.
What is tangzhou and can I skip it?
Tangzhou is an Asian bread making method that has you cooking milk (or water) with a little flour to create a paste. Though it sounds fussy, it’s a great method because it gelatinizes the flour and traps moisture in the dough. This keeps the bread from going stale as fast, resulting in a longer shelf life. I know that it takes me a few days to work my way through a loaf of sweet bread like this, so I opted to add the tangzhou to my loaf.
But if you plan on eating the loaf right away, or you feel like skipping the tangzhou method, you can totally do that! There’s already egg and lots of butter in the bread, so the loaf is an enriched dough that will keep longer than a more traditional loaf.
To skip the tangzhou step, just heat the milk on the stovetop until it is warm to the touch, about 100°F. Then sprinkle the yeast in it to proof. Increase the flour to 3 1/4 cups (455 g) when you add it. That’s it!
Can I knead this bread by hand?
Yes. If you don’t have a stand mixer or if you prefer the meditative process of kneading dough by hand, you can definitely knead this by hand. Follow the steps for this recipe, combining the wet ingredients like eggs, melted butter, yeast and tangzhou (if using) in a large mixing bowl with a whisk. Stir in the flour with a wooden spoon until a rough dough forms.
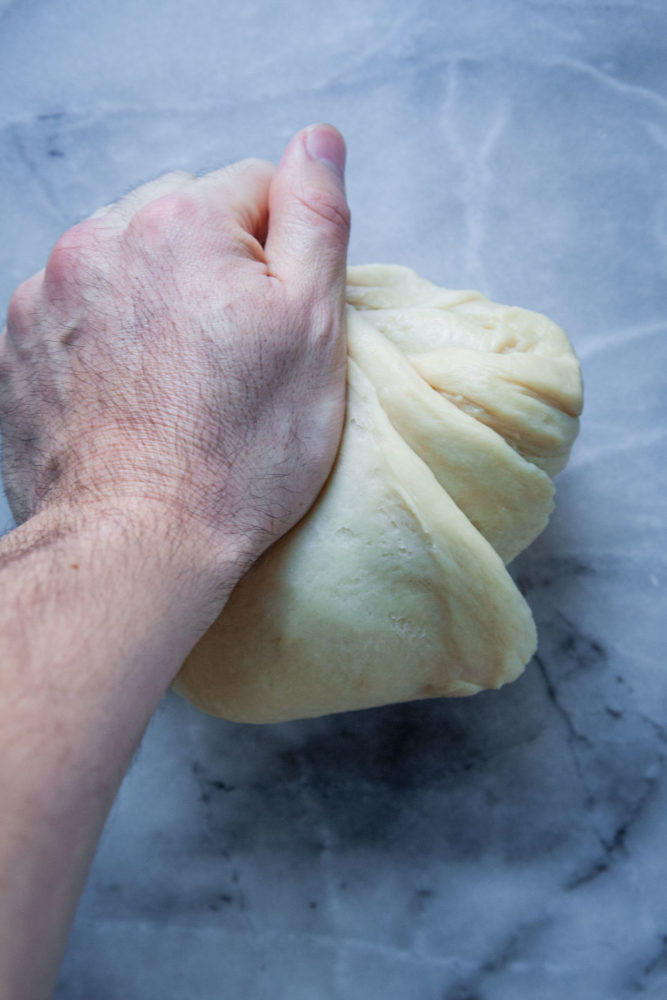
Then scrape the dough onto a clean surface and start kneading it by hand. Knead the dough for about 6 to 7 minutes or until it is smooth and uniform in consistency. It will be slightly tacky but shouldn’t be sticky. Continue with the recipe as directed, letting it rise and then rolling it out and forming the loaf.
How long does this bread keep?
If you use the tangzhou in the bread, the bread should keep at room temperature for 4 to 5 days. I like to refresh the bread slightly in the toaster oven for 5 to 10 minutes at 250°F before serving. But you can also microwave small individual portions for 5 to 15 seconds if you are feeling rushed. Normally I don’t microwave bread, but this enriched dough stands up to the microwave heat as long as you eat it right away.
If you don’t use the tangzhou in the bread, expect the bread to last 2 to 3 days at room temperature.
Why glaze it when it’s warm?

This bread recipe is adapted from Sarah Kieffer’s book Baking for the Holidays (<- affiliate link). She specifically glazes her bread (and cinnamon rolls) when they are hot! If you glaze the pull-apart bread immediately after it comes out of the oven, the glaze melts and pools into all the crevices of the bread. Then it cools and solidifies, giving you a thin layer of crusty glaze on top and in all the dips and crooks of the bread. Then you glaze it again once it has cooled slightly to get a lovely thicker layer of glaze on top of the bread.
How do I quickly get the eggs to room temperature?
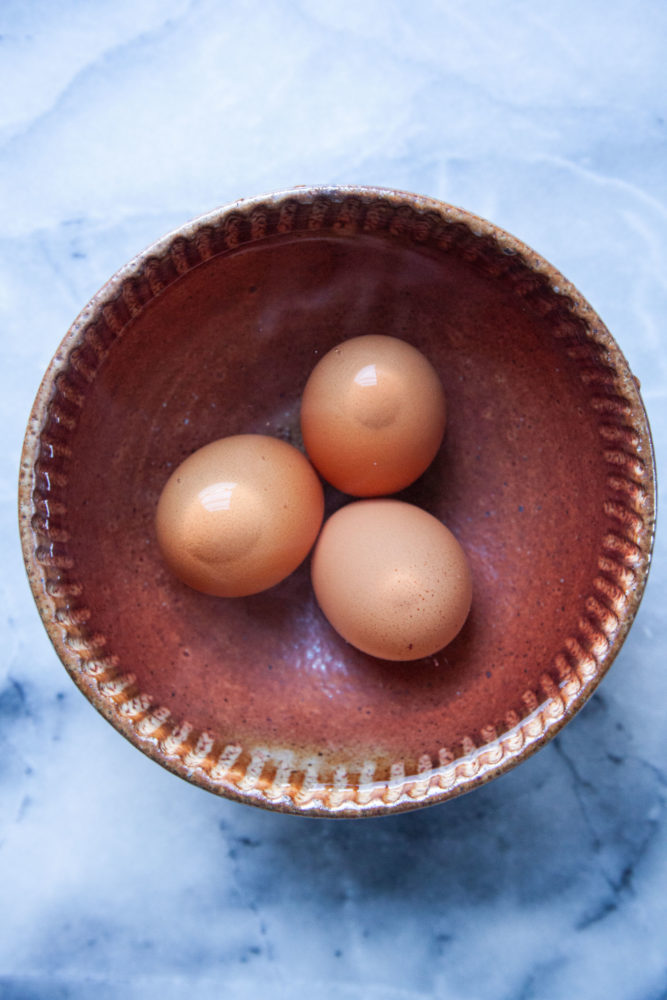
If you’re like me, you probably don’t plan ahead and take your eggs out of the fridge to bring it to room temperature. My easy trick for quick room temperature eggs is to stick the eggs in a bowl of hot water from your faucet!
Don’t use boiling water, as you don’t want to cook the eggs. But run hot water from your faucet into a large bowl and place the eggs in the water before you do anything else for this recipe. Make the tangzhou and then start making the bread dough using the eggs that have been sitting in the warm water for 5 minutes. The time in the water should cut the chill and bring the eggs to room temperature.
If you like this cinnamon pull apart bread, check out these other enriched dough breads and treats
- Red Velvet Cinnamon Rolls
- Apple Fritters
- Pumpkin Spice Morning Buns
- Shortcut Kouign Amann
- Eggnog Cinnamon Rolls
- Pumpkin Cinnamon Rolls
- Pistachio Cinnamon Rolls

Cinnamon Pull Apart Bread with Orange Zest and Glaze
Ingredients
Tangzhou
- 1/2 cup milk whole preferred but any will work
- 1/4 cup all-purpose flour 35 g
Dough
- 3 large eggs, at room temperature (see section above on a quick trick on bringing them to temperature fast)
- 2 tablespoons honey
- 1/2 cup melted unsalted butter 1 stick or 115 g
- 1 1/2 teaspoons kosher salt
- 2 1/4 teaspoon active dry yeast 7 g or 1 envelope
- 3 cups all-purpose flour 420 g
Filling
- 1/2 cup white sugar 100 g
- 1/4 cup packed brown sugar 55 g
- 2 tablespoons orange zest optional
- 1 tablespoon ground cinnamon
- Pinch of salt
- 2 tablespoons melted unsalted butter
- 1 teaspoon vanilla extract
Glaze
- 1 1/2 cups powdered sugar, sifted 175 g
- 2 to 4 tablespoons orange juice or milk if preferred
- 1 tablespoon melted unsalted butter
- 1 teaspoon vanilla extract
Instructions
- Make the tangzhou by placing the milk and flour in small pan. Cook on medium heat, for a minute or two until a thick paste forms. Set aside to cool slightly.

- Make the dough by placing the eggs, honey, butter, and salt in the bowl of stand mixer. Beat together with a balloon whisk to break up the eggs. Then sprinkle the yeast over the mixture and stir in. Add the tangzhou (it’s OK if it’s still warm, but make sure it’s not hot) to the bowl and use the whisk to break it up. Don’t worry if there are still some small lumps in the mixture. Just break up the tangzhou as much as possible.
- Add the flour and then mix the dough with the dough hook. Mix on low, occasionally stopping to scrape down the sides until all the dry ingredients are incorporated, then increasing the speed to medium. Knead the dough for 4 to 5 minutes or until it is smooth and slightly tacky to the touch. It should not be too sticky or wet. If it is, add a tablespoon of flour.You can also knead this dough by hand. See the section above for instructions.
- Spray a bowl with cooking oil and then pull the dough into a smooth ball. Place the rough side down in the bowl and cover with plastic wrap or a damp towel. Put in a warm place and let rise until double in size, about 60 to 90 minutes.
- While the dough is rising, lightly coat a loaf pan with cooking oil (preferably a straight sided one like a pullman loaf, but any standard loaf pan will work). Place a piece of parchment paper inside the loaf pan, with about 1-inch of paper overhanging the sides of the pan.Set pan aside and make the filling by combining the white sugar, brown sugar, orange zest, cinnamon, and salt in a small bowl. Place the melted butter and vanilla in a different bowl and stir to combine.
- Once the dough has risen, dump it onto a clean surface. Roll the dough into a 12 by 20-inch rectangle.
- Brush the rectangle with the melted butter mixture, then sprinkle the filling all over the dough, going all the way to the edges.
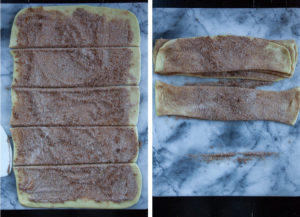
- Cut the dough into 5 even strips, about 4-inches wide. Then stack the dough strips on top of each other. The filling might spill off or shift on the strips but just redistribute it as best you can as you stack it, no need to be perfect about it.
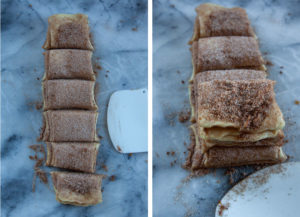
- Once all the strips are stacked on top of each other, cut through all the dough strips with 6 even distributed cuts, making 4 x 2-inch squares. Stack half the dough squares together.
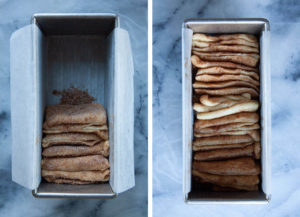
- Place the stacked dough vertically in the loaf pan.. Then repeat and stack the other half and do the same. The dough should fit tightly into the pan but don't worry if there is a little wiggle room. It will rise and expand to fill the space.Cover the pan with plastic wrap and place in a warm area to rise again. Let rise for 60 minutes or until the dough is puffy and roughly double in size. About 15 minutes before the dough is ready, preheat the oven to 350°F.Remove the plastic wrap and bake the dough in the oven for 50 to 60 minutes, or until the top is a deep golden brown and the internal temperature of the bread is 195°F. If the top of the bread seems to be browning extra fast, cover the loaf pan with aluminum foil to prevent burning.
- While the bread is baking, make the glaze. Sift the powdered sugar into a medium-sized bowl and then add 2 tablespoons of orange juice, melted butter and vanilla. Stir and then add more orange juice until you have a glaze with a consistency that you like. I found 3 tablespoons was perfect for me. Cover the bowl until ready to use.
- Once the bread is done, immediately spoon half the glaze over the warm bread still in the pan. Spread the glaze all over, making sure it gets into the nooks and crannies of the top of the loaf.Then let the loaf cool in the pan for 15 minutes on a wire rack. Run a thin butter knife or offset spatula around the parchment paper and the pan and lift it up and out of the pan using the parchment paper like a sling. Move the loaf onto a wire cooling rack. Carefully remove the parchment paper and then spoon the remaining glaze over the bread.Serve warm or let cool completely if you wish.

Pete says
Do you mean tangzhong rather than tangzhou? 🙂
slope game says
Wow, this looks really delectable; I’m sure it’s soft and tasty. To make this dish, combine together the wet ingredients, such as eggs, melted butter, yeast, and Hangzhou, in a large mixing basin. With a wooden spoon, stir in the flour until a rough dough forms.
s.g. says
Love food!! I can’t get it out of my head! Thank you for posting your recipr!
s. g says
Good Steps!