• Skip to primary navigation
  • Skip to main content
  • Skip to primary sidebar
  • My Cookbook: Marbled, Swirled, and Layered
  • Recipes
  • Travel & Events
  • About this Blog
  • Bio
  • FAQ
  • Work with Me

Eat The Love

Recipes, Photographs and Stories about Desserts, Baked Goods and Food in general, with a healthy dose of humor and happiness for the food obsessed

You are here: Home / breakfast / Chocolate and Strawberry Scones

Published: February 6, 2023 3 Comments

Chocolate and Strawberry Scones

These chocolate and strawberry scones are an easy-to-make, tender, and sweet addition to your breakfast, brunch or coffee/tea time break.
Jump to Recipe

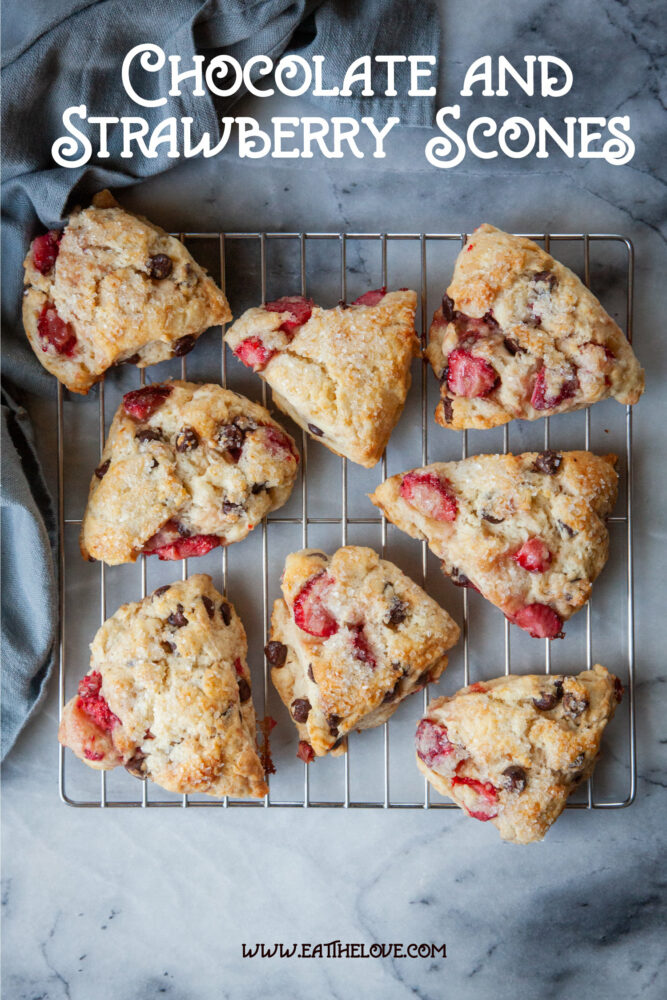
Chocolate and strawberry scones on a wire cooling rack. The rack is sitting on a marble surface. There is a blue cloth napkin next to the cooling rack and scones.

One of total misconceptions of scones is their dry crumb and tough texture. But I’m a huge fan of homemade scones, especially this particular strawberry and chocolate scones, which are tender and flaky. The secret, much like making homemade southern-style biscuits, is to use a light hand, not overwork the ingredients, and let the dough chill in the fridge. The technique is similar to my fig and hazelnut scones, or my eggnog scones, but these cream scones are packed with fresh strawberries and dark chocolate chips, making them a delightful treat for a special occasion breakfast, a weekend brunch, or really anytime of the year.
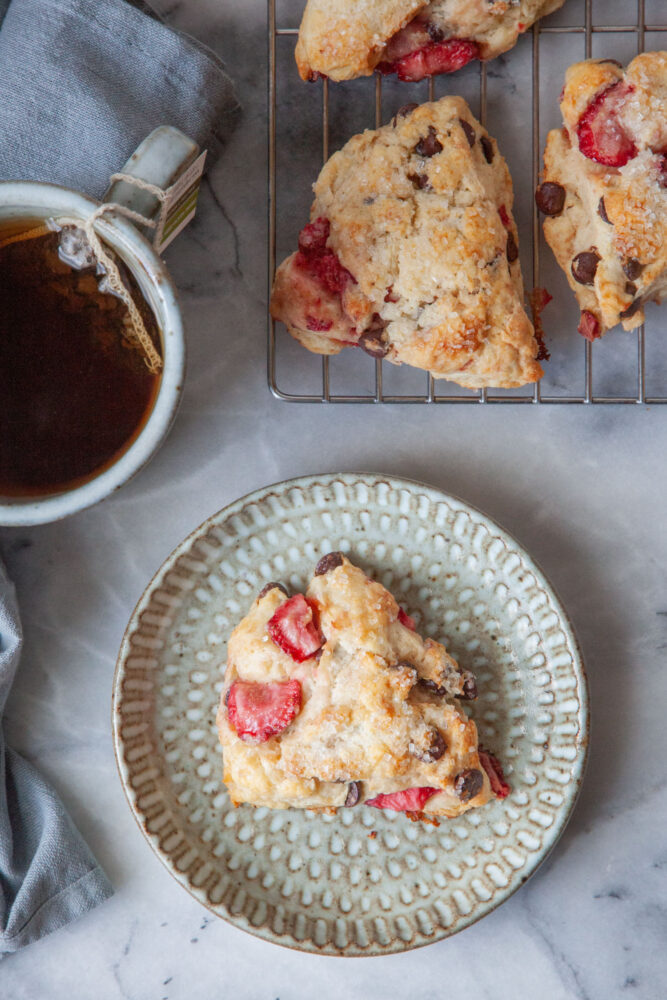
A chocolate and strawberry scone on a plate, with a mug of tea and a wire rack of more scones next to it.

How do make these scones

Making scones isn’t difficult. First prep the strawberries by slicing them and then tossing with a little bit of balsamic vinegar. Set aside for the vinegar to absorb.

Combine flour, a little bit of sugar, baking powder, and salt together in a medium-sized bowl. Then grate some cold butter into the dry ingredients. Toss to coat the butter. Drizzle some heavy cream over the ingredients, tossing with a fork until a dough starts to form. Add the strawberries and the chocolate chips, fold the dough gently, add a little more cream, then fold more until fruit and chocolate is incorporated.

Divide the dough in half and form round disks. Wrap in plastic and chill in the fridge. Preheat the oven, divide the dough into scone triangles, brush the top of the scones with a little bit extra cream, and sprinkle with sparkling sugar. Bake until done.
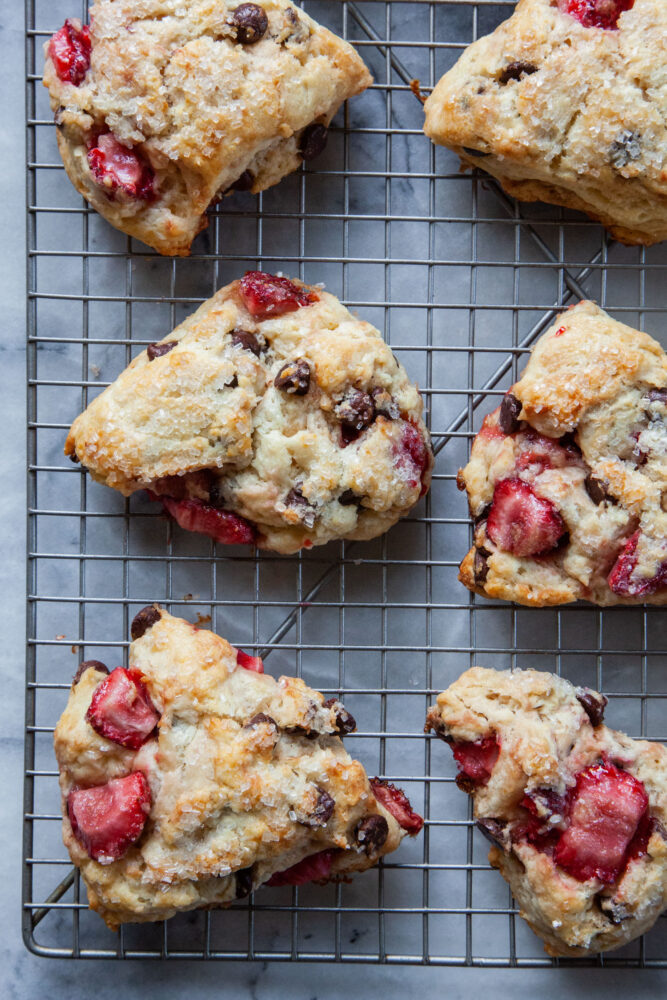
Chocolate and strawberry scones on a wire cooling rack.

Tips on making the best strawberry chocolate scones

  • Toss strawberries in balsamic vinegar: Cut the strawberries in half or quarters (if they are large, then toss the fruit with balsamic vinegar. The sweet syrup acidic vinegar will bring out the sweetness and juiciness of the fruit itself. If you don’t have balsamic vinegar, substitute with fresh lemon juice. Do not substitute with another vinegar, as other vinegars are too harsh.
  • Use cold butter and cream: Cold ingredients help relax the gluten in the flour. Gluten is a protein that forms when flour reacts with water and is knead or manipulated. It gives baked goods stretchy chew. For some baked goods, like bread, you want to develop gluten. But for scones, you want to prevent too much gluten from form, as it will lead to a tough scone. Cold ingredients like cold butter and cream will help prevent the gluten from forming, as will chilling the dough.
  • Chill the dough: Gluten creation is inevitable when making the dough. But you can also help relax the gluten by chilling the dough after you make. Just let the dough chill in the refrigerator for 30 minutes or longer, up to overnight, to help make the scones tender. Chilling also helps solidify the butter, which will lead to flakiness in the scones
  • Grate the butter: You can incorporate the butter by using your fingers or using a pastry blender, which is how I make my Earl Grey and dried cherry scones and my British-style honey and thyme scones. But for these scones, I like to grate the butter into the dough. This gives small shards of butter in the dough, which will lead to a flaky scone. Be sure to dip the butter stick into the flour to coat it. This will help prevent the butter from melting from your hands. Keep dipping the butter stick back in the flour as you grate the butter, whenever the butter starts to melt. 
  • Use quality ingredients: Most recipes benefit from quality ingredients. But because there are so few ingredients in this recipe, quality butter, strawberries, and chocolate make a difference. If you have it, European-style butter, which has a higher percentage of butterfat, gives a richer and flakier scone. Ripe in-season strawberries are best in the scone but even out of season strawberries are pretty decent in this scone because of the balsamic vinegar added. However, I don’t recommend frozen strawberries for this recipe, as they shed too much liquid, making a soggy scone, fresh are the best. Finally, pick a chocolate that you like to eat out of hand. Quality chocolate chips or your favorite chopped chocolate are awesome for these scones.

Make the dough ahead

You can make the dough for these scones a day ahead of time, letting it rest in the fridge overnight. This will lead to a flakier and more tender scone, as the butter will have solidified, and the gluten in the flour will have relaxed. Just take the dough out and bake as directed.
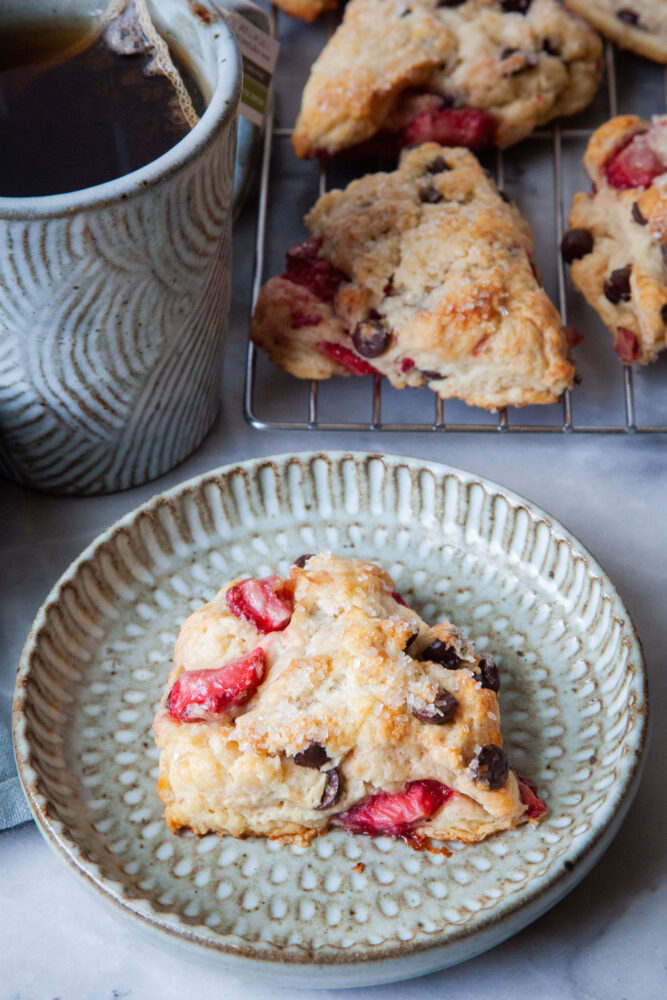
 A chocolate and strawberry scone on a plate, with a mug of tea and a wire rack of more scones behind it.

How to store scones

Store scones at room temperature for up to 2 days in an airtight container or resealable Ziploc bag. You can also freeze scones in a heavy-duty freezer resealable bag for up to 2 months. Keep in mind that sugar on top of the scones will most likely dissolve when you store the scones. Thaw the scones on the countertop or table to room temperature, then refresh them in a toaster oven or regular oven at 300°F, for 10 minutes or until warm. 

If you like these Chocolate and Strawberry Scones, check out these other baked breakfast treats:

  • Swedish Tea Ring
  • Cardamom Buns
  • Classic Cinnamon Rolls
  • Double Chocolate Chip Muffins
  • Chocolate Banana Bread
  • Apple Cider Donuts
  • Apple Fritters
  • Carrot Muffin with Prunes, Sunflower Seeds and Pecans
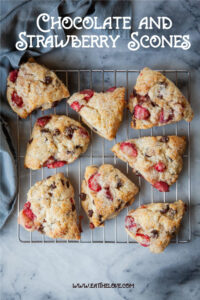
Chocolate and strawberry scones on a wire cooling rack. The rack is sitting on a marble surface. There is a blue cloth napkin next to the cooling rack and scones.
Print Pin
5 from 2 votes

Chocolate and Strawberry Scones

These chocolate and strawberry scones are a special treat for breakfast, brunch or just as a side item for coffee or tea time. Use the best quality ingredients and make sure to chill the dough before baking them. The chill time ensure that butter has solidified and the gluten in the flour has relaxed, leading to a tender and flaky scone.
Calories 229kcal
Author Irvin

Ingredients

  • 1 1/2 to 2 cups strawberries 8 ounces
  • 1 tablespoon balsamic vinegar or lemon juice
  • 2 cups all-purpose flour 280 g
  • 2 tablespoons white sugar
  • 1 tablespoon baking powder
  • 1/2 teaspoon kosher salt
  • 6 tablespoons cold unsalted butter 85 g
  • 1 1/4 cups heavy cream
  • 1/2 cup chocolate chips 85 g

To finish

  • 2 tablespoons cream
  • 1 tablespoon sparkling sugar or white sugar

Instructions

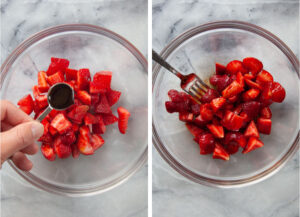
  • Cut the strawberries in half, or quarters (if the strawberries are large) and place them in a medium sized bowl. Drizzle the balsamic vinegar (or lemon juice) over the strawberries, toss to coat, and set aside.
    Left image is a tablespoon of balsamic vinegar being held by a hand over a bowl of chopped strawberries. Right image is a fork in a bowl filled with chopped strawberries that were tossed in the balsamic vinegar.
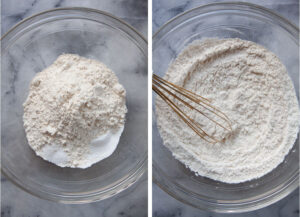
  • Place the flour, sugar, baking powder and salt in a large bowl. Using a balloon whisk, vigorously stir the dry ingredients together so they are well blended.
    Left image is a bowl of flour, sugar, and baking powder in a glass bowl. Right image is a balloon whisk in the same bowl, having stirred and blended all the dry ingredients together.
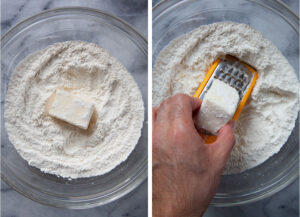
  • Dip the butter into the dry ingredients to coat, then use a box grater and grate the butter through the big holes. If the butter starts to melt or stick to your fingers, just dip and roll the butter back in the dry ingredients to coat.
    Left image is a stick of butter sitting in the dry ingredients for the scone in a glass bowl. Right image is a hand grating the butter into the dry ingredients.
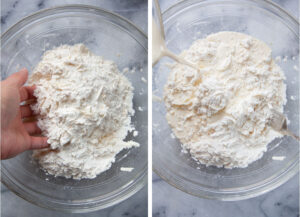
  • Once the butter is grated, toss the ingredients together so the butter shards are coated. Then drizzle half the cream over the dry ingredients, tossing/mixing with a fork, until the cream has been absorbed.
    Left image is a hand tossing grated butter with dry ingredients for the scone. Right image is heavy cream being poured into the bowl of scone ingredients.
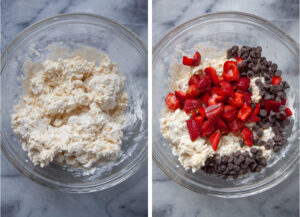
  • Add the strawberries, along with any juices that have accumulated on the bottom of the bowl, and the chocolate chips. Toss to evenly distribute. Then add the remaining cream and continue to mix until the dough forms.
    Left image is the scone dough in a glass bowl. Right image is the chopped balsamic vinegar soaked strawberries and chocolate chips added to the bowl.
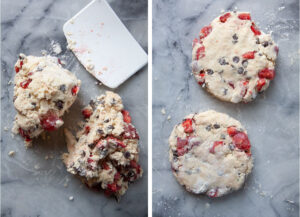
  • Divide the dough in half, roughly 475 g each (if you have a scale), and pat the dough into 2 disks, about 6-inches wide and 1-inch thick. Wrap each dough disk in plastic wrap, and then refrigerate for at least 30 minutes up to overnight.
    Left image is the scone dough divided in half. Right image is each half of the dough formed into a 6-inch wide disk about 1-inch thick.
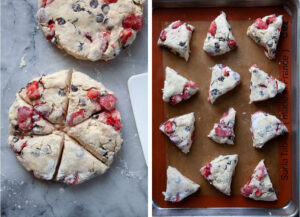
  • Once the dough has chilled, preheat the oven 400°F. Line a baking sheet with parchment paper or a silicon baking mat. Take the chilled dough disks out and cut each disk into 6 even wedges. Place the wedges on the baking sheet, about 1 inch apart.
    Left image is a chilled scone dough disk that has been cut into 6 wedges. Right is the scones placed on a baking sheet lined with a silicon baking mat.
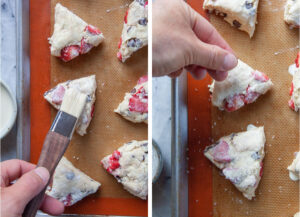
  • Brush the top of each scone with cream, then sprinkle a little sparkling sugar over the top of each scone.
    Left image is a hand brushing heavy cream on top of the scones. Right image is a hand sprinkling coarse sugar on top of the scones.
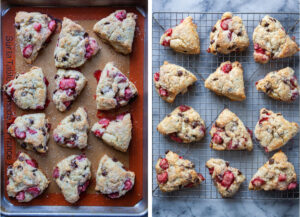
  • Bake the scones for 16 to 18 minutes, until the scones are golden brown around the edges of the scone. Let cool on the baking sheet for 5 minutes before moving them to a wire rack to cool completely.
    Left image is scones baked on a baking sheet. Right image is the scones resting and cooling on a wire cooling rack.

Nutrition

Calories: 229kcal | Carbohydrates: 24.6g | Protein: 3g | Fat: 13.9g | Saturated Fat: 8.6g | Cholesterol: 37mg | Sodium: 158mg | Potassium: 190mg | Fiber: 1g | Sugar: 6.7g | Calcium: 71mg | Iron: 1mg

Filed Under: breakfast, chocolate, fruit, muffins, side dish, snack, vegetarian Tagged With: berries, chocolate, chocolate chip, fruit, scones, strawberries

Reader Interactions

Comments

  1. Cam says

    February 2, 2024 at 1:35 pm

    Is it intentional that there are no eggs in this recipe? I’m noticing that most other scone recipes contain eggs. Thanks!

    Reply
  2. Kathy says

    May 21, 2024 at 2:10 pm

    Yummy

    Reply
  3. Editimg says

    July 23, 2025 at 8:47 pm

    Thank you for sharing such a delicious recipe. I’ll try making delicious food right away
    https://editimg.ai

    Reply
5 from 2 votes

Leave a Reply Cancel reply

Your email address will not be published. Required fields are marked *

Recipe Rating


This site uses Akismet to reduce spam. Learn how your comment data is processed.

Primary Sidebar

Follow Me On

Twitter-Link-to-Eat-the=Love Facebook-Link-to-Eat-the-Love Pinterest-Link-Eat-The-Love Instagram-Link-Eat-The-Love RSS-Feed-Link-Eat-The-Love
on Mastodon

Available Now: Marbled, Swirled and Layered
Available Now: Marbled, Swirled and Layered Available Now: Marbled, Swirled and Layered Available Now: Marbled, Swirled and Layered

"Mr. Lin, a graphic designer in San Francisco who writes the food blog Eat the Love, takes risks in nearly every one of the 150 elaborate recipes in his book. He doesn’t just paint the lily; he bejewels and shellacs it, too."
–MELISSA CLARK for the New York Times

“My goodness, this cookbook! It’s filled to the brim with recipes for the most splendidly beautiful cakes, cookies, breads, and tarts I think I’ve ever seen. My eyes kept getting wider and wider as I turned every page—both the flavor combinations and the photos are out of this world. Irvin Lin has most definitely outdone himself. This book is a triumph!”
—REE DRUMMOND, New York Times best-selling author of The Pioneer Woman Cooks

“Irvin Lin gives home-baked treats a twist, ramping them up with a range of contemporary flavors that are sure to surprise and delight. From beer-battered brownies to smoky butterscotch taking a classic cake to the next level, I can’t wait to mix, stir, and bake my way through Marbled, Swirled, and Layered!”
—DAVID LEBOVITZ, author of My Paris Kitchen

Search

Subscribe via Email

The Writer, The Baker, The Recipe Maker

Hey there! Thanks for visiting my blog. I'm Irvin Lin, a critically acclaimed cookbook author, IACP-Award winning photographer, IACP-nominated blogger, award winning baker, award winning former graphic designer, storyteller, recipe developer, writer and average joe bon vivant. I currently reside in San Francisco a block from Dolores Park and right near Tartine Bakery, Bi Rite Market & Creamery, and Delfina.

Feel free to contact me by clicking on that picture of me up above or emailing me eatthelove {at} gmail {dot} com.

IACP Photography Contest Best in Show WinnerIACP Photography Contest Best in Show Winner

“Irvin Lin is the creative mind behind his Eat the Love food blog. Lin’s impressive photography skills support his training in graphic design on the site, and you would never believe that is food blogger is a self-taught baker.” - PBS Food

“We love Eat the Love because Irvin's beautiful sweets look as good as they taste — his art director's eye appreciates the ruby sparkle of a pile of pomegranate seeds against the matte canvas of chocolate ganache.” - Saveur.com, Sites We Love

Popular Posts

Brookie Recipe (brownie and cookie) with potato chips, pretzels and double chocolate chips. Photo and recipe by Irvin Lin of Eat the Love.

Brookie Recipe with Salty Sweet Snack Treats

Perfect Soft Boiled Egg. Recipe and Photo by Irvin Lin of Eat the Love. www.eatthelove.com

Perfect Soft Boiled Egg

Korean Fried Chicken Recipe. Photo and recipe by Irvin Lin of Eat the Love. www.eatthelove.com

Korean Fried Chicken Recipe – insanely easy, super addictive

Personal Posts

Mexican Chocolate Corn Coffee Cake by Irvin Lin of Eat the Love.

Mexican Chocolate Corn Coffee Cake (and how AJ and I get engaged)

Grape and Blueberry Pie by Irvin Lin of Eat the Love.

Grape and Blueberry Pie

Crispy Oven Roasted Potatoes by Irvin Lin of Eat the Love.

Crispy Oven-Roasted Potatoes (and remembering a childhood friend)

Marbled, Swirled, and Layered.

My cookbook MARBLED, SWIRLED, and LAYERED

Recent Travel & Events

San Francisco Meals on Wheels Star Chefs and Vintners Gala 2019

Photo Essay: Meals on Wheels Gala 2019, part 2

Meals on Wheels Gala 2019

Photo Essay: Meals on Wheels Gala 2019, part 1

More Travel & Events

Wordless Recipes

EatTheLove Wordless Recipes #1 How to make your own ice cream "magic" chocolate hard shell

WORDLESS RECIPE #1: How to Make Your Own Ice Cream “Magic” Chocolate Hard Shell

Eat the Love presents: WORDLESS RECIPES #2 Halloween Edition - Haunted Honey Caramel Popcorn

WORDLESS RECIPE #2 Halloween Edition – Haunted Honey Caramel Popcorn

Molten-Lava-Chocolate-Cake-Wordless-Recipes-Valentines-Day-Eat-The-Love-Irvin-Lin-cover

WORDLESS RECIPES #3 Valentine’s Day Edition – Molten Chocolate Lava Cake

Bluth's Original Frozen Banana Copycat Wordless Recipe by Irvin Lin of Eat the Love. www.eatthelove.com

Wordless Recipe #4: Arrested Development’s Bluth’s Original Frozen Banana “Copycat” Recipe

Disclaimer

This blog currently has a partnership with Amazon.com in their affiliate program, which gives me a small percentage of sales if you buy a product through a link on my blog. I only recommend products (usually cookbooks, but sometimes ingredients or equipment) that I use and love, not for any compensation unless otherwise noted in the blog post. If you are uncomfortable with this, feel free to go directly to Amazon.com and search for the book or item of your choice.

Copyright © 2010 to 2023. Eat the Love. All rights reserved. | Privacy Policy

Rate This Recipe

Your vote:


A rating is required
A name is required
An email is required

Recipe Ratings without Comment

Something went wrong. Please try again.