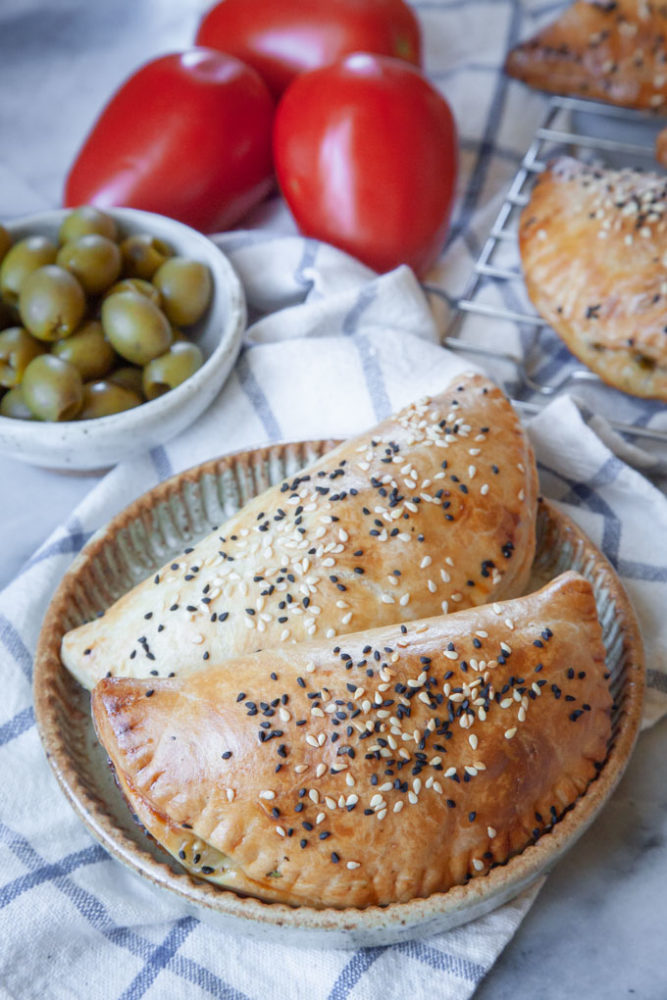
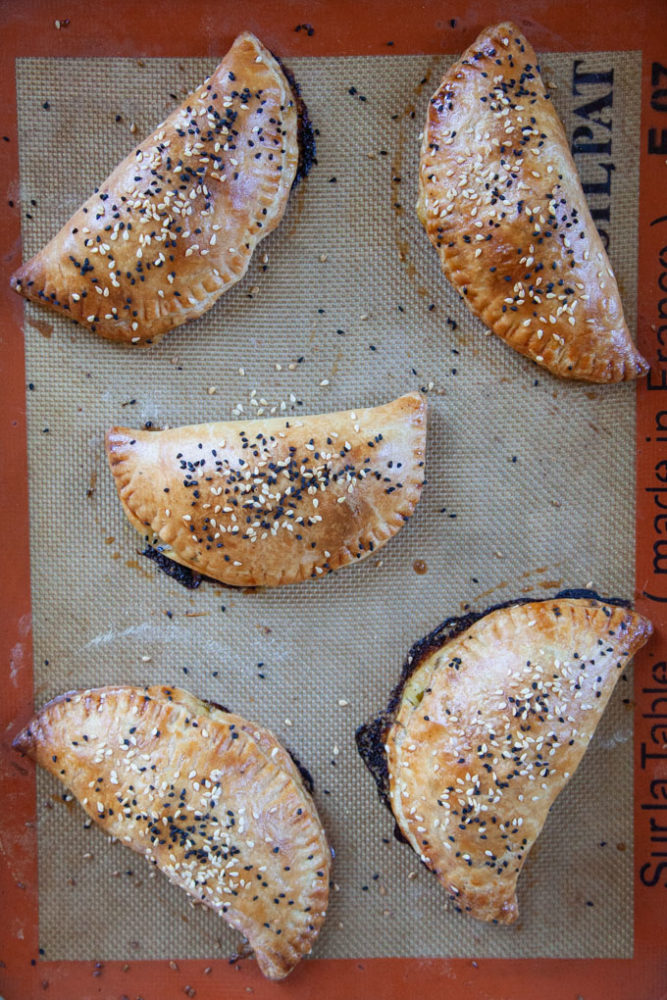
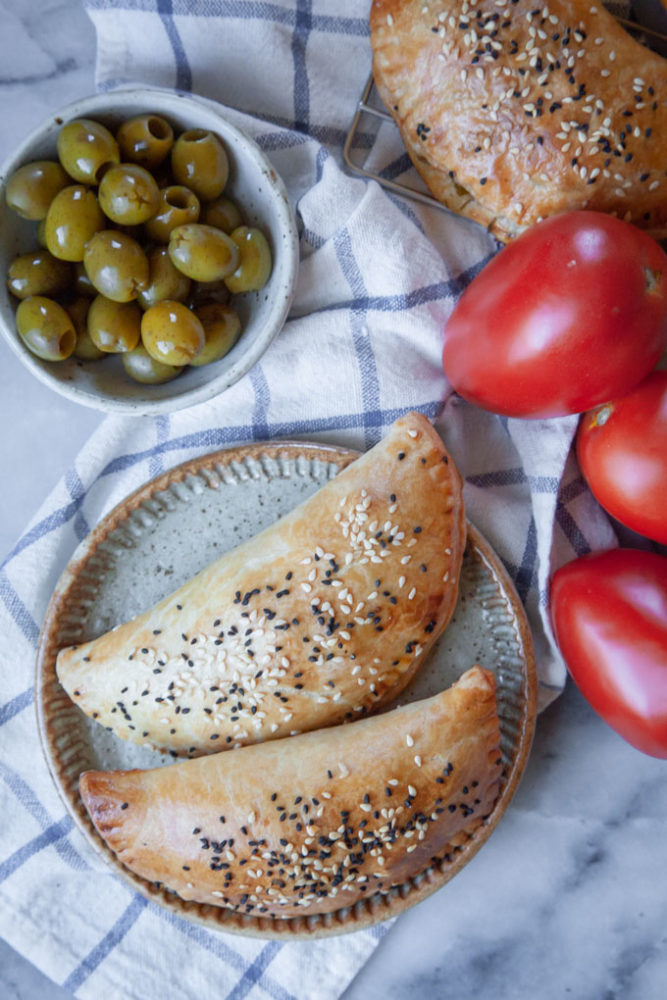
These savory and satisfying hand pies are packed with California grown green olives, tomatoes, roasted onions, fresh thyme and feta cheese.

This post was sponsored by California Grown. I was compensated for this post and for developing the recipe. However, all opinions below are completely my own.
Summertime is here and I’m obsessed with all the Summer produce! I’m buying up pretty much everything from the bright and juicy berries to the luscious Summer stonefruit. But every time Summer comes around, the one thing I’m super excited about are tomatoes! The flavors of summertime tomatoes can’t be beat, and they are incredibly versatile in the kitchen. I use them as a topping for my tomato focaccia, my Summer zucchini pasta, as well as in my easy baked ziti dish. These tomatoes are paired with California green ripe olives another super versatile ingredient that I love and use all the time, like in my twice cooked eggplant and olive dish, my double olive sausage pizza and my Moroccan spiced roast chicken. In additional I added in roasted onions, feta and fresh thyme for the filling, to make a savory hand pie that is super satisfying as a snack or light lunch.
How do I make Olive, Tomato and Onion Hand Pies?
Like all pies, you want to start with the pie crust! This pie crust is similar to traditional pie crust that starts with flour, salt, butter and water. But I add in some baking powder as well. This gives the crust some additional lift that you can’t get with just using butter, which gives some extra flakiness. This added insurance of the baking powder lift also allows you to re-roll the dough scraps more.
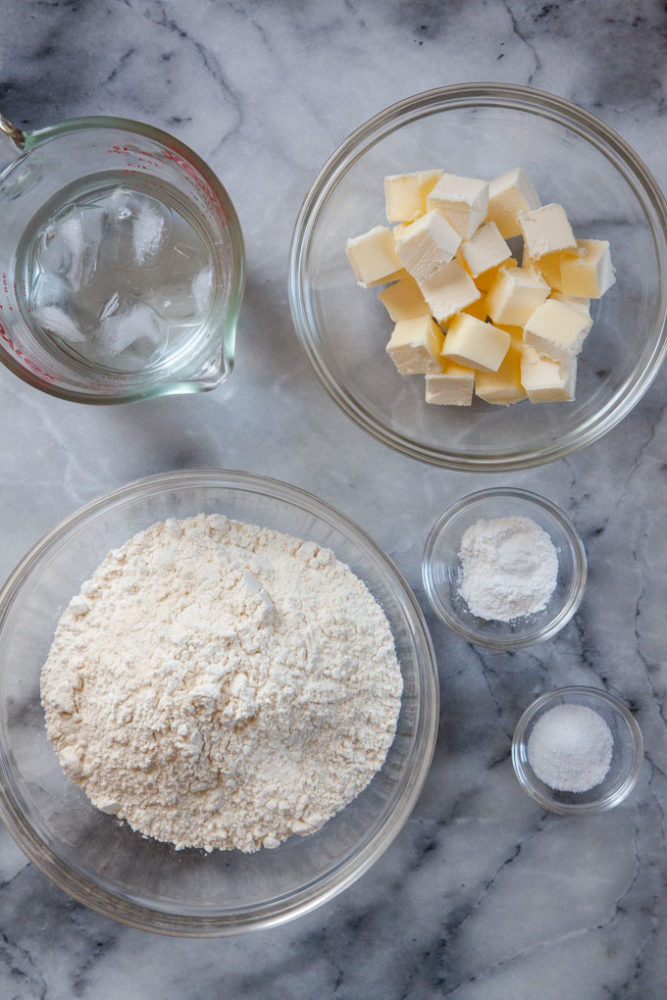
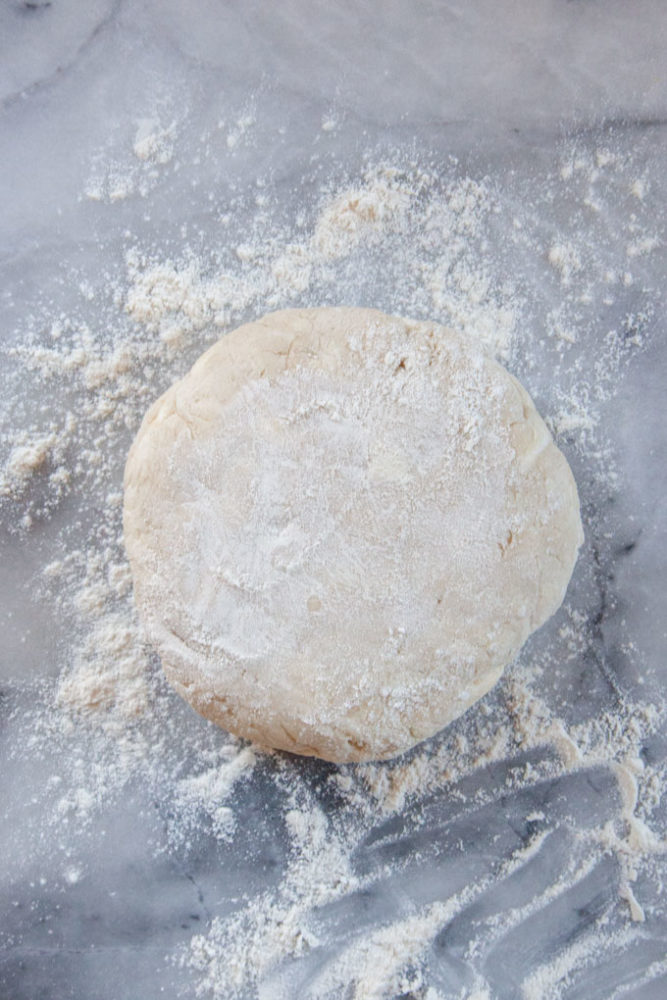
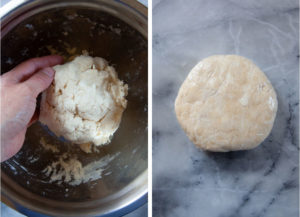
Combine the dry crust ingredients together. Smash the butter into small flat pieces. Drizzle in the water and toss until a dough forms. Once that you have a dough, form a 1-inch thick disk, wrap it with plastic wrap, and chill in the fridge for 2 hours or overnight.
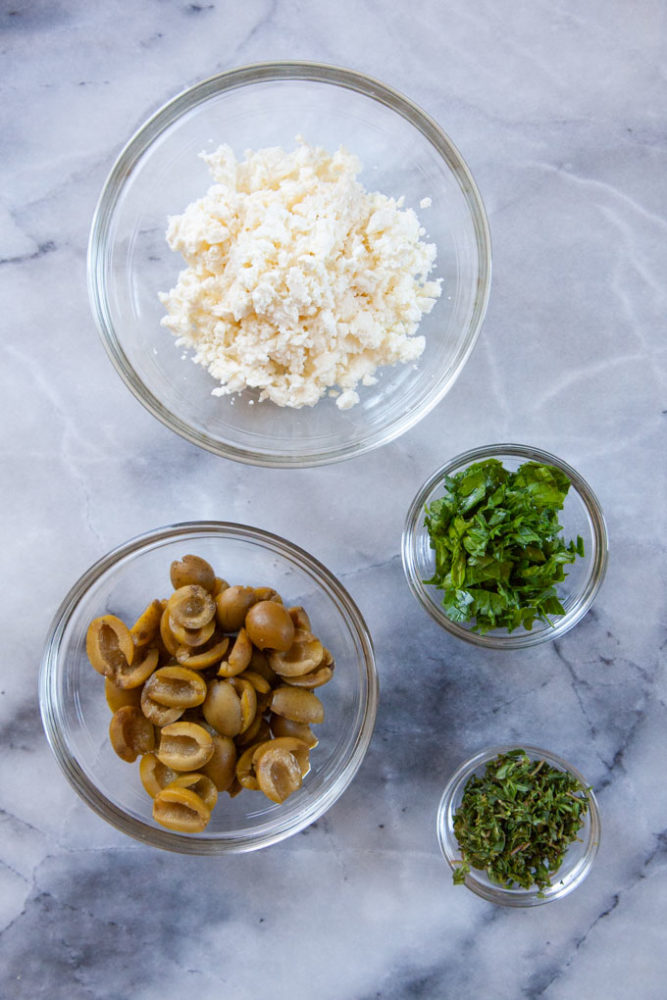
While the dough is chilling, roast the tomatoes and onions in a preheated oven for 30 minutes. Then let the vegetables cool. While the vegetables are roasting, slice the olives, chopped the parsley and thyme leaves, and crumble the feta if necessary.
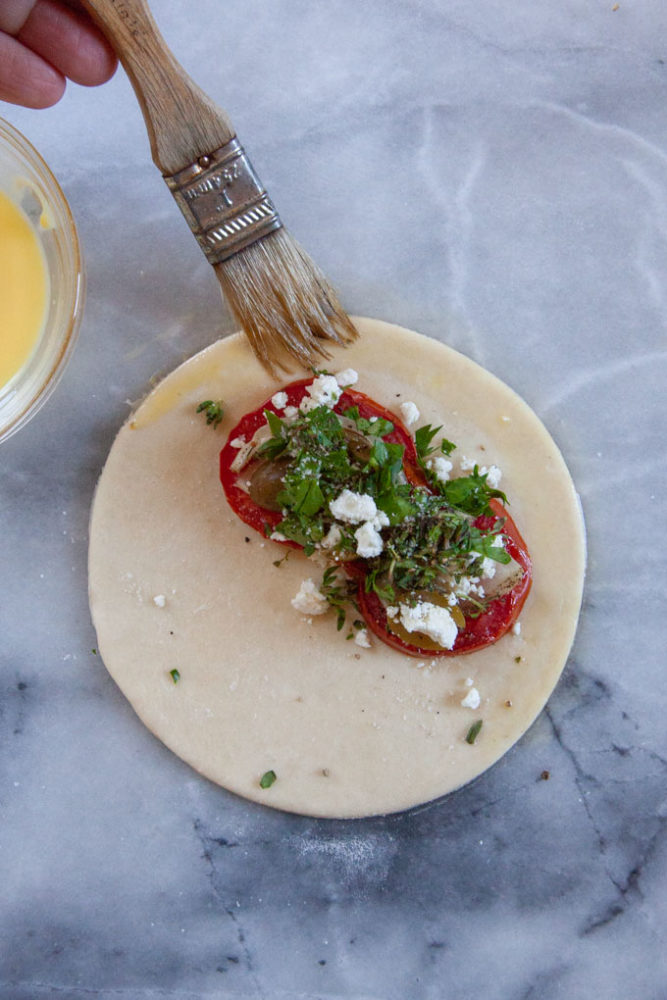
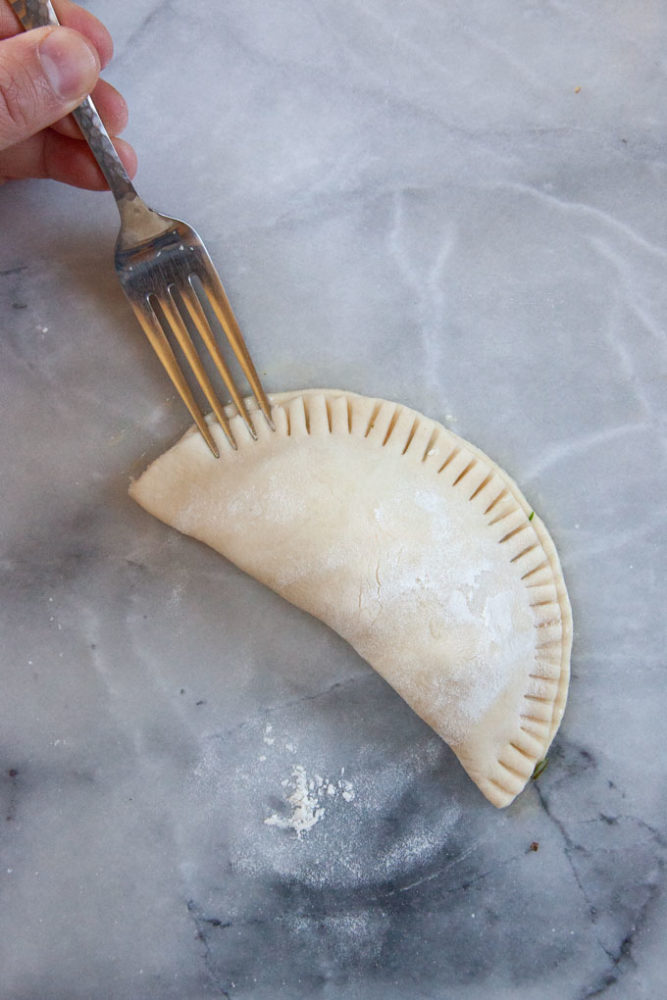
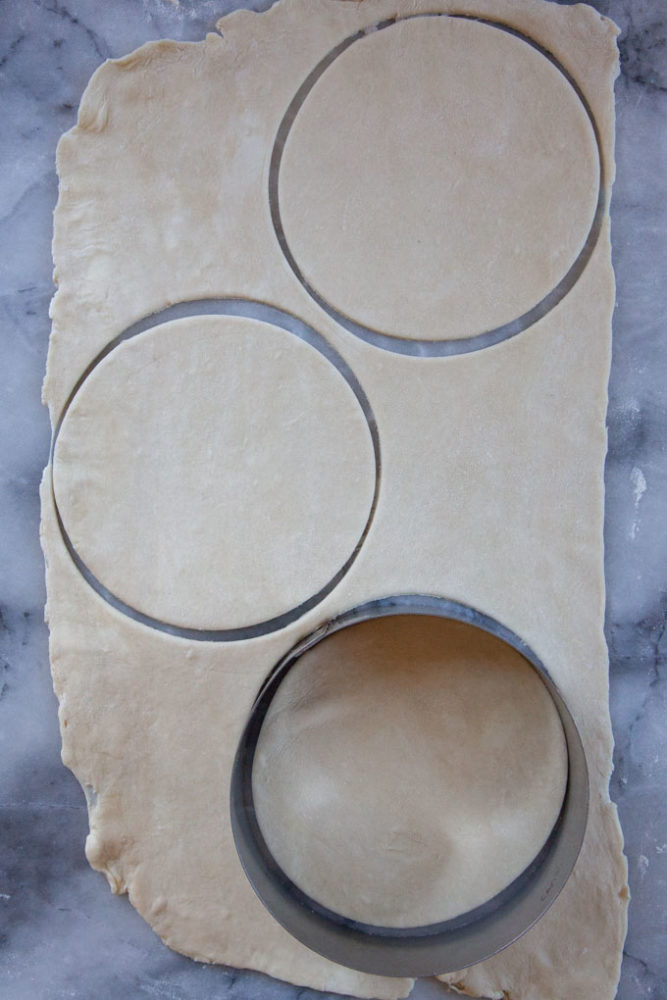
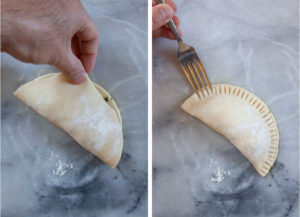
Once the dough is chilled, roll it out and cut 6-inch circles of dough. Assemble the pie by placing a few tomatoes and onions on one side of the circle, then sprinkling with some olives, feta, herbs, and a pinch of salt and pepper. Brush half the circle with an egg wash, and fold over into half moon shapes. Seal with a fork and then move to a baking pan. Repeat until you’ve made 8 to 10 pies.
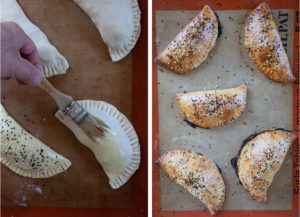
Brush with the pies with remaining egg wash, sprinkle with some sesame seeds and or nigella seeds, and then place in the refrigerator for 15 minutes to firm the dough again. Preheat the oven to 400°F, then bake the pies for about 25 to 30 minutes.
What sort of olives should I use?
I used pitted California green ripe olives in this recipe. They are always available since they are in cans! They’re actually the exact same olive as the canned California black olives but processed in a different manner to keep them green. I like the smooth buttery flavor of them, but if you can’t find or don’t want to use the pitted green olives feel free to substitute black olives for them.
What sort of tomatoes should I use?
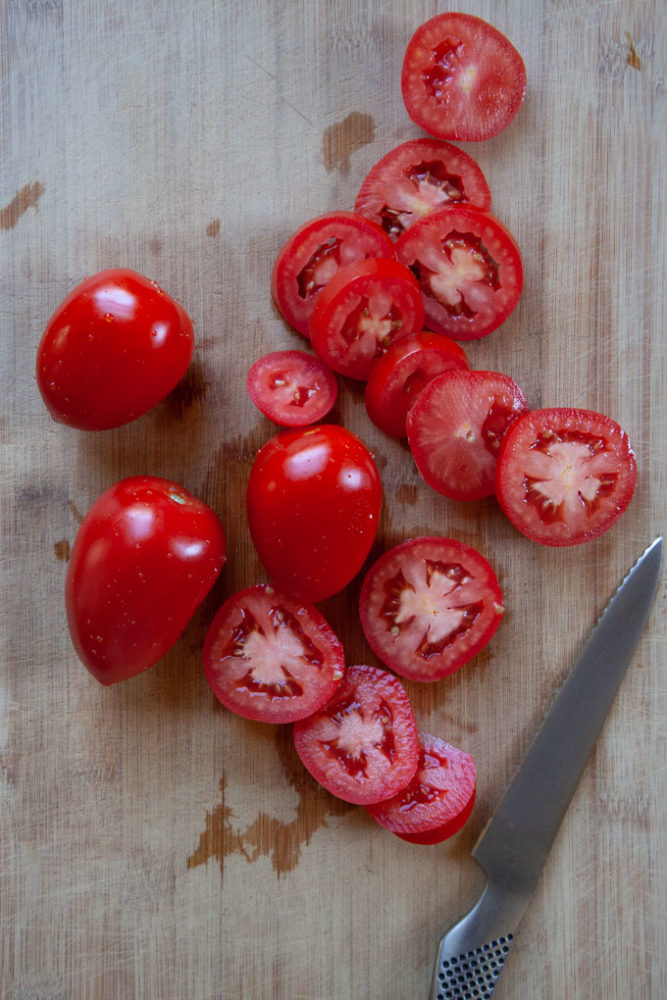
I used California grown Roma tomatoes, as they are easy to find and are juicy but not too watery. Roasting them will help intensify their flavor as well. If you can’t find Roma tomatoes, you can substitute them with Early girl tomatoes, San Marzano, or halved cherry tomatoes. I recommend using fresh tomatoes for this recipe. Canned tomatoes will make the filling water and potentially lead to a soggy hand pie.
How is this pie crust different?
Most pie crust recipes tell you to handle the dough as little as possible. This is to keep the butter cold and so you don’t overwork the dough and develop the gluten, the stringy protein that can lead to tough pie crust.
This is great advice for most traditional pies but for hand pies, which are eaten out of hand, and need to have a little more structure to support the filling, it’s ok to work the crust a bit more. Be sure to add enough water to the crust so you have a dough that you can work with and that isn’t crumbly. Feel free to massage the dough in the beginning to make sure all the ingredients are incorporated and hydrated. I’ve included baking powder in the dough to help with the flakiness.
Don’t skip the chilling part. After working the dough together, you want to refrigerate the dough. Chilling the dough will also allow the water to move throughout the dough, evening out the water content, relax the gluten and harden the butter.
If you find the dough is overly sticky when you’re rolling it out, you can just liberally dust the surface you are rolling the dough on, as well as the top of the dough. Just keep on adding flour to the dough if it sticks more. And once you’ve assembled the hand pie, brush any excess flour off before baking.
Can I make the pie dough ahead?
Yes! In fact, the pie dough handles better when it is chilled and I recommend chilling it in the refrigerator for at least 2 hours before assembling the pies. But you can also making the dough the night before, letting it rest overnight in the fridge. In fact, you can make the dough up to 2 days ahead of time. Just make sure it is well wrapped in the plastic wrap.
Chilling the dough relaxes the gluten in the crust and helps solidify the butter. This leads to a more tender and flaky crust. Since we’re working with California ingredients in the filling, be sure to look for the Real CA Milk seal on the butter for this crust!
You can even make the dough well ahead of time and freeze it. Place the wrapped dough in a heavy-duty Ziploc freezer bag and label it with the date. The dough will keep in the freezer for up to 2 months. Thaw it out overnight in the fridge before using.
How do you store leftover pies?
These pies are best enjoyed the same day they’re made, still warm from the oven. But they also rewarm beautifully. If you have leftover pies, store them in an airtight container, in the refrigerator, for up to 3 days. Reheat the pies in a 350°F preheated oven or toaster oven for 10 to 12 minutes or until the pie is heated through. I don’t recommend heating it in the microwave, as that will lead to a soggy pie crust.

Olive, Tomato, and Onion Hand Pies
Ingredients
Crust
- 2 2/3 cups all-purpose flour 375 g
- 1 1/2 teaspoons baking powder
- 3/4 teaspoon kosher salt
- 3/4 cup unsalted butter, cold 170g or 1 1/2 sticks
- 8 to 11 tablespoons ice water
Filling
- 1 1/2 lbs Roma tomatoes, sliced 1/2-inch thick about 6 to 7 medium-sized
- 2 medium yellow onions, sliced 1/2-inch thick
- 4 tablespoons California extra virgin olive oil
- 3 teaspoons kosher salt divided
- 3 teaspoon fresh ground black pepper divided
- 1/2 cup pitted green olives, cut in half lengthwise, 70 g or 2 1/2 oz
- 1/2 cup crumbled feta cheese 80 g or 2 3/4 oz
- 2 tablespoon chopped Italian parsley leaves
- 1 tablespoon fresh thyme leaves
To finish
- 1 large egg yolk
- 1 tablespoon water
- Black and white sesame seeds or nigella seeds optional
Instructions
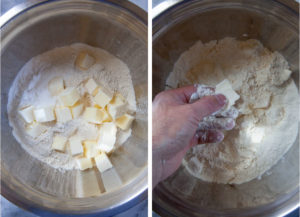
- Preheat the oven to 350°F. Lightly coat 2 rimmed baking sheets with 1 tablespoon olive oil.Make the crust by placing the flour, baking powder and salt in a medium sized bowl. Stir with a balloon whisk until blended. Cut the butter into 1/2-inch cubes and sprinkle over the dry ingredients. Using your fingers and hands, first toss the butter in the flour then smash the butter into thin slivers, breaking them up as you go.

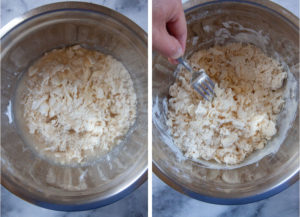
- When the butter has been broken and flattened into small bits the size of peas, drizzle 8 tablespoons of water over the dry ingredients. Toss with a fork, then use your hands to blend the water in. Keep working the ingredients until they start to stick together. If the dough seems too dry, add more water, 1 tablespoon at a time, if necessary.
- Once a dough forms, place it on a piece of plastic wrap and flatten into a disk, about 1-inch thick. Wrap well with the plastic wrap and refrigerate for 2 hours, or until the dough is chilled throughout. You can make the dough the day before and chill overnight.
- While the dough is chilling, place the sliced tomatoes on one of the roasting pan and onions on the other. Drizzle with the tomatoes and onions with olive oil and sprinkle with 1/2 teaspoon of the salt and pepper over each the tomatoes and the onions, using 1 teaspoon total of salt and pepper. Roast in the oven for 30 minutes.Once the tomatoes and onions have roasted (they should look a little dry on top, but still be juicy) let them cool on the pan about 20 minutes.
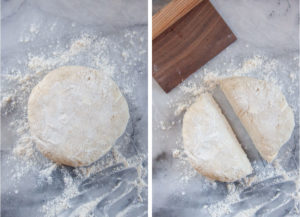
- Once the dough has chilled and the tomatoes have cooled, line two clean baking sheets with parchment paper or silicon baking mats.Cut the chill dough in half. This will make the dough easier to handle.
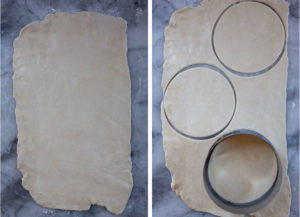
- Roll out one half of the dough to about an 8 inches wide and 16 inches tall rectangle on a clean floured surface to a 1/4-inch thickness. You should be able to cut out 3 6-inch rounds pieces if you stagger the circles. Gather scraps and re-roll to get a 4th circle. Repeat with the other half getting 4 circles. Re-roll any remaining scraps to get a 9th and possibly 10th circle.
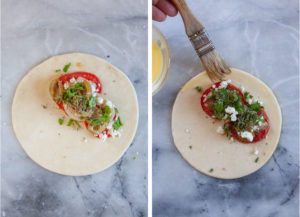
- Beat the egg yolk and water together to form an egg wash. Place one round in front of you and place a few roasted tomatoes and some cooked onions on one half side of the dough. Add some olives, feta cheese, parsley and thyme over the tomatoes and onions. Sprinkle a pinch of salt and pepper over the filling. Brush the half of the edge of the round of dough that has the filling.
- Fold the other half over on top. Seal with a fork. Then move the hand pie to the baking sheet. Repeat with remaining hand pies and filling.
- Brush with the egg wash over the top of the pies and sprinkle with some sesame seeds and/or nigella seeds. Place pans in the refrigerator for 15 minutes and preheat the oven to 400°F.Once the pies have chilled, bake for 25 to 30 minutes or until the top of the pie is golden brown. You may want to rotate the pans for even baking. Let cool on the baking sheet for 10 minutes once done, then move to a wire cooling rack to cool further. Best enjoyed while still warm.

Anita @Omega Juicer says
This looked so yum that I had to make it and was blown away by the amazing flavors bursting out of that hand pies. Thanks for the lovely idea.