• Skip to primary navigation
  • Skip to main content
  • Skip to primary sidebar
  • My Cookbook: Marbled, Swirled, and Layered
  • Recipes
  • Travel & Events
  • About this Blog
  • Bio
  • FAQ
  • Work with Me

Eat The Love

Recipes, Photographs and Stories about Desserts, Baked Goods and Food in general, with a healthy dose of humor and happiness for the food obsessed

You are here: Home / cake / Marbled Pound Cake

Published: September 19, 2025 2 Comments

Marbled Pound Cake

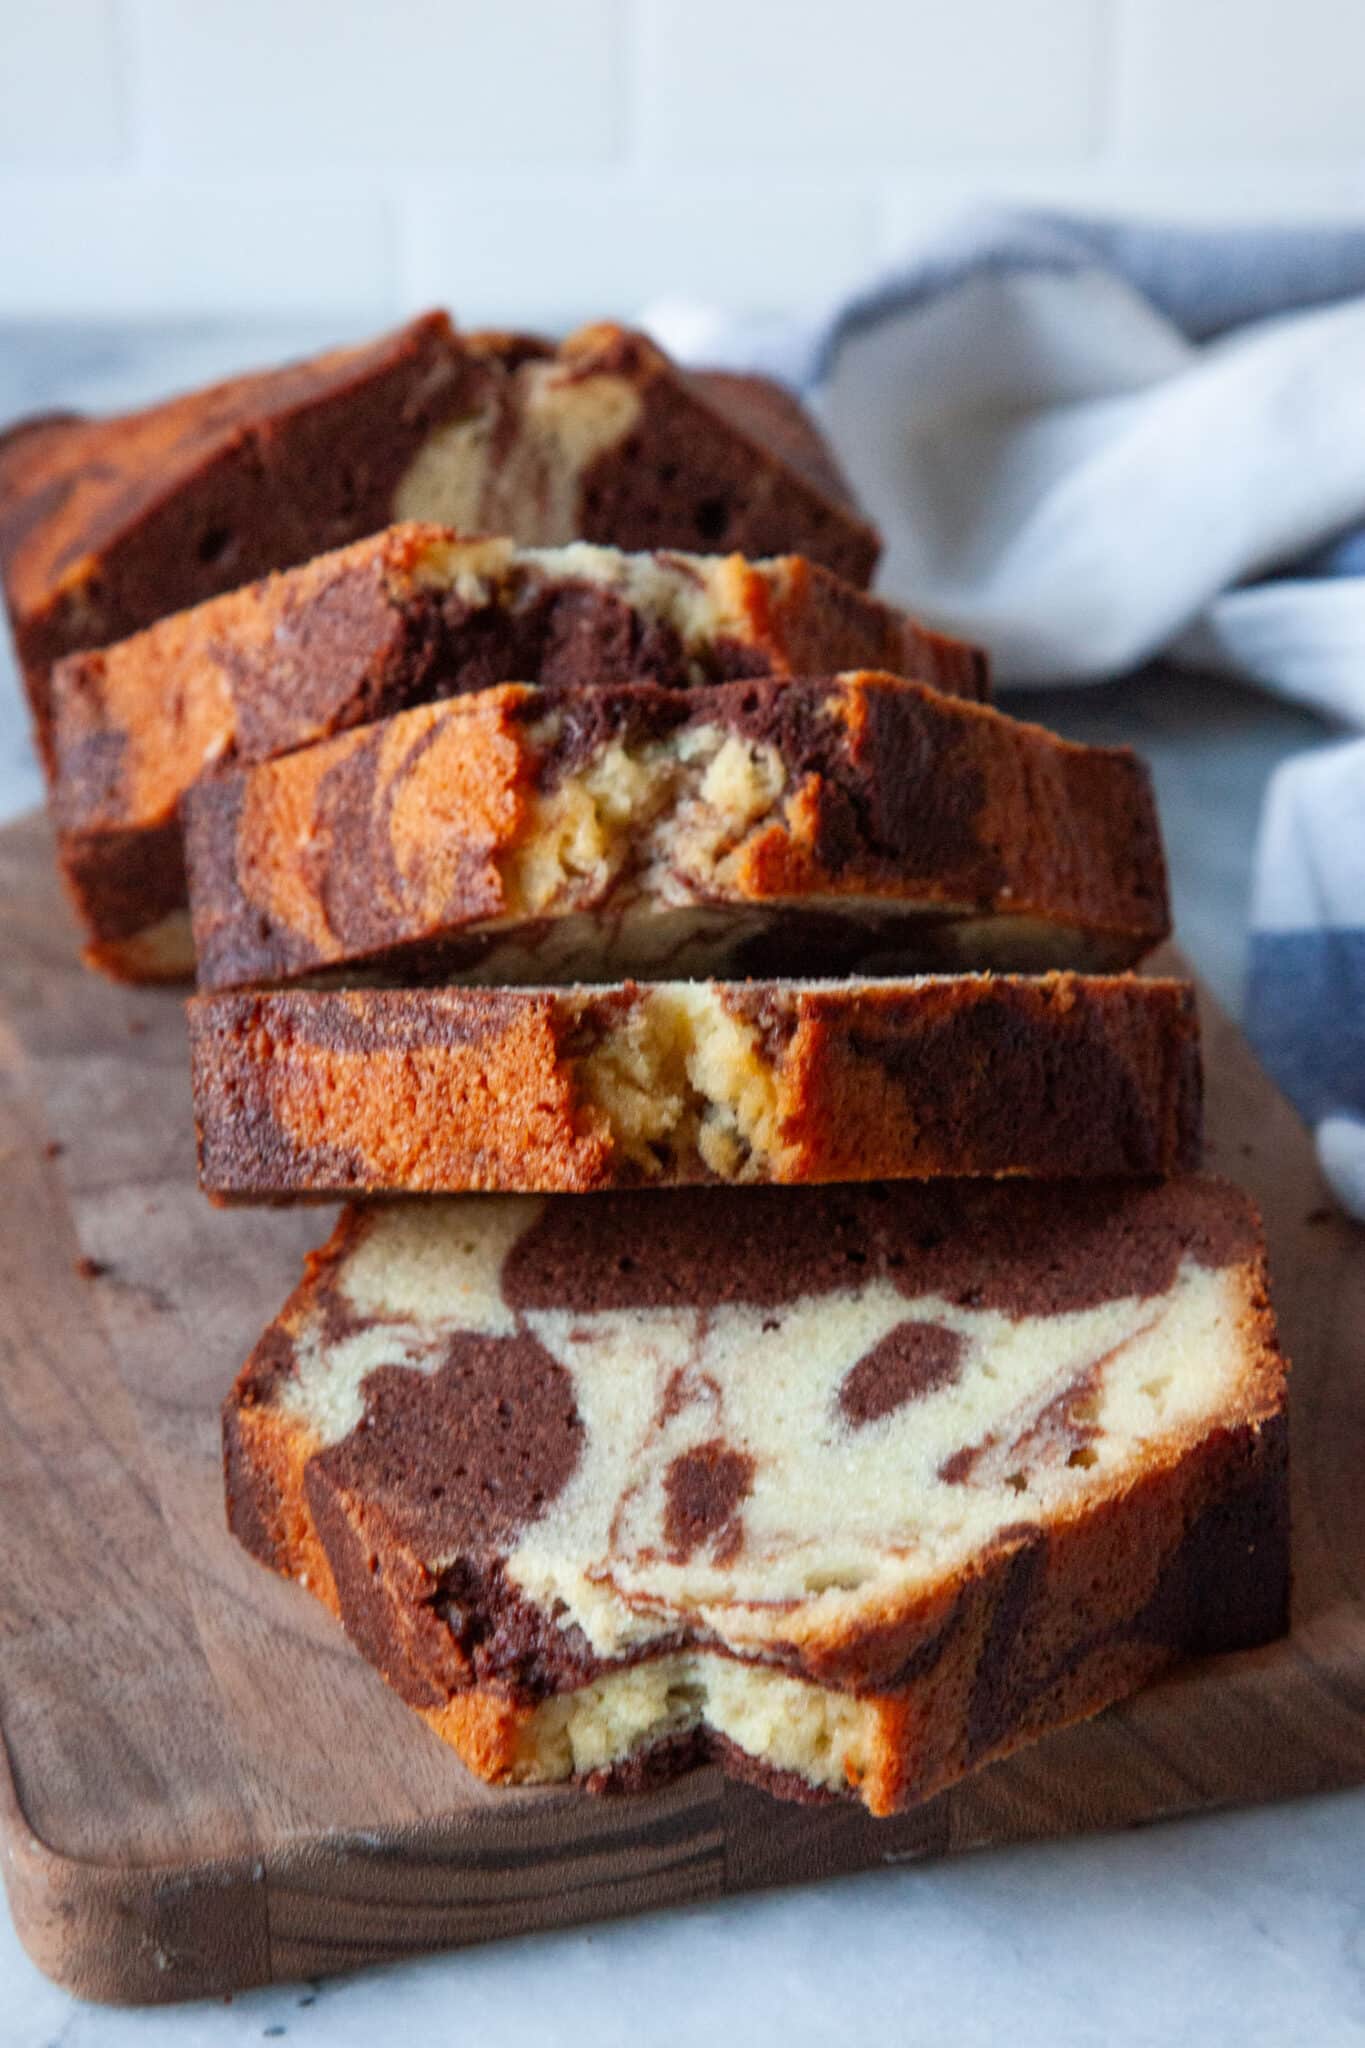
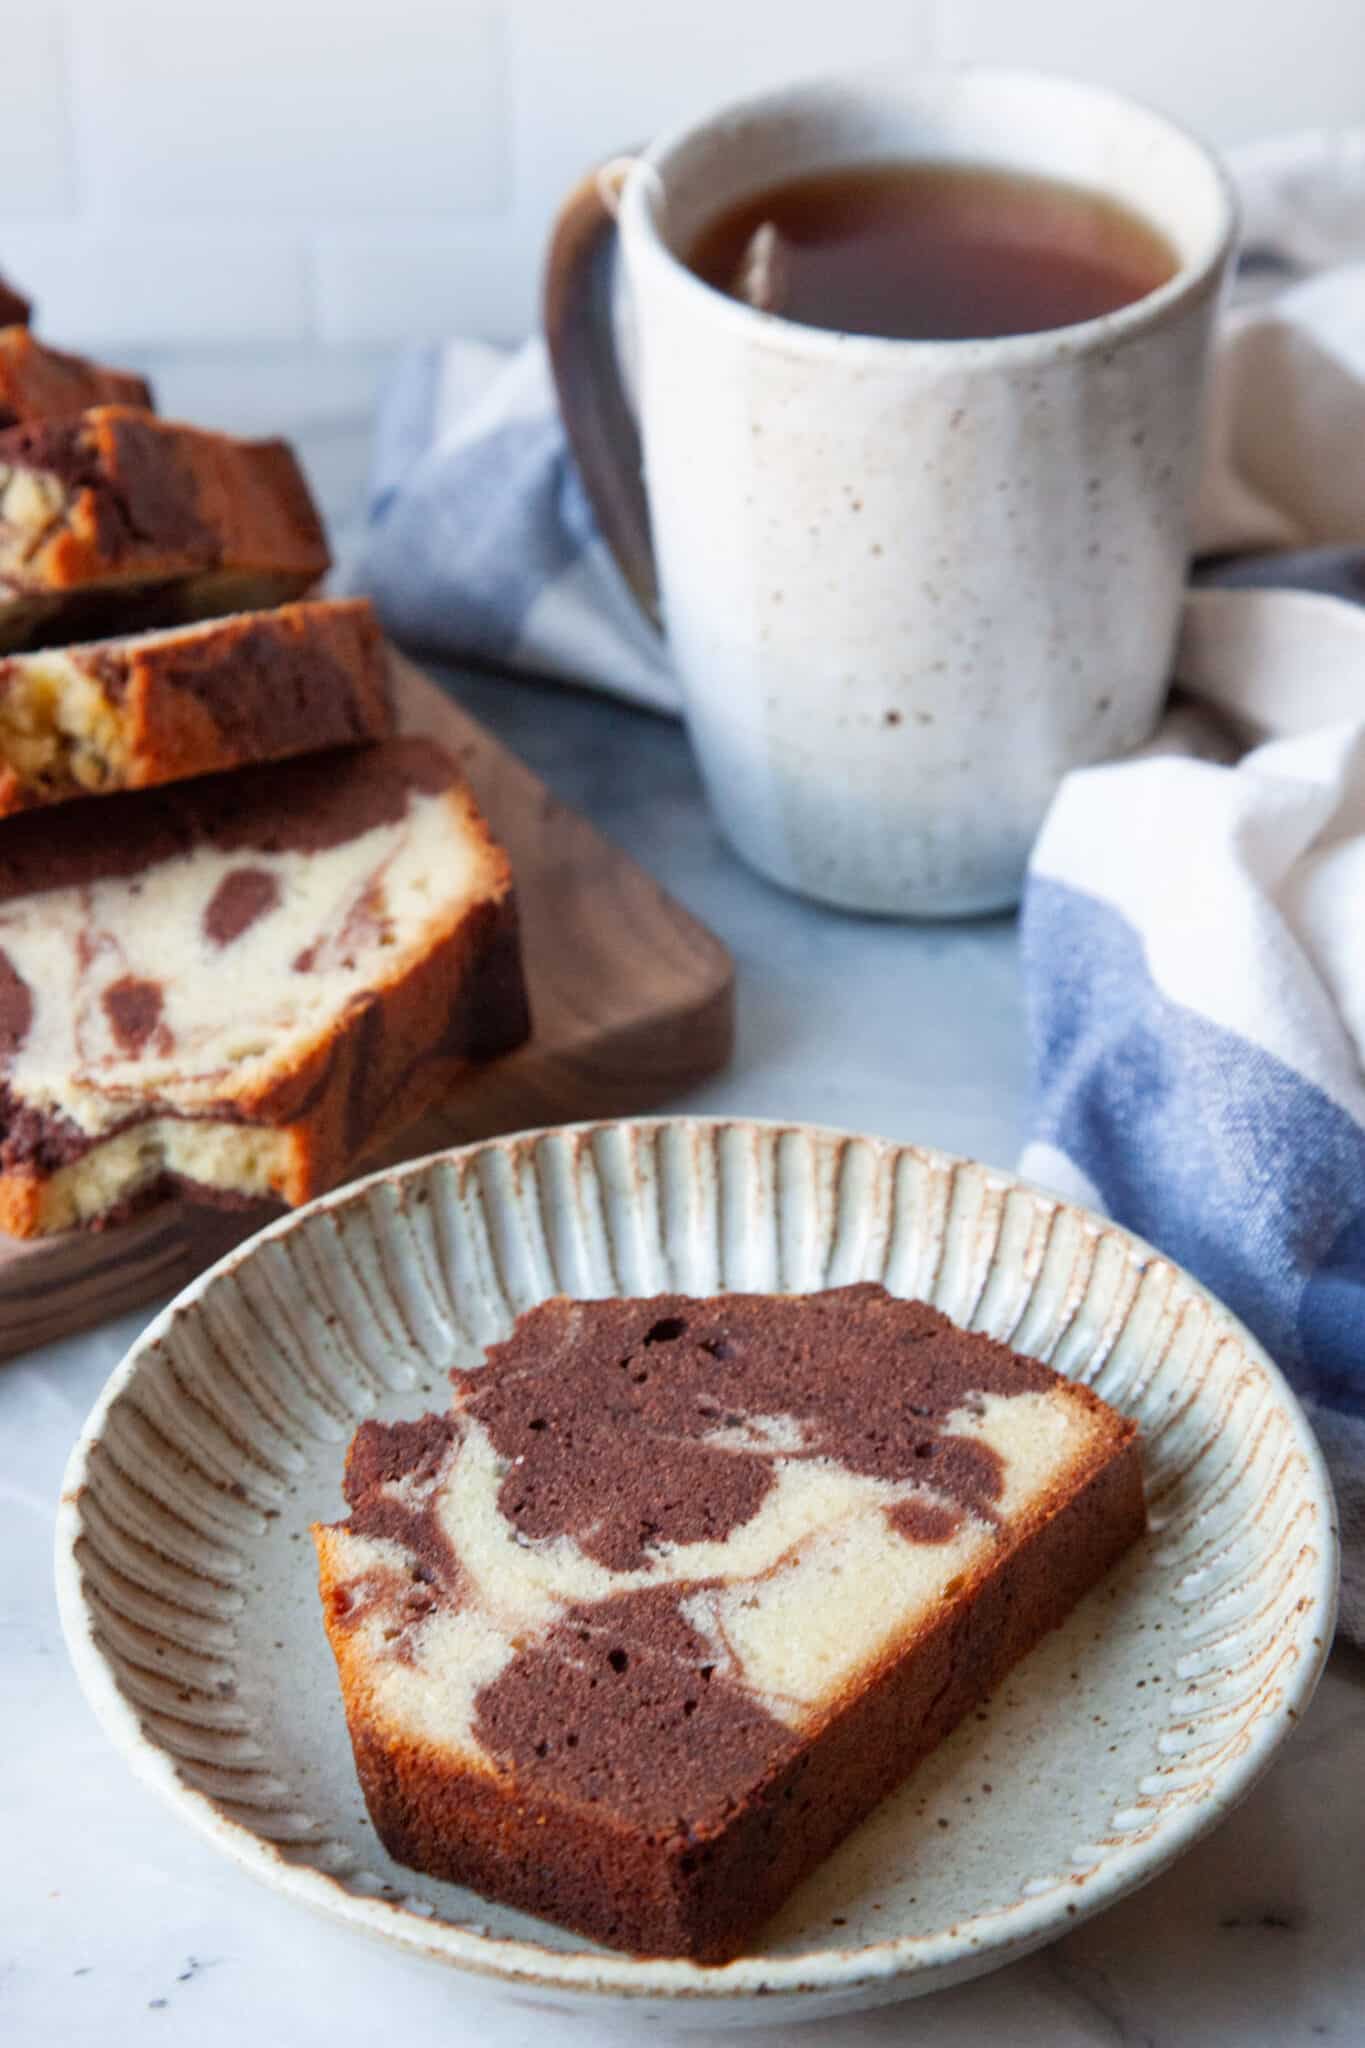
This beautiful marbled pound cake use cream cheese to give it a classic pound cake crumb that everyone loves.

Jump to Recipe

A slice of marbled pound cake on a plate, with the rest of the cake on a cutting board next to it along with a mug of tea.

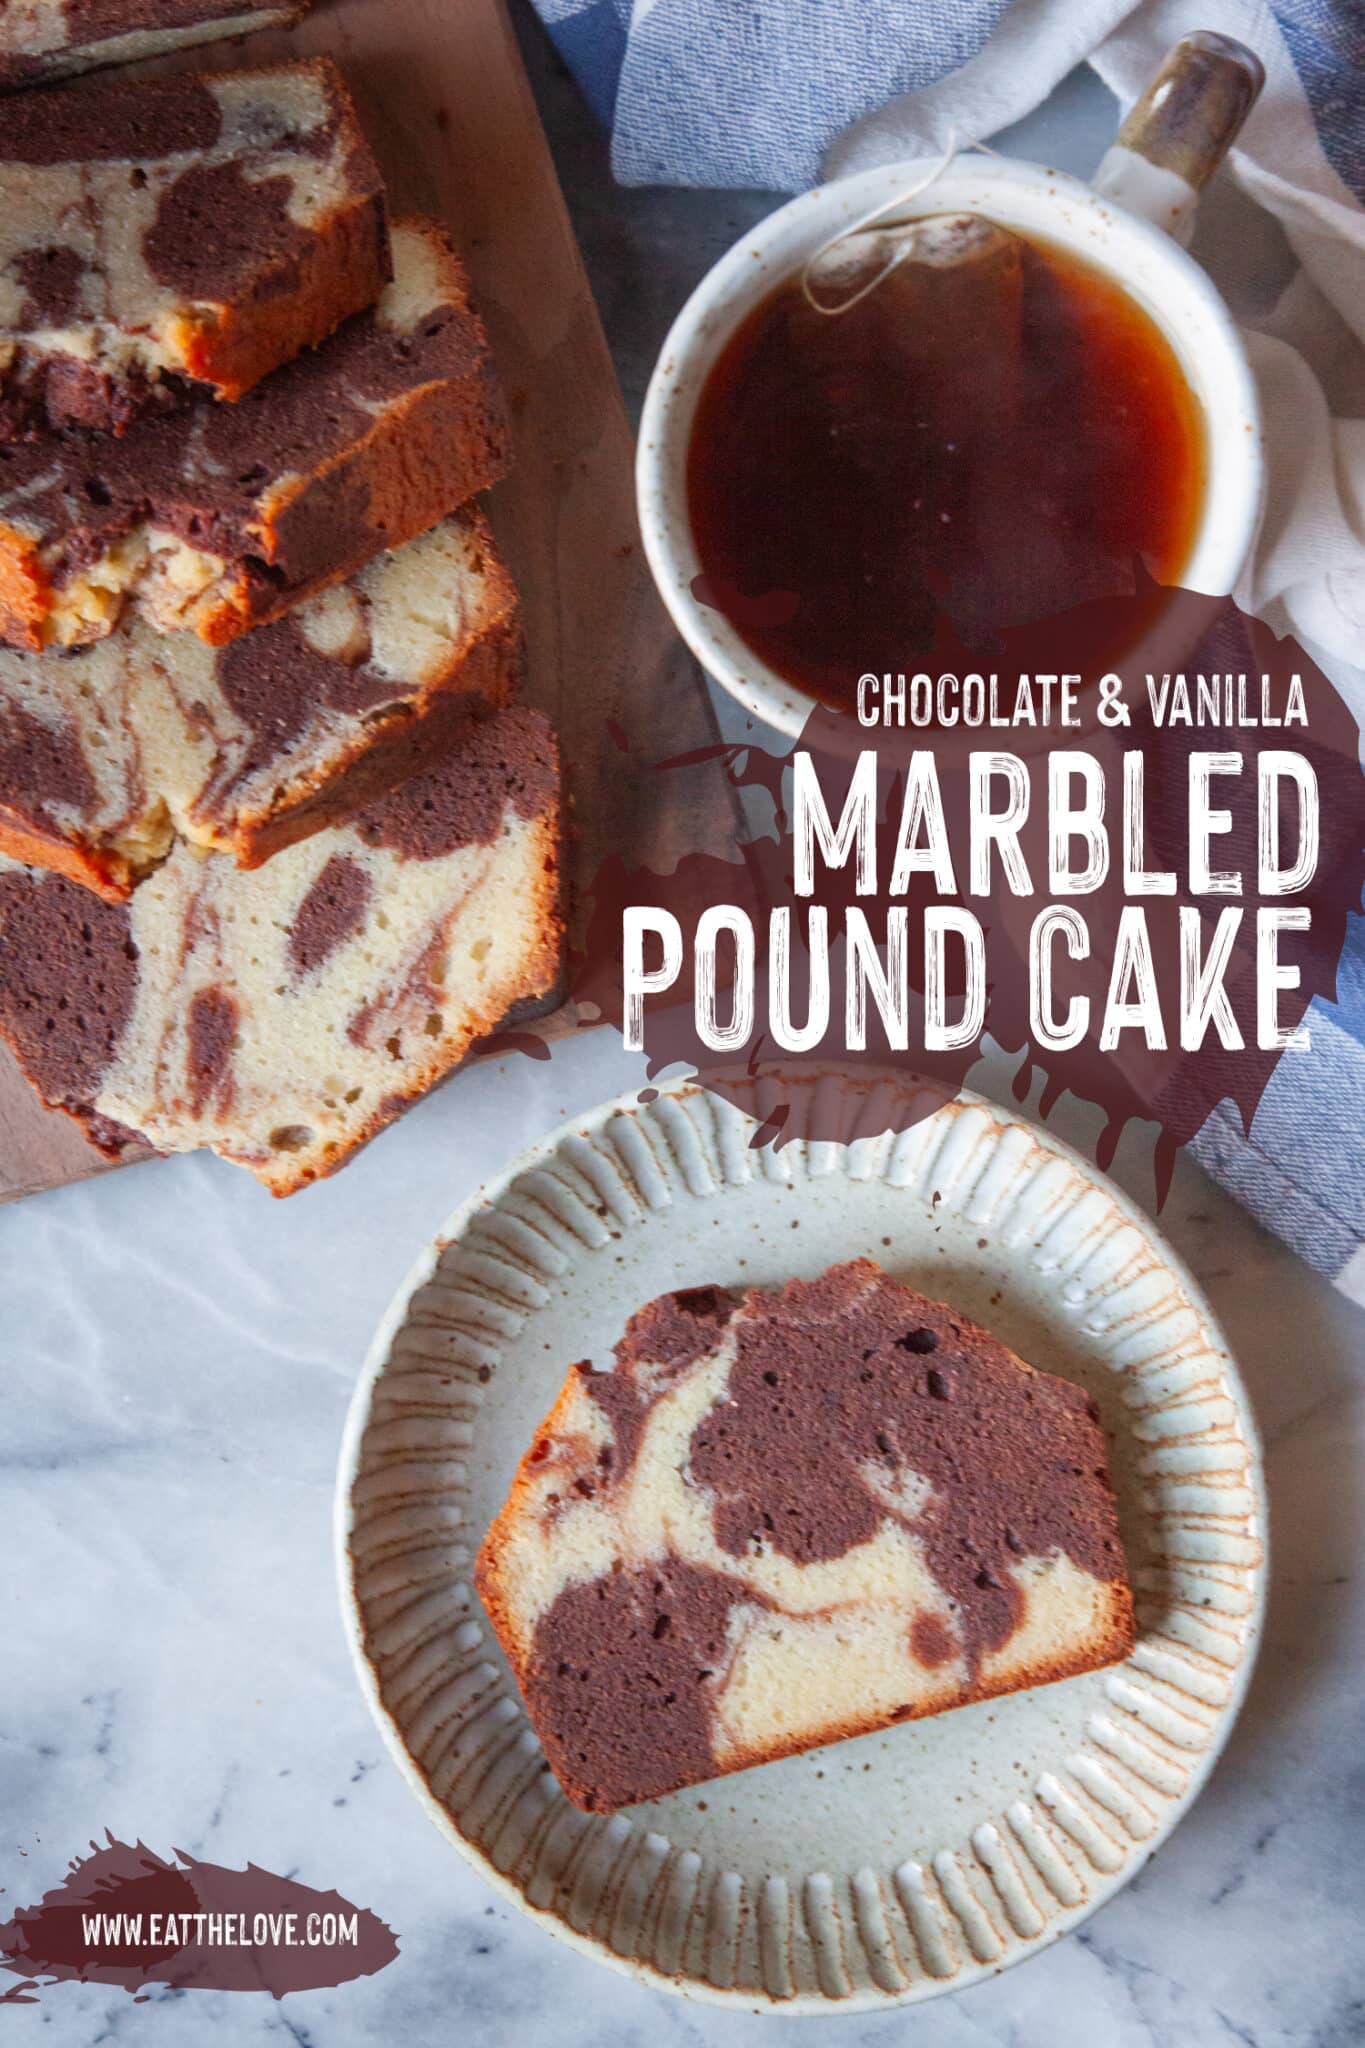
I adore my classic cream cheese pound cake for the velvety tight crumb that it has. But when I want something that’s even more impressive, I make this marbled version. After all, I did write the cookbook Marbled, Swirled, and Layered! How could I resist making a chocolate and vanilla pound cake, aka the marbled version of my favorite pound cake? With swirls of chocolate batter in it, each slice of the pound cake looks beautiful when you slice into it. The recipe isn’t much different than my cream cheese pound cake but you do need to do the extra step of turning half the batter into a chocolate batter to mix in. Don’t worry though, it’s a pretty easy step!

A marbled pound cake sliced on a cutting board.

How to make this pound cake

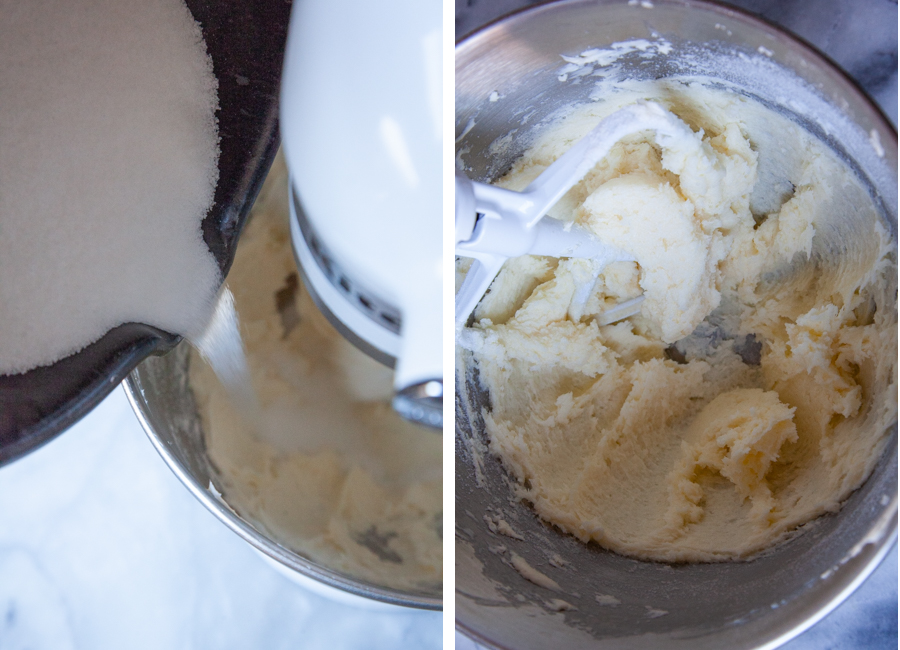
Like my cream cheese pound cake, you start by creaming together butter and cream cheese until well blended. Then add in salt and baking powder. Once everything is well blended, pour in the white sugar as you mix, continue to beating it until the mixture is light and fluffy. This process mechanically incorporates as much air as possible into the batter. But the addition of a touch of baking powder also is an added insurance that the pound cake isn’t too dense.

Left image is sugar being slowly poured into the mixing bowl of a stand mixer with butter and cream cheese well blended. Right image is the sugar mixed into the butter and cream cheese to the point where it is clinging to the side of the bowl and is fluffy and light colored.

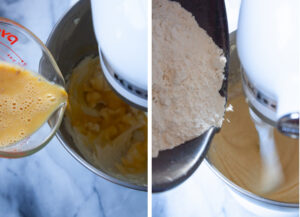
Beat together room temperature eggs with the vanilla and then drizzle the mixture into the batter, trying to add just a little bit at a time to keep the mixture emulsified and smooth. But don’t stress too much if that doesn’t happen! Adding the flour next will help bring the whole batter back together.

Once the flour is added, scoop out half of the batter and add in cocoa, instant espresso powder or coffee, and vanilla to it. Mix until uniform. 

Left image is the cake batter divided into one bowl, and the remaining batter still in the mixing bowl with cocoa powder, vanilla and instant coffee. Right image is the chocolate batter mixed in the bowl, with the plain vanilla batter in another bowl next to it.

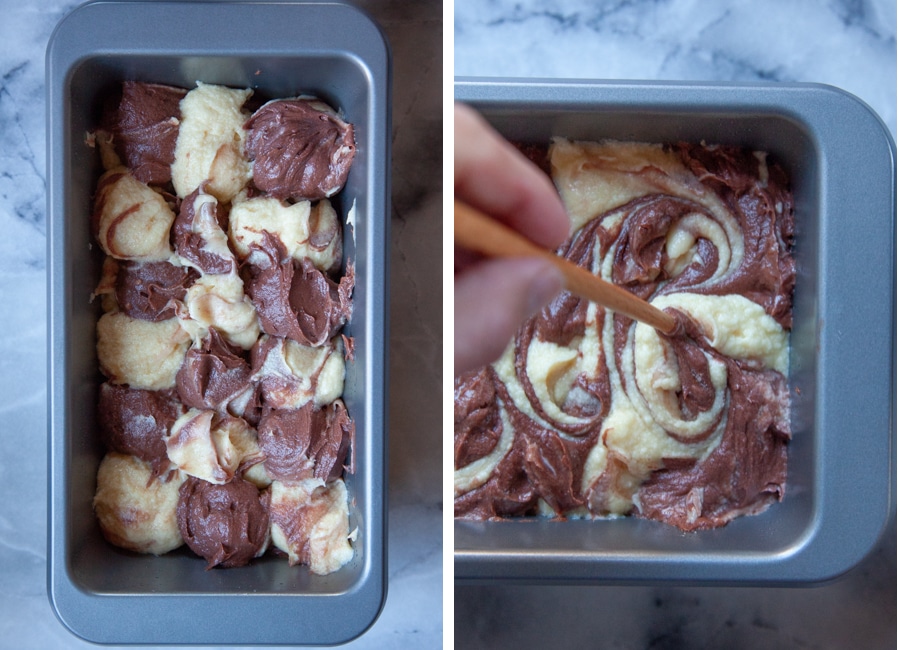
Now spoon the vanilla and chocolate batter into a loaf pan, alternating batters in the pan. Then use a chopstick or butter knife and swirl the batters together. Don’t swirl too much! Bake and cool slightly in the pan, then invert and let cool on a wire rack until room temperature and ready to serve.

Left image is chocolate and vanilla pound cake batter alternating in a loaf pan. Right image is a hand swirling the batter together with a chopstick.

What sort of cocoa to use

For a lot of recipes, the type of cocoa you use makes a difference, as it affects the way the baked good rises. But because pound cake primarily uses a mechanical leavening, where you add air into the batter by just mixing it until it’s fluffy, it doesn’t matter what cocoa powder you use in this cake!

Two spoonfuls of different cocoa powder on a marble surface, with darker Dutch-processed cocoa in front, and natural cocoa powder in back.

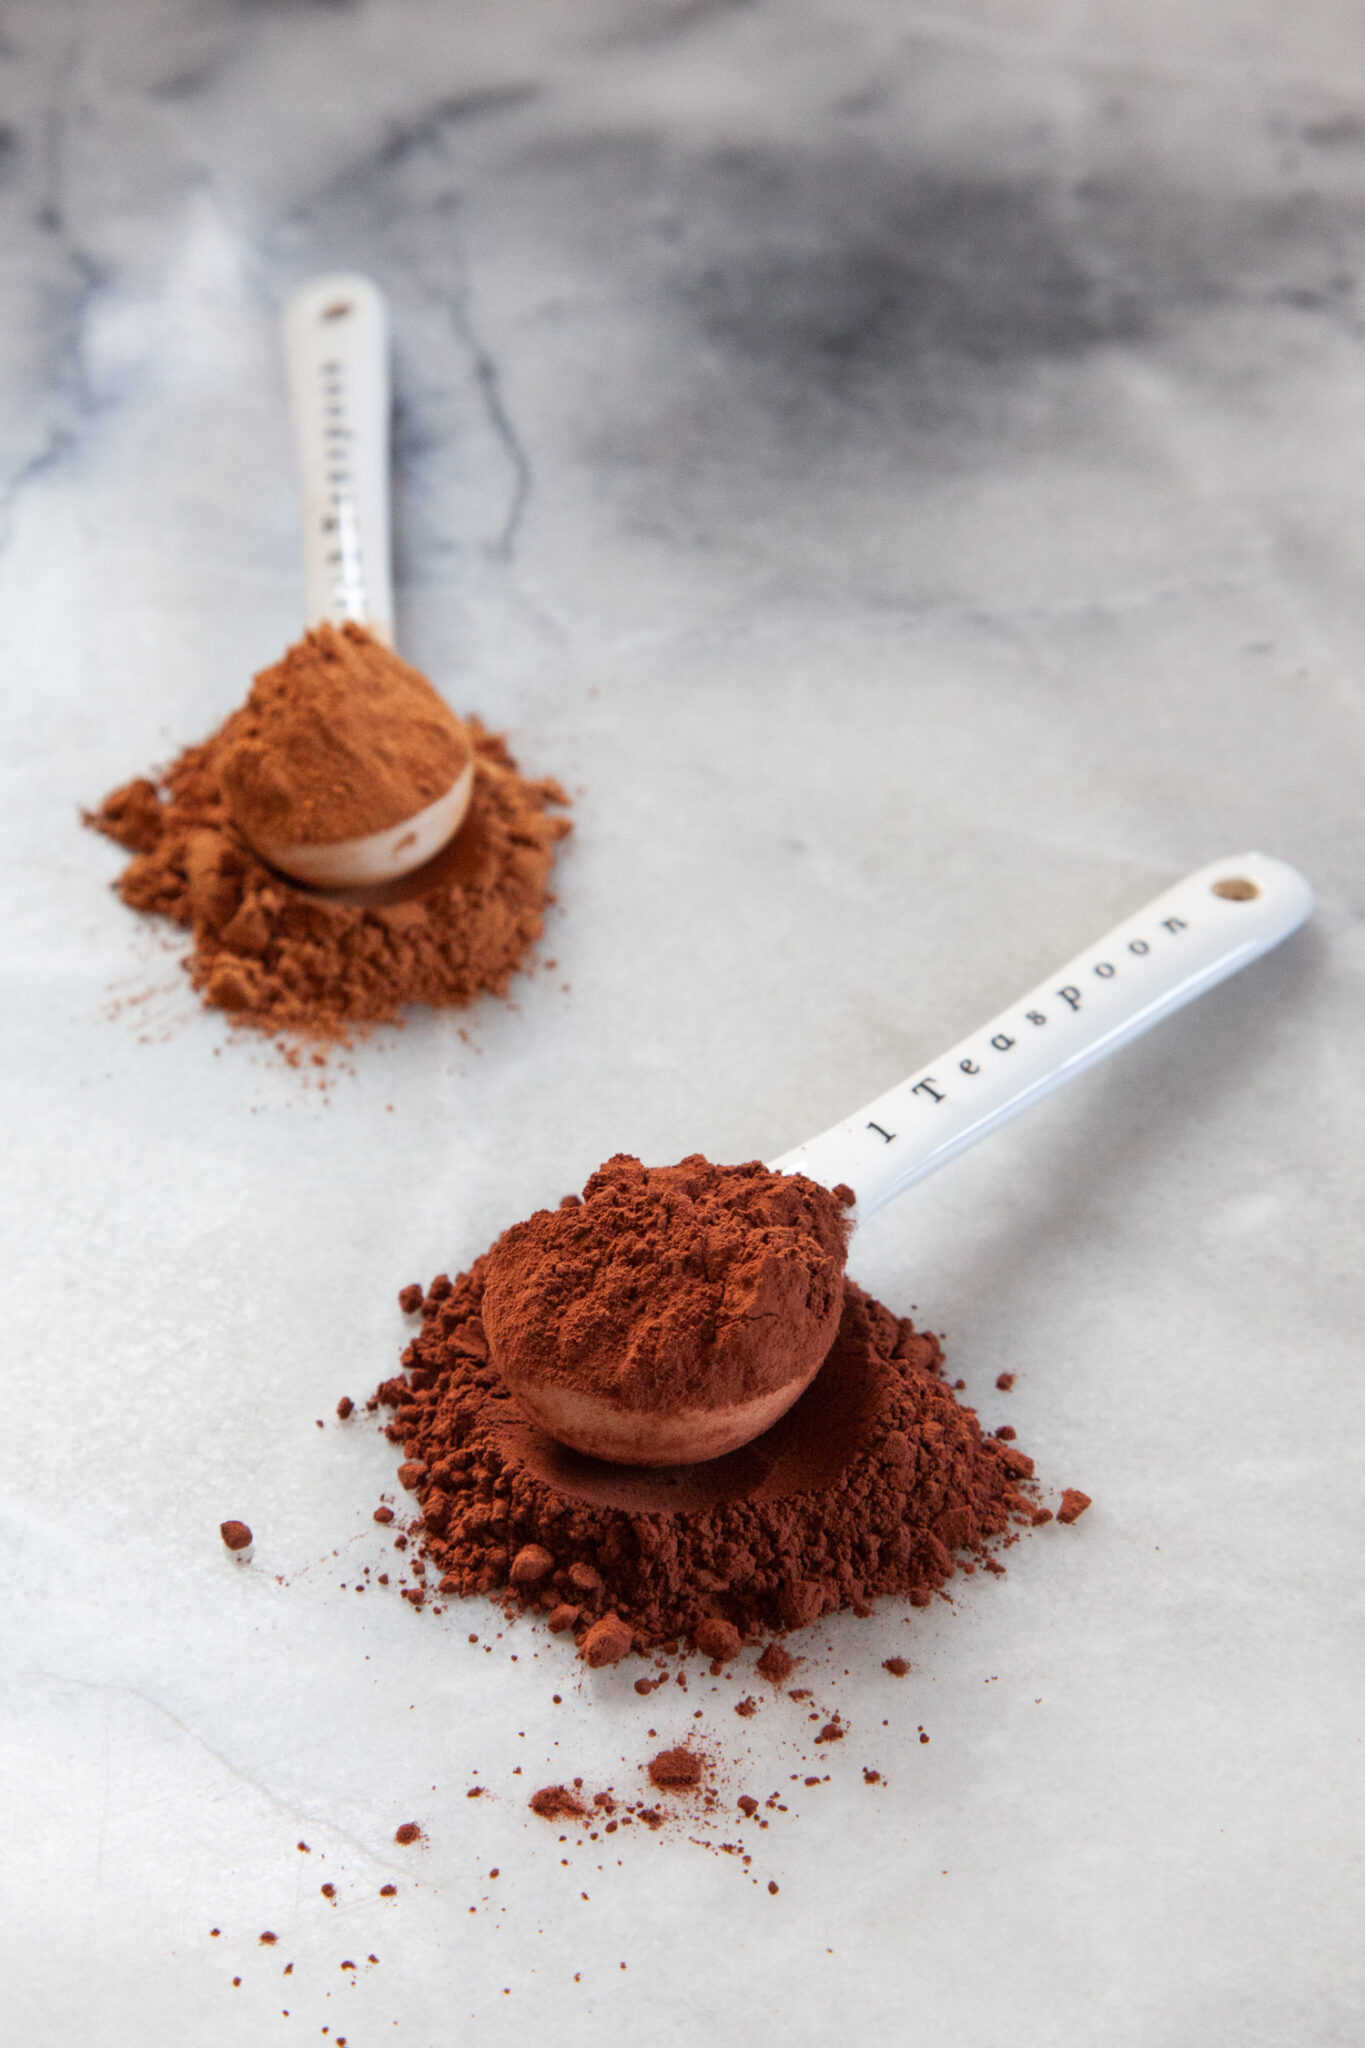
I choose Dutch-processed cocoa because it’s darker color and creates a more contrasting swirling pattern. It also has a more mellow chocolate flavor. But if you only have natural cocoa powder or prefer the more acidic sharper chocolate flavor, then you can use the same amount of natural cocoa in place. 

How to store this pound cake

This pound cake can be stored at room temperature, tightly wrapped in plastic wrap, under a cake dome, for up to 3 day. You can also freeze this pound cake! Let the pound cake cool completely and then wrap tightly in plastic wrap. Place the wrapped pound cake in a large freezer Ziploc bag in the freezer for up to 2 months.

A slice of marbled pound cake on a plate. Behind the cake slice is a mug of tea and the rest of the cake on a cutting board.

If you like this marbled pound cake, check out these other marbled and swirled recipes:

  • Marbled Sugar Cookies
  • White Chocolate and Green Tea Brownies
  • Chocolate and Vanilla Waffles
  • Psychedelic Rainbow Cheesecake Brownies
  • Marbled Rum Cake
  • Neapolitan Cheesecake Brownies
A slice of marbled pound cake on a plate, with the rest of the cake on a cutting board next to it along with a mug of tea.
Print Pin
5 from 1 vote

Marble Cream Cheese Pound Cake

This beautiful marbled pound cake has a velvety crumb and is practically fool proof. It has the addition of a little bit of baking powder (something that traditionally not included in pound cake) to help ensure it’s not too dense and is just the right consistency and texture. Be sure to just swirl the batter only once or twice. If you over mix the batter, you run the risk of blending them together too much.
Course coffee time, Dessert
Cuisine American
Keyword cake, chocolate, marbled, swirl, vanilla
Servings 8
Calories 1811kcal
Author Irvin

Ingredients

Cake batter

  • 14 tablespoons unsalted butter 2 1/4 sticks or 200 g
  • 3 ounces cream cheese 85 g
  • 3/4 teaspoon kosher salt
  • 1/2 teaspoon baking powder
  • 1 1/2 cups granulated sugar 300 g
  • 5 large eggs at room temperature (see note below)
  • 2 teaspoon vanilla extract
  • 1 1/2 cups all-purpose flour 210 g

Chocolate mix-in

  • 3 tablespoons Dutch-processed cocoa sifted if clumped together
  • 1/2 teaspoon instant coffee or espresso optional but recommended
  • 1 teaspoon vanilla extract

Instructions

  • Preheat oven to 325°F. Lightly grease a 9 x 5-inch loaf pan with cooking oil spray.
    Cut the butter and cream cheese into 1/2-inch cubes. If you're using a stand mixer, the ingredients can be directly from the refrigerator cold. But if you're using a hand mixer, it’s better to use room temperature ingredients.
    Place the ingredients in the bowl of a stand mixer fitted with a paddle attachment and mix on low speed until they start to combine, which should take 1 to 2 minutes. Then, increase the speed to medium and continue mixing until the ingredients have a creamy appearance, are well blended, and cling to the sides of the bowl, which should take another 2 to 3 minutes.
    Left image is cubed butter and cream cheese in mixing bowl. Right image is two ingredients creamed together with the paddle attachment of a stand mixer in the bowl.
  • Add the salt and baking powder and mix for an additional 30 seconds until they are fully incorporated. Scrape down the sides and bottom of the bowl using a silicone spatula.
    With the mixer still on low speed, gradually add the sugar, pouring it into the bowl in a steady stream to incorporate it slowly into the butter. Continue adding all the sugar until it is well combined and appears fluffy. Once again, scrape down the sides and bottom of the bowl with a spatula.
    Left image is sugar being slowly poured into the mixing bowl of a stand mixer with butter and cream cheese well blended. Right image is the sugar mixed into the butter and cream cheese to the point where it is clinging to the side of the bowl and is fluffy and light colored.
  • In a separate glass measuring cup with a spout, whisk together the eggs and vanilla. Slowly drizzle this egg mixture into the bowl with the mixer on low speed, occasionally pausing to make sure egg is fully absorbed before adding more. The goal is to maintain a smooth batter, but don't worry if it appears slightly broken and grainy in the end – this is normal.
    Scrape down the sides and bottom of the bowl again and, with the mixer on low speed, gradually add the flour, mixing until the flour is fully incorporated, and the batter becomes smooth.
    Left image is egg drizzled into the bowl of creamed sugar, butter and cream cheese. Right image is flour being added to the cake batter.
  • Do a couple more scrapes of the bottom and side with a spatula and another mix to make sure everything is well blended. Then take half the batter, about 550 grams if you have a scale, and move it to a separate bowl. Add the cocoa, instant coffee (if using), and vanilla to the remaining batter in the mixer bowl and mix until incorporated.
    Left image is the cake batter divided into one bowl, and the remaining batter still in the mixing bowl with cocoa powder, vanilla and instant coffee. Right image is the chocolate batter mixed in the bowl, with the plain vanilla batter in another bowl next to it.
  • Spoon alternating batches of the plain and chocolate batter into the prepared pan. Then, using a chopstick or butter knife, gently swirl the batters together, using large “figure eight” motions. Don’t over swirl, but mix it enough to create a pretty pattern.
    Left image is chocolate and vanilla pound cake batter alternating in a loaf pan. Right image is a hand swirling the batter together with a chopstick.
  • Bake for 85 to 90 minutes, or until the top has cracked open, the center looks dry (not wet) and a skewer inserted comes out clean. If you have an instant read thermometer, the internal center temperature should be somewhere between 200° and 205°F.
    Let cool for 5 minutes in the pan, then invert onto a wire rack and flip right side up. Let the pound cake cool completely before serving.
    Left image is unbaked marbled pound cake in a loaf pan. Right image is the pound cake baked in the pan, ready to be unmolded on a cooling rack.

Notes

If you forgot the step of bringing your eggs to room temperature, don’t worry. You can quickly warm them up by placing them in a bowl of hot water straight from the tap. Allow the eggs to sit in the hot water for approximately 10 minutes, which should be about the same time it takes to reach the step where you need to add them to the batter. This will bring the eggs to room temperature.

Nutrition

Calories: 1811kcal | Carbohydrates: 62.9g | Protein: 21g | Fat: 166.4g | Saturated Fat: 103g | Cholesterol: 650mg | Sodium: 1447mg | Potassium: 1822mg | Fiber: 11.8g | Sugar: 24.9g | Calcium: 427mg | Iron: 9mg

Pin it for later!

Top image is a slice of marbled pound cake on a plate. Bottom image is a slice of marbled pound cake, with the rest of the cake on a cutting board next to it along with a mug of tea.

Filed Under: cake, marbled swirled layered Tagged With: cake, chocolate, marbled, pound cake, swirled, vanilla

Reader Interactions

Comments

  1. Simone Ashley says

    October 22, 2025 at 2:55 am

    That marbled pound cake looks amazing! The chocolate and Geometry Dash vanilla swirls make it so pretty and delicious-looking.

    Reply
  2. cayroshop says

    October 30, 2025 at 2:20 am

    As you have Listed some brands above but i have one brand in Mind from where i usually Buy my products Named as Cayroshop they provide all brands products atleast 4–50% Cheaper than others with premium Quality Cayroshop is the Best online electronic store in New Delhi Ncr

    https://www.cayroshop.com/

    Reply
5 from 1 vote

Leave a Reply Cancel reply

Your email address will not be published. Required fields are marked *

Recipe Rating


This site uses Akismet to reduce spam. Learn how your comment data is processed.

Primary Sidebar

Follow Me On

Twitter-Link-to-Eat-the=Love Facebook-Link-to-Eat-the-Love Pinterest-Link-Eat-The-Love Instagram-Link-Eat-The-Love RSS-Feed-Link-Eat-The-Love
on Mastodon

Available Now: Marbled, Swirled and Layered
Available Now: Marbled, Swirled and Layered Available Now: Marbled, Swirled and Layered Available Now: Marbled, Swirled and Layered

"Mr. Lin, a graphic designer in San Francisco who writes the food blog Eat the Love, takes risks in nearly every one of the 150 elaborate recipes in his book. He doesn’t just paint the lily; he bejewels and shellacs it, too."
–MELISSA CLARK for the New York Times

“My goodness, this cookbook! It’s filled to the brim with recipes for the most splendidly beautiful cakes, cookies, breads, and tarts I think I’ve ever seen. My eyes kept getting wider and wider as I turned every page—both the flavor combinations and the photos are out of this world. Irvin Lin has most definitely outdone himself. This book is a triumph!”
—REE DRUMMOND, New York Times best-selling author of The Pioneer Woman Cooks

“Irvin Lin gives home-baked treats a twist, ramping them up with a range of contemporary flavors that are sure to surprise and delight. From beer-battered brownies to smoky butterscotch taking a classic cake to the next level, I can’t wait to mix, stir, and bake my way through Marbled, Swirled, and Layered!”
—DAVID LEBOVITZ, author of My Paris Kitchen

Search

Subscribe via Email

The Writer, The Baker, The Recipe Maker

Hey there! Thanks for visiting my blog. I'm Irvin Lin, a critically acclaimed cookbook author, IACP-Award winning photographer, IACP-nominated blogger, award winning baker, award winning former graphic designer, storyteller, recipe developer, writer and average joe bon vivant. I currently reside in San Francisco a block from Dolores Park and right near Tartine Bakery, Bi Rite Market & Creamery, and Delfina.

Feel free to contact me by clicking on that picture of me up above or emailing me eatthelove {at} gmail {dot} com.

IACP Photography Contest Best in Show WinnerIACP Photography Contest Best in Show Winner

“Irvin Lin is the creative mind behind his Eat the Love food blog. Lin’s impressive photography skills support his training in graphic design on the site, and you would never believe that is food blogger is a self-taught baker.” - PBS Food

“We love Eat the Love because Irvin's beautiful sweets look as good as they taste — his art director's eye appreciates the ruby sparkle of a pile of pomegranate seeds against the matte canvas of chocolate ganache.” - Saveur.com, Sites We Love

Popular Posts

Brookie Recipe (brownie and cookie) with potato chips, pretzels and double chocolate chips. Photo and recipe by Irvin Lin of Eat the Love.

Brookie Recipe with Salty Sweet Snack Treats

Perfect Soft Boiled Egg. Recipe and Photo by Irvin Lin of Eat the Love. www.eatthelove.com

Perfect Soft Boiled Egg

Korean Fried Chicken Recipe. Photo and recipe by Irvin Lin of Eat the Love. www.eatthelove.com

Korean Fried Chicken Recipe – insanely easy, super addictive

Personal Posts

Mexican Chocolate Corn Coffee Cake by Irvin Lin of Eat the Love.

Mexican Chocolate Corn Coffee Cake (and how AJ and I get engaged)

Grape and Blueberry Pie by Irvin Lin of Eat the Love.

Grape and Blueberry Pie

Crispy Oven Roasted Potatoes by Irvin Lin of Eat the Love.

Crispy Oven-Roasted Potatoes (and remembering a childhood friend)

Marbled, Swirled, and Layered.

My cookbook MARBLED, SWIRLED, and LAYERED

Recent Travel & Events

San Francisco Meals on Wheels Star Chefs and Vintners Gala 2019

Photo Essay: Meals on Wheels Gala 2019, part 2

Meals on Wheels Gala 2019

Photo Essay: Meals on Wheels Gala 2019, part 1

More Travel & Events

Wordless Recipes

EatTheLove Wordless Recipes #1 How to make your own ice cream "magic" chocolate hard shell

WORDLESS RECIPE #1: How to Make Your Own Ice Cream “Magic” Chocolate Hard Shell

Eat the Love presents: WORDLESS RECIPES #2 Halloween Edition - Haunted Honey Caramel Popcorn

WORDLESS RECIPE #2 Halloween Edition – Haunted Honey Caramel Popcorn

Molten-Lava-Chocolate-Cake-Wordless-Recipes-Valentines-Day-Eat-The-Love-Irvin-Lin-cover

WORDLESS RECIPES #3 Valentine’s Day Edition – Molten Chocolate Lava Cake

Bluth's Original Frozen Banana Copycat Wordless Recipe by Irvin Lin of Eat the Love. www.eatthelove.com

Wordless Recipe #4: Arrested Development’s Bluth’s Original Frozen Banana “Copycat” Recipe

Disclaimer

This blog currently has a partnership with Amazon.com in their affiliate program, which gives me a small percentage of sales if you buy a product through a link on my blog. I only recommend products (usually cookbooks, but sometimes ingredients or equipment) that I use and love, not for any compensation unless otherwise noted in the blog post. If you are uncomfortable with this, feel free to go directly to Amazon.com and search for the book or item of your choice.

Copyright © 2010 to 2023. Eat the Love. All rights reserved. | Privacy Policy

Rate This Recipe

Your vote:


A rating is required
A name is required
An email is required

Recipe Ratings without Comment

Something went wrong. Please try again.