• Skip to primary navigation
  • Skip to main content
  • Skip to primary sidebar
  • My Cookbook: Marbled, Swirled, and Layered
  • Recipes
  • Travel & Events
  • About this Blog
  • Bio
  • FAQ
  • Work with Me

Eat The Love

Recipes, Photographs and Stories about Desserts, Baked Goods and Food in general, with a healthy dose of humor and happiness for the food obsessed

You are here: Home / pie / Fig, Blackberry and Goat Cheese Tart with Walnut Crust [Sponsored Post]

Published: July 30, 2021 3 Comments

Fig, Blackberry and Goat Cheese Tart with Walnut Crust [Sponsored Post]

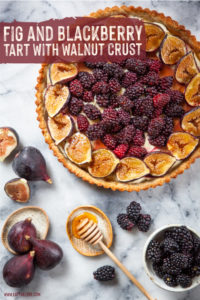
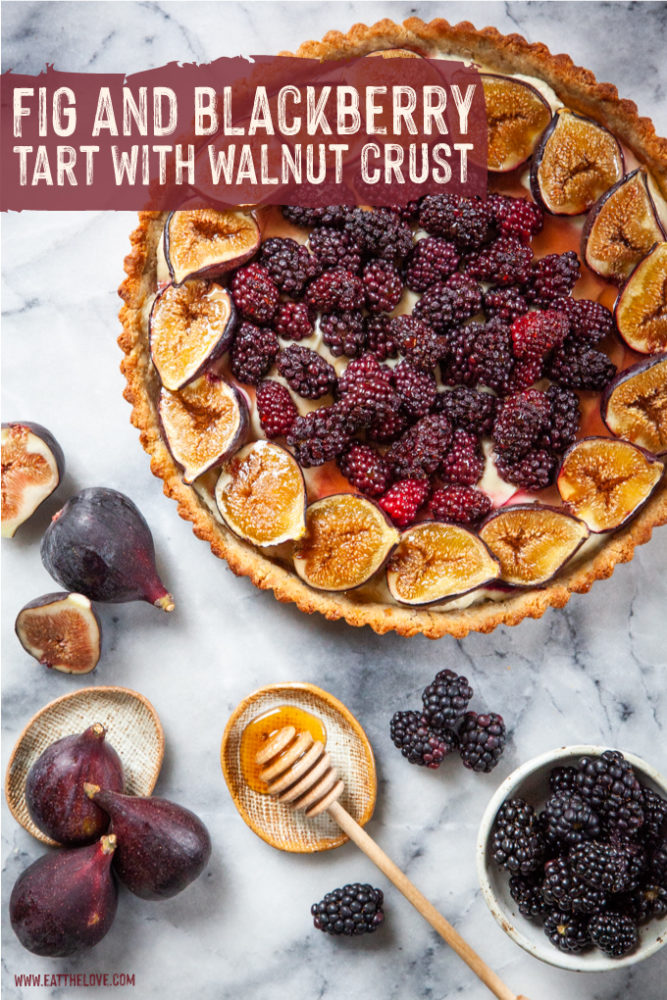
This quick, easy fig and blackberry tart has a honey goat cheese filling and a walnut shortbread crust, all of which can be made in an hour.
Jump to Recipe

A fig and blackberry tart on a marble surface, with fresh figs, blackberries and a honey dipper with some honey next to it.

This post was sponsored by California Grown. I was compensated for this post and developing this recipe. However, all opinions below are my own.

Fig season always comes and goes faster that I am ready for it. But when it arrives, I find myself gorging on fresh figs as much as possible. Some would say I’m a fig fiend! This is clearly evident by fig recipes I have here on my blog, including my fig focaccia, my fig financier, apple fig cobbler and fig and hazelnut scones. And though I will eat figs in my yogurt with homemade granola, in my salad, or all by themselves, I get super excited to make beautiful, luscious things out of them. My current obsession is this figs and blackberry tart with honey goat cheese and a walnut crust.

How to make a fig tart?
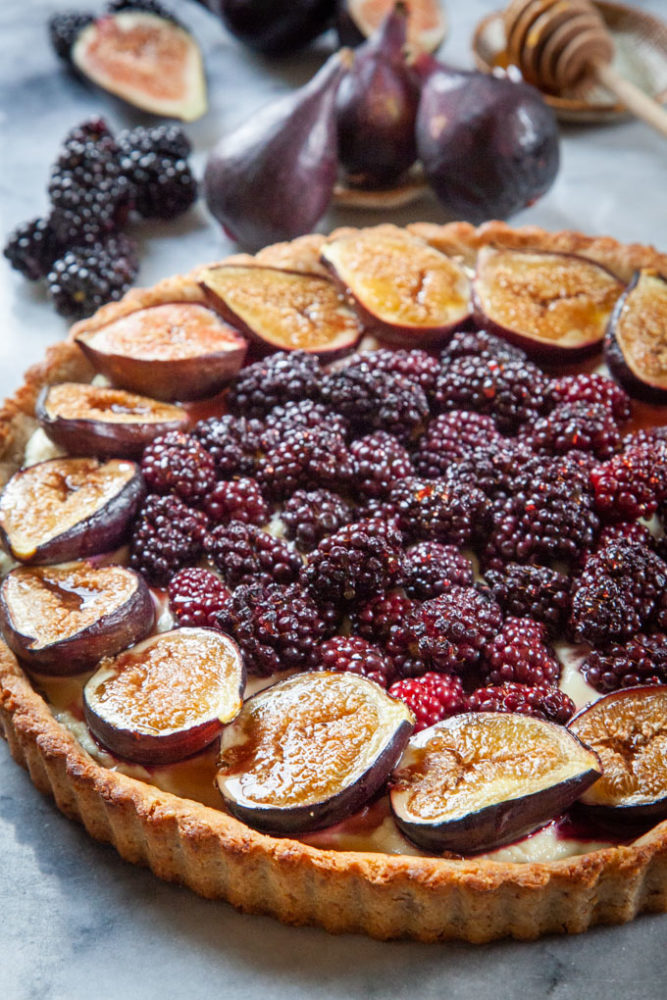
A fig and blackberry tart on a marble surface, with fresh figs, blackberries and a honey dipper with some honey next to it.

Like all tarts, you have to start by making the crust. I make a version of a shortbread crust in the food processor, which is super easy and fast. It also means I don’t have to worry about keep the crust cold, nor do I have to chill the dough. I can just make the crust in a food processor, press it into the tart pan, and bake away.
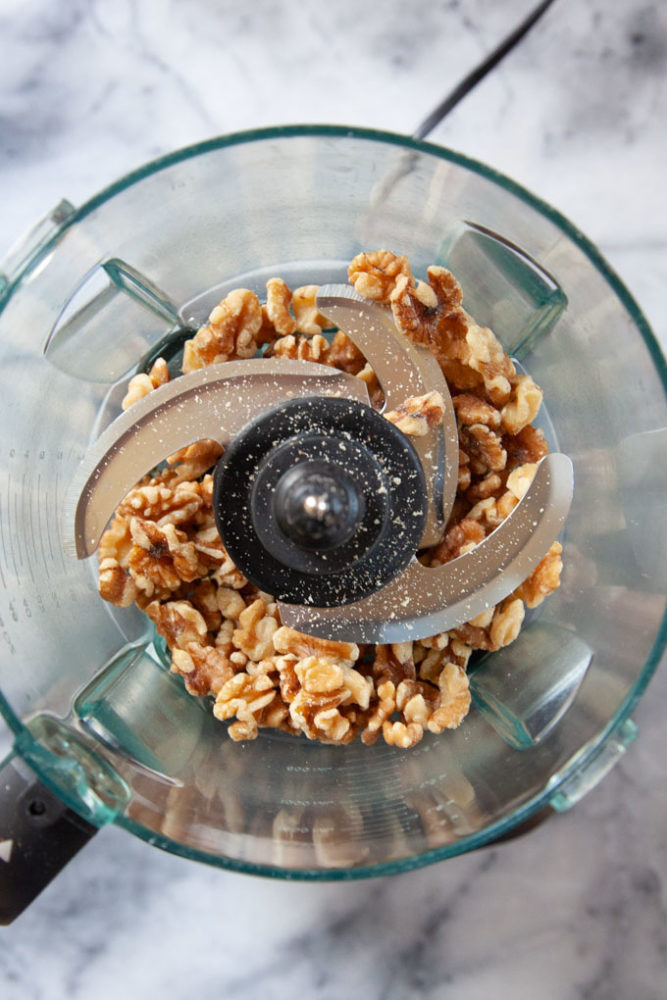
Walnut pieces in a food processor bowl.

The crust uses walnuts in it. Place the walnuts in the food processor, process until they are broken into crumbs, then add the flour, powdered sugar, granulated sugar, and salt. Pulse a few times to mix, then add in cold butter cubes. Pulse again, and then drizzle in an egg yolk mixed with water. Once the mixture starts to hold together like a dough, you just press it into the tart pan.

A hand placing some fresh blackberries in the center of the fig and blackberry tart.

Bake the crust first, then spread a simple filling made of goat cheese and honey into the tart shell. Press in cut figs and blackberries, then bake again. Drizzle honey on the warm tart and serve.

When are figs in season?

Dried figs are available all the time (just look for them where you buy other dried fruit). But fresh figs start to appear at grocery store in the early summertime into early Fall. California grows 98% of the commercially sold fresh figs here in the U.S. and they start popping up as early as mid-May, though it depends on the growing conditions. They become more common to find at the stores starting in July through November. You can find more details about figs and how they’re grown and when they are in season, as well as what California fruits and vegetables are in season and when over at the California Grown website.
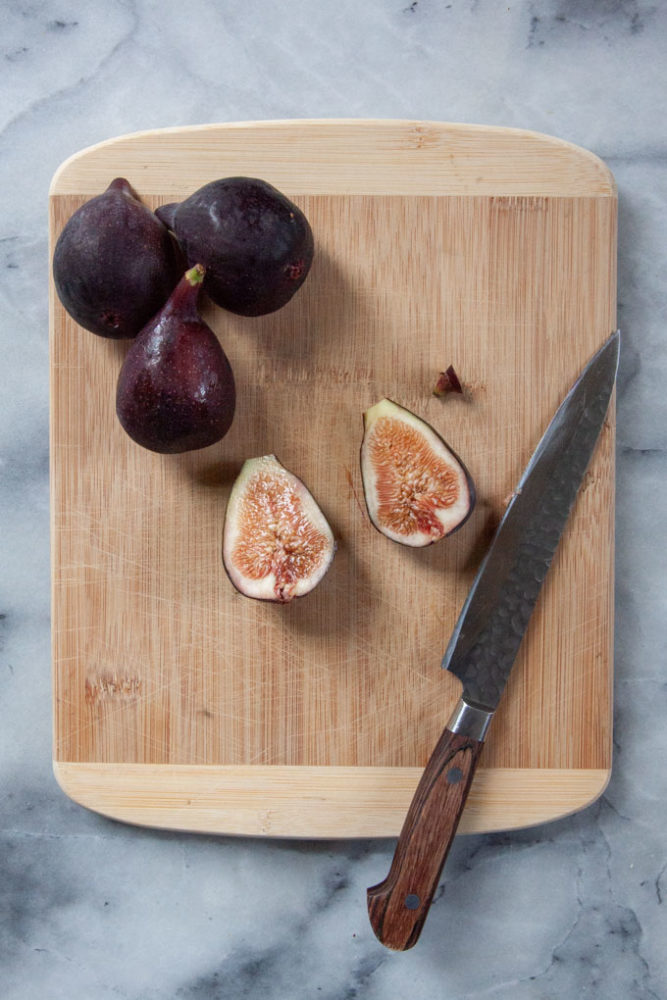
Fresh figs on a cutting board with one fig cut in half. A knife is next to the cut fig.

Can you use dried figs in place of the fresh figs?

I love dried figs, but they won’t work for this recipe. Instead, try swapping out another fresh fruit like sliced plums, pitted cherries, or ripe sliced pears instead of the figs. You can also use blueberries or raspberries in place of the blackberries if you wish.

What sort of figs work best in this recipe?

Fresh figs come in a number of varieties. I’ve used Mission figs in this tart, which is a fairly common variety. But you can use any type of fig that you like. The ones I find the most at my local stores include the Mission figs, the Brown Turkey fig and the Tiger Stripe fig.

Mission figs have a deep, almost meaty flavor, while Brown Turkey figs have a rich sweet, slightly nutty flavor, and Tiger Stripe figs have a striking green and yellow striped skin with a vibrant red inside with a sweet, vaguely berry flavor. Other fresh figs available include Kadota, Sierra, and Calmyrna figs. You can learn more about fresh figs and the different varieties at the California Fig website.
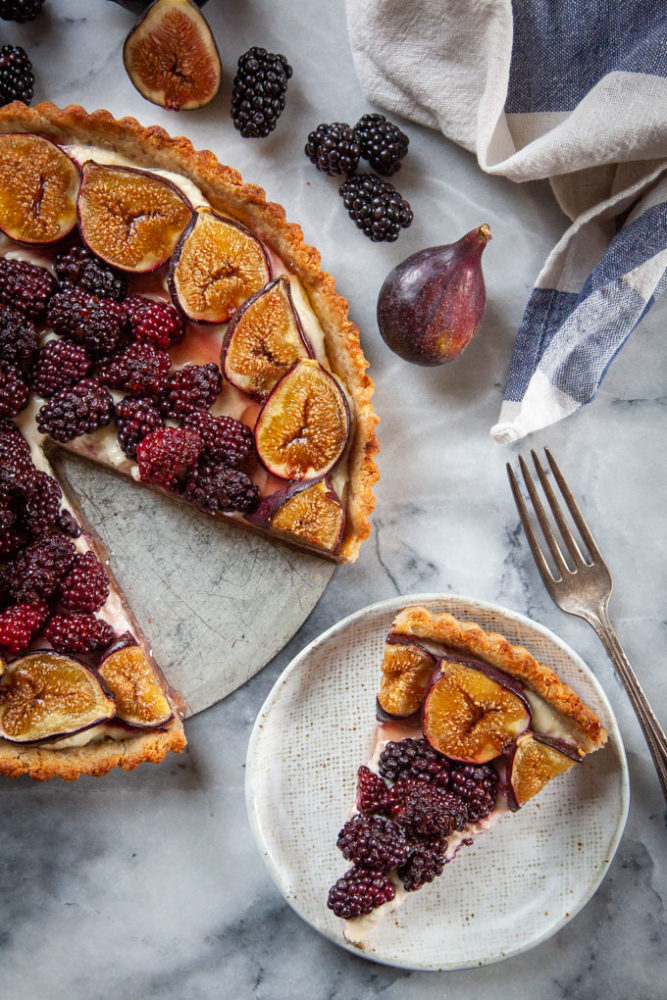
A slice of fig and blackberry tart on a plate, with the remaining tart next to it. Fresh figs, blackberries, a napkin and a fork are next to the plate and tart.

Can you make this ahead?

I don’t recommend making the entire tart ahead of time but you can make some of the components a day before you serve it. You can make the crust dough a day ahead. Just press it out in the tart pan, and then slide the entire pan into a large 2-gallon Ziploc bag, seal it and store it in the refrigerator. Remove from the bag and bake from the fridge as directed, adding a minute or two to accommodate for the cold temperature. 

You can also bake the crust ahead of time. Bake as directed, then store it at room temperature up to 24 hours. Store it in a large 2-gallon Ziploc bag or under a large cake dome. Then place it in the pre-heated oven for 5 minutes to warm and crisp it up again (no need to use parchment or pie weights, just pop it in the oven). Proceed with the recipe as directed.

How do you store leftovers?
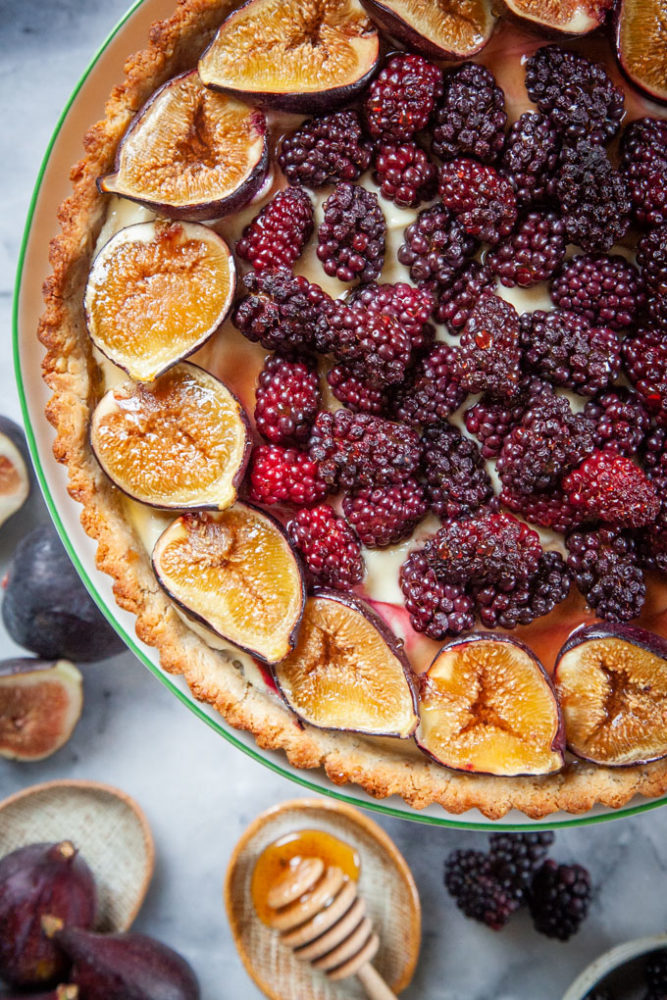
A fig and blackberry tart on a marble surface, with fresh figs, blackberries and a honey dipper with some honey next to it.

As with all baked goods, this tart is best enjoyed the day it’s made. But if you have leftovers, store it in an airtight container in the refrigerator for up to 2 days. Bring the leftovers to room temperature or warm it up in an oven or toaster oven at 300°F for 5 to 10 minutes to help take the chill off the tart and refresh it before eating.

If you like this fig and blackberry tart check out these out tarts and pies:

  • Strawberry Rhubarb Pie
  • Plum Galette
  • Meyer Lemon Shaker Tart and with Strawberry Rhubarb
  • Apple and Prunes Slab Pie
  • Classic Blueberry Pie
  • Mixed Berry Tart
  • Grape and Blueberry Pie
A fig and blackberry tart on a marble surface, with fresh figs, blackberries and a honey dipper with some honey next to it.
Print Pin
5 from 2 votes

Fig, Blackberry and Goat Cheese Tart with Walnut Crust

This easy to make fig and blackberry tart has a goat cheese and honey filling and crisp walnut shortbread crust. It comes together fast with the use of a food processor. Just make sure you use room temperature goat cheese. If the goat cheese is too cold it will be difficult incorporate the honey. Warm the goat cheese up by leaving it at room temperature for an hour, or just cut it into small pieces and microwave it at low power for 30 second burst until it has softened.
Course Dessert
Cuisine American
Keyword blackberries, fig, goat cheese, honey, walnuts
Prep Time 20 minutes minutes
Cook Time 37 minutes minutes
Servings 8
Calories 472kcal
Author Irvin

Ingredients

Walnut Crust

  • 1 cup walnut pieces 100 g
  • 2 cups all-purpose flour 280 g
  • 1/4 cup powdered sugar 30 g
  • 2 tablespoons white sugar
  • 1/2 teaspoon salt
  • 3/4 cup cold unsalted butter 1 1/2 sticks or 170 g
  • 1 large egg separated
  • 4 to 7 tablespoon cold water

Filling

  • 8 ounces plain soft goat cheese softened
  • 3 tablespoons honey
  • 8 to 10 fresh figs 1 pound or 455 g
  • 2 1/4 cups blackberries 9 ounces or 255 g

To finish

  • 1 to 2 tablespoons honey

Instructions

  • Preheat the oven to 425°F.
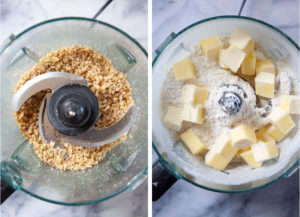
    Place the walnut pieces in a food processor and pulse the walnuts until they are broken down into crumbs. Add the flour, powdered sugar, white sugar, and salt to the processor bowl. Pulse a few times to combine. Cut the butter into 1/2-inch chunks and add them to the processor. Pulse again, until the butter is broken down. The whole mixture should be fairly uniform with tiny pebble sized pieces of walnuts and butter.
    Left image is walnuts broken into small bits in a food processor bowl. Right image is the rest of the crust ingredients, including cubes of butter, in the bowl of a food processor.
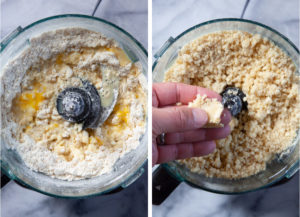
  • Separate the egg and set aside the egg white in a small bowl for later. Place the egg yolk in a small bowl and beat in 4 tablespoons of water. Drizzle the liquid into the processor bowl. Pulse until the mixture starts to clump together. Remove the lid of the processor and try to press some of the dough together. If it holds together, it’s done, but if the dough seems too crumbly and dry, add 1 tablespoon of water at a time, until it holds together.
    Left image is a food processor with crust ingredients and water in it. Right image is the crust processed and a hand pressing some of the crust together to form a dough.
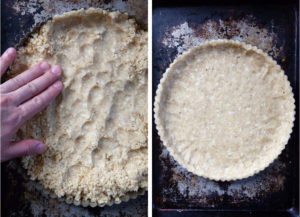
  • Carefully remove the blade from the processor. Dump the content of the processor bowl into the center of a 10-inch tart pan with a removable bottom. Press the dough into the bottom and sides of the pan. Continue to do this with all the dough, until the bottom and sides are evenly lined with the dough.
    Left image is a hand pressing the dough into the bottom of a tart pan. Right image is the tart pan with the crust pressed into the bottom and up the sides.
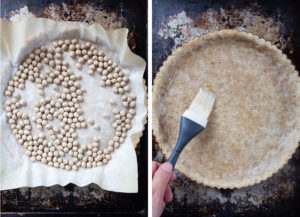
  • Place a piece of parchment paper over the top of the dough and fill with pie weights or dried beans. Place the pan on a rimmed baking sheet or pizza pan and bake in the oven for 12 minutes. While the crust is baking, beat the egg white with 1 tablespoon of water.
    Remove the pie weights by carefully lifting the parchment paper up and moving it with the weights inside to a heatproof bowl. Brush the egg white wash over the sides and bottom of the tart crust. This will help seal the crust and prevent it from becoming soggy. Move the pan back to the oven and bake an additional 5 to 7 minutes, or until the edges of the pan start to brown and the top of the dough looks dry. If the crust puffs up after baking, just prick it with a fork or knife to deflate.
    Left image is the crust covered with parchment paper and filled with pie weights. Right image is a hand brushing an egg white wash over the crust.
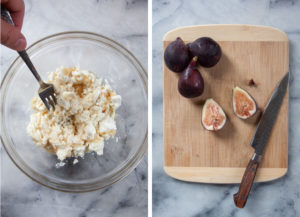
  • While the dough is baking, make the filling by combining the goat cheese with the honey. Trim the stems off the figs, then cut them in half lengthwise.
    Left image is a hand mixing honey into goat cheese. Right image is figs cut on a cutting board with a knife next to it.
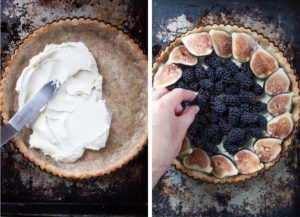
  • When the tart dough is done baking, spread the honey goat cheese over the still warm crust. Then place the fig halves around the edge of the tart, overlapping the fig stems over the body of the figs slightly. Sprinkle the blackberries over the center area of the tart. Place back in the oven for an additional 20 minutes or until the tart is fragrant and the fruit starts to look juicy.
    Let the tart cool on a wire rack for 15 minutes. Remove the tart from the pan and move to a serving plate. Drizzle an additional 1 to 2 tablespoons of honey over the tart and serve warm.
    Left image is a spatula spreading goat cheese into the crust. Right image is a hand adding blackberries to the center of the tart.

Nutrition

Calories: 472kcal

Filed Under: dessert, fruit, pie Tagged With: blackberries, figs, goat cheese, honey, tart, walnuts

Reader Interactions

Comments

  1. ashok says

    August 14, 2021 at 10:36 pm

    Thanks For Sharing this amazing recipe. My family loved it. I will be sharing this recipe with my friends. Hope the will like it.

    Reply
  2. BGW says

    August 18, 2021 at 2:50 am

    You rock with your writing!! Spectacular one for sure.

    Reply
  3. Alanna Taylor-Tobin says

    September 18, 2021 at 7:37 pm

    Could this be any more beautiful?? Totally swooning over these flavors.

    Reply
5 from 2 votes

Leave a Reply Cancel reply

Your email address will not be published. Required fields are marked *

Recipe Rating


This site uses Akismet to reduce spam. Learn how your comment data is processed.

Primary Sidebar

Follow Me On

Twitter-Link-to-Eat-the=Love Facebook-Link-to-Eat-the-Love Pinterest-Link-Eat-The-Love Instagram-Link-Eat-The-Love RSS-Feed-Link-Eat-The-Love
on Mastodon

Available Now: Marbled, Swirled and Layered
Available Now: Marbled, Swirled and Layered Available Now: Marbled, Swirled and Layered Available Now: Marbled, Swirled and Layered

"Mr. Lin, a graphic designer in San Francisco who writes the food blog Eat the Love, takes risks in nearly every one of the 150 elaborate recipes in his book. He doesn’t just paint the lily; he bejewels and shellacs it, too."
–MELISSA CLARK for the New York Times

“My goodness, this cookbook! It’s filled to the brim with recipes for the most splendidly beautiful cakes, cookies, breads, and tarts I think I’ve ever seen. My eyes kept getting wider and wider as I turned every page—both the flavor combinations and the photos are out of this world. Irvin Lin has most definitely outdone himself. This book is a triumph!”
—REE DRUMMOND, New York Times best-selling author of The Pioneer Woman Cooks

“Irvin Lin gives home-baked treats a twist, ramping them up with a range of contemporary flavors that are sure to surprise and delight. From beer-battered brownies to smoky butterscotch taking a classic cake to the next level, I can’t wait to mix, stir, and bake my way through Marbled, Swirled, and Layered!”
—DAVID LEBOVITZ, author of My Paris Kitchen

Search

Subscribe via Email

The Writer, The Baker, The Recipe Maker

Hey there! Thanks for visiting my blog. I'm Irvin Lin, a critically acclaimed cookbook author, IACP-Award winning photographer, IACP-nominated blogger, award winning baker, award winning former graphic designer, storyteller, recipe developer, writer and average joe bon vivant. I currently reside in San Francisco a block from Dolores Park and right near Tartine Bakery, Bi Rite Market & Creamery, and Delfina.

Feel free to contact me by clicking on that picture of me up above or emailing me eatthelove {at} gmail {dot} com.

IACP Photography Contest Best in Show WinnerIACP Photography Contest Best in Show Winner

“Irvin Lin is the creative mind behind his Eat the Love food blog. Lin’s impressive photography skills support his training in graphic design on the site, and you would never believe that is food blogger is a self-taught baker.” - PBS Food

“We love Eat the Love because Irvin's beautiful sweets look as good as they taste — his art director's eye appreciates the ruby sparkle of a pile of pomegranate seeds against the matte canvas of chocolate ganache.” - Saveur.com, Sites We Love

Popular Posts

Brookie Recipe (brownie and cookie) with potato chips, pretzels and double chocolate chips. Photo and recipe by Irvin Lin of Eat the Love.

Brookie Recipe with Salty Sweet Snack Treats

Perfect Soft Boiled Egg. Recipe and Photo by Irvin Lin of Eat the Love. www.eatthelove.com

Perfect Soft Boiled Egg

Korean Fried Chicken Recipe. Photo and recipe by Irvin Lin of Eat the Love. www.eatthelove.com

Korean Fried Chicken Recipe – insanely easy, super addictive

Personal Posts

Mexican Chocolate Corn Coffee Cake by Irvin Lin of Eat the Love.

Mexican Chocolate Corn Coffee Cake (and how AJ and I get engaged)

Grape and Blueberry Pie by Irvin Lin of Eat the Love.

Grape and Blueberry Pie

Crispy Oven Roasted Potatoes by Irvin Lin of Eat the Love.

Crispy Oven-Roasted Potatoes (and remembering a childhood friend)

Marbled, Swirled, and Layered.

My cookbook MARBLED, SWIRLED, and LAYERED

Recent Travel & Events

San Francisco Meals on Wheels Star Chefs and Vintners Gala 2019

Photo Essay: Meals on Wheels Gala 2019, part 2

Meals on Wheels Gala 2019

Photo Essay: Meals on Wheels Gala 2019, part 1

More Travel & Events

Wordless Recipes

EatTheLove Wordless Recipes #1 How to make your own ice cream "magic" chocolate hard shell

WORDLESS RECIPE #1: How to Make Your Own Ice Cream “Magic” Chocolate Hard Shell

Eat the Love presents: WORDLESS RECIPES #2 Halloween Edition - Haunted Honey Caramel Popcorn

WORDLESS RECIPE #2 Halloween Edition – Haunted Honey Caramel Popcorn

Molten-Lava-Chocolate-Cake-Wordless-Recipes-Valentines-Day-Eat-The-Love-Irvin-Lin-cover

WORDLESS RECIPES #3 Valentine’s Day Edition – Molten Chocolate Lava Cake

Bluth's Original Frozen Banana Copycat Wordless Recipe by Irvin Lin of Eat the Love. www.eatthelove.com

Wordless Recipe #4: Arrested Development’s Bluth’s Original Frozen Banana “Copycat” Recipe

Disclaimer

This blog currently has a partnership with Amazon.com in their affiliate program, which gives me a small percentage of sales if you buy a product through a link on my blog. I only recommend products (usually cookbooks, but sometimes ingredients or equipment) that I use and love, not for any compensation unless otherwise noted in the blog post. If you are uncomfortable with this, feel free to go directly to Amazon.com and search for the book or item of your choice.

Copyright © 2010 to 2023. Eat the Love. All rights reserved. | Privacy Policy

Rate This Recipe

Your vote:


A rating is required
A name is required
An email is required

Recipe Ratings without Comment

Something went wrong. Please try again.