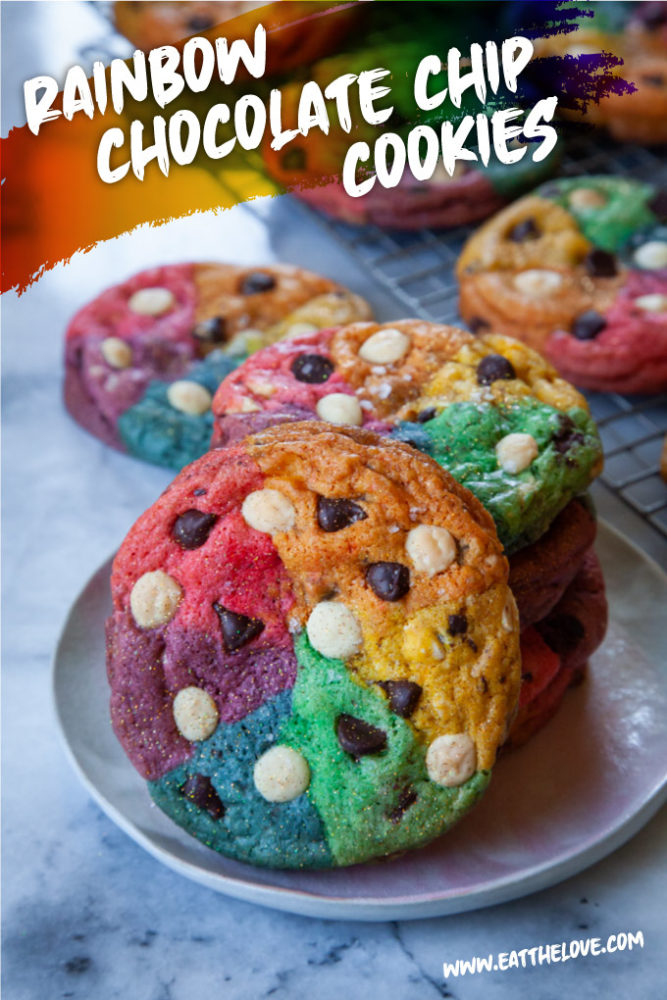
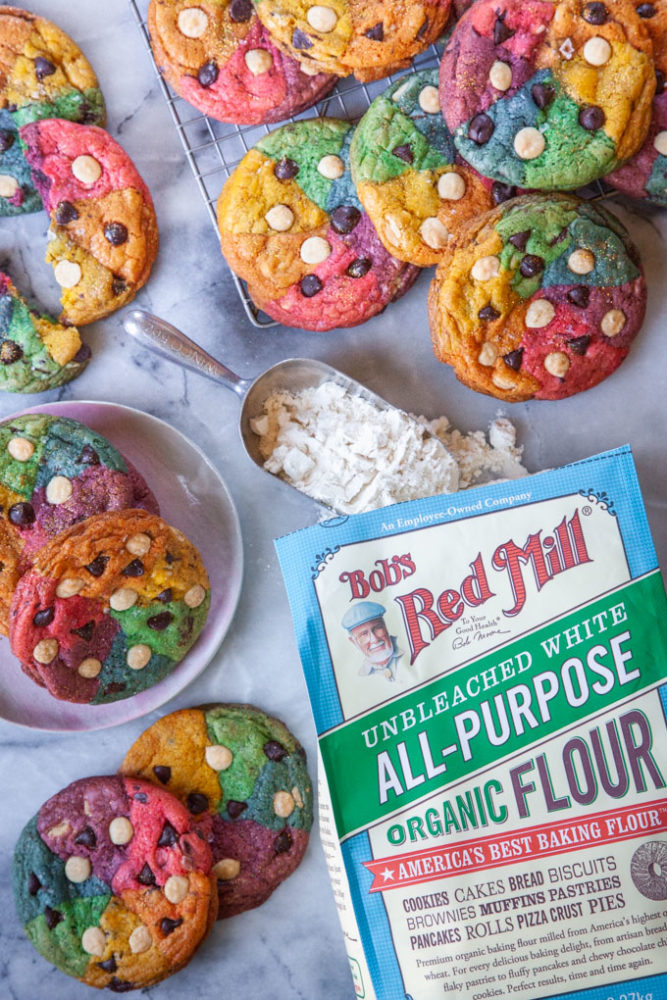
These fabulous and fun rainbow chocolate chip cookies are a showstopper and look difficult to make, but they are easier than you think!
This post is brought to you by Bob’s Red Mill for gay pride month. I was compensated for this post and developing this recipe. However, all opinions are my own.
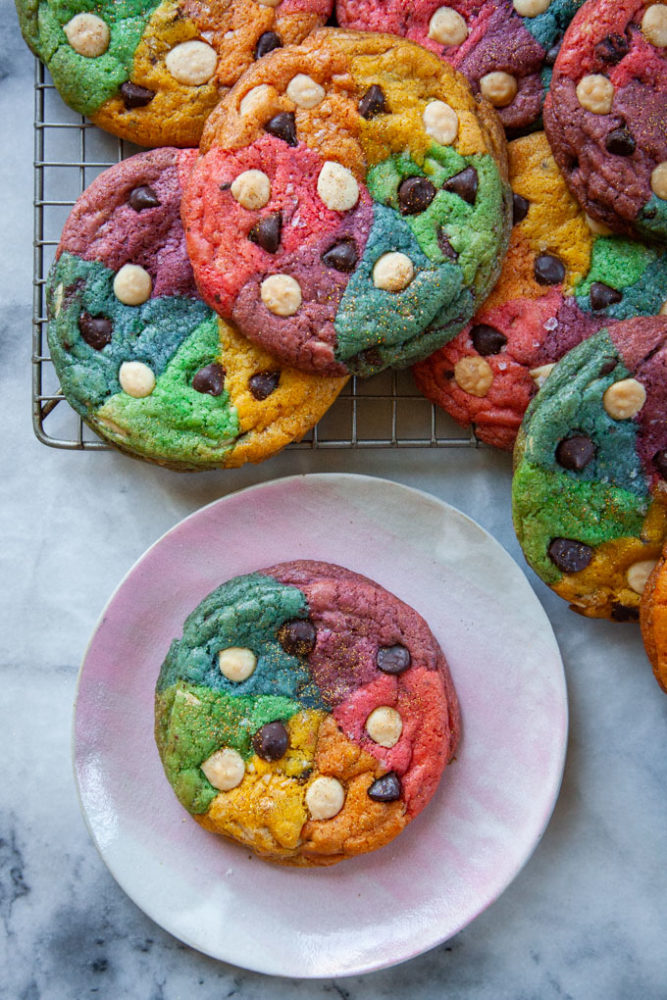
There’s something magical about rainbows, whether it’s a naturally occurring atmospheric phenomenon, the rainbow pride t-shirts worn in the month of June, or rainbows in edible baked goods. And though I wrote a whole book on marbled, swirled and layered desserts, I didn’t include a single rainbow dessert in there. I have rectified this glaring omission by presenting to you this rainbow chocolate chip cookie! And though it looks difficult to make, if you can make my bakery-style chocolate chip cookie or my mint chocolate chip cookie and you know how to slice a pie, you can make these cookies without a problem!
How do you make rainbow chocolate chip cookies?
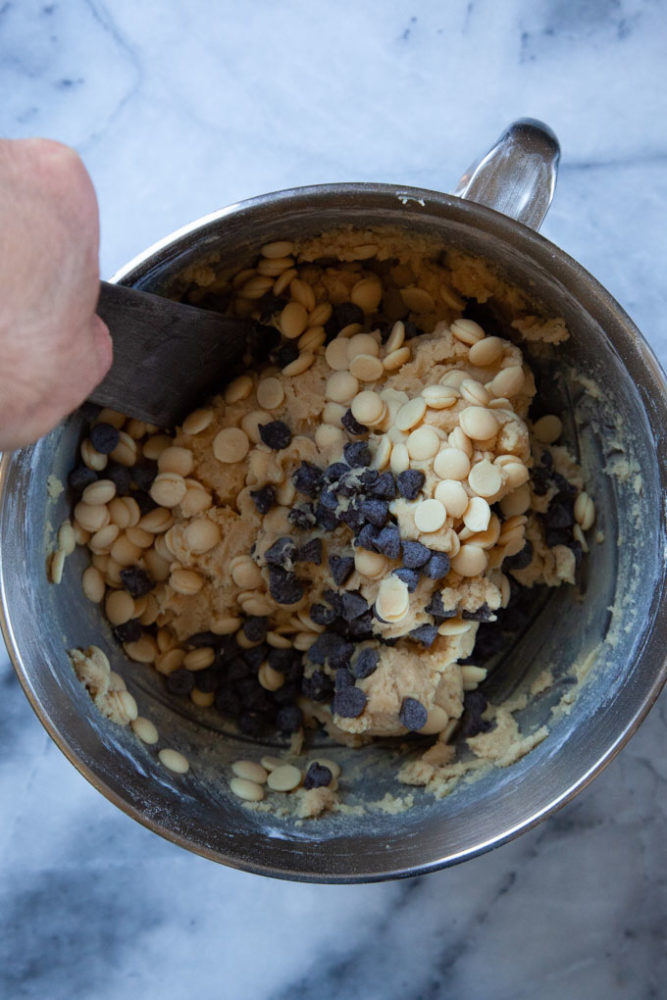
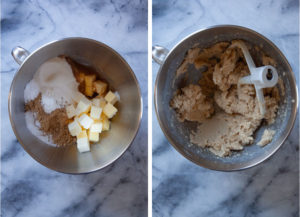
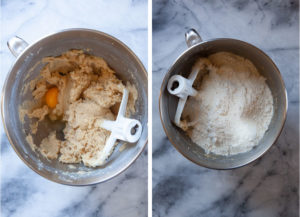
Making rainbow chocolate chip cookies starts out like making any other chocolate chip cookie. Cream butter, sugar, vanilla, baking powder, baking soda and salt together. Add the eggs, one at a time, then add the flour. Finally, stir in the chocolate chips.
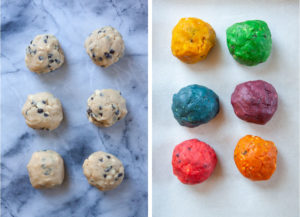
But here’s where the magic starts! Divide the dough into 6 different equal portions. Mix in liquid food coloring so you have 6 different colors. Wrap the dough and chill it for at least 2 hours or overnight. Chilling the dough will make it easier to work with the dough because you’ll be manipulating it a lot to form the cookies. Cold dough is easier to work with.
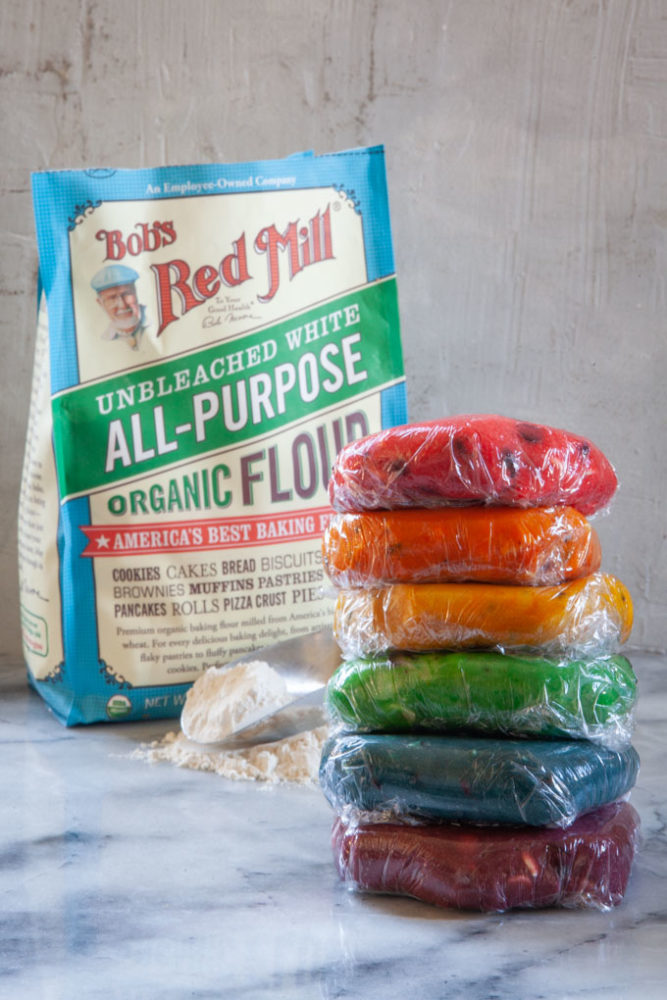
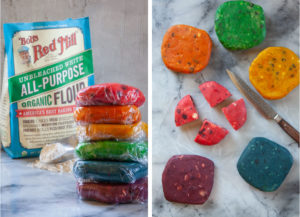
Once chilled, divide each batch of dough into 4 quarters. Then shape each quarter into a 2-inch wide disk, about 1-inch thick. Repeat this with all the dough colors. You should have 24 disks total of various colors.
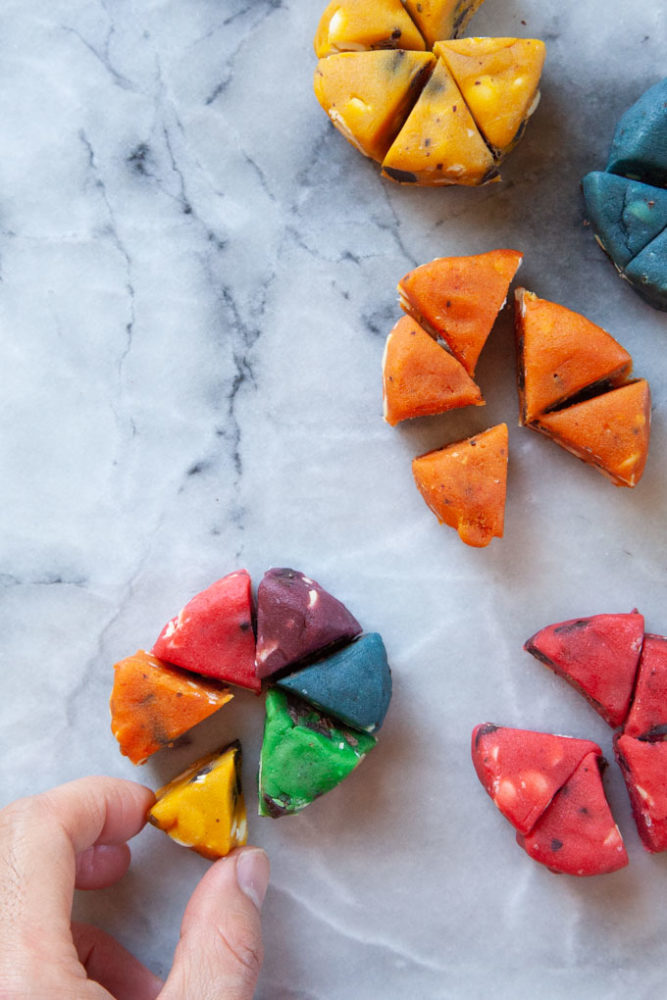
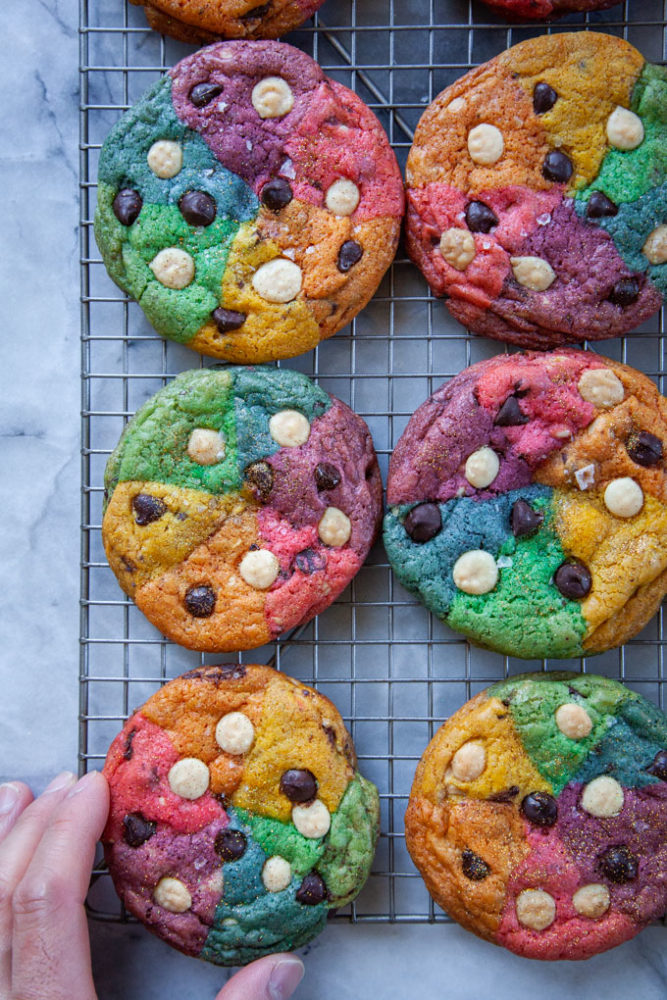
Divide one disk of each color into 6 even “pie” pieces. Then reassemble the pieces to form a new disk that has one color of each dough. Squish together and you have a rainbow cookie! Repeat and bake the cookies.
If you are still confused as to how to form the cookie, you can watch this short video!
How do you get the cookies to look so professional and pretty?
Rainbow cookies are pretty awesome looking all by themselves, but here’s a few tips and tricks I use to take them to the next level.
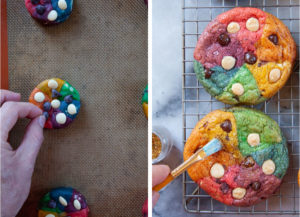
- I reserve some chocolate chips, about 2/3 cup total, and then place the chips right on top AFTER I form the cookies. This will highlight the chocolate.
- I sprinkle the cookies with a little bit of flaky sea salt, like Maldon, to give the cookies a bit of salty crunch and pop of saltiness.
- I will take the cookies out of the oven and if they are slightly misshapen, I’ll take a spatula and just tap the sides a bit to form them back into a perfect circle. You only have about a minute to do this, while the cookie is still hot and soft from the oven, so do this immediately if you need to.
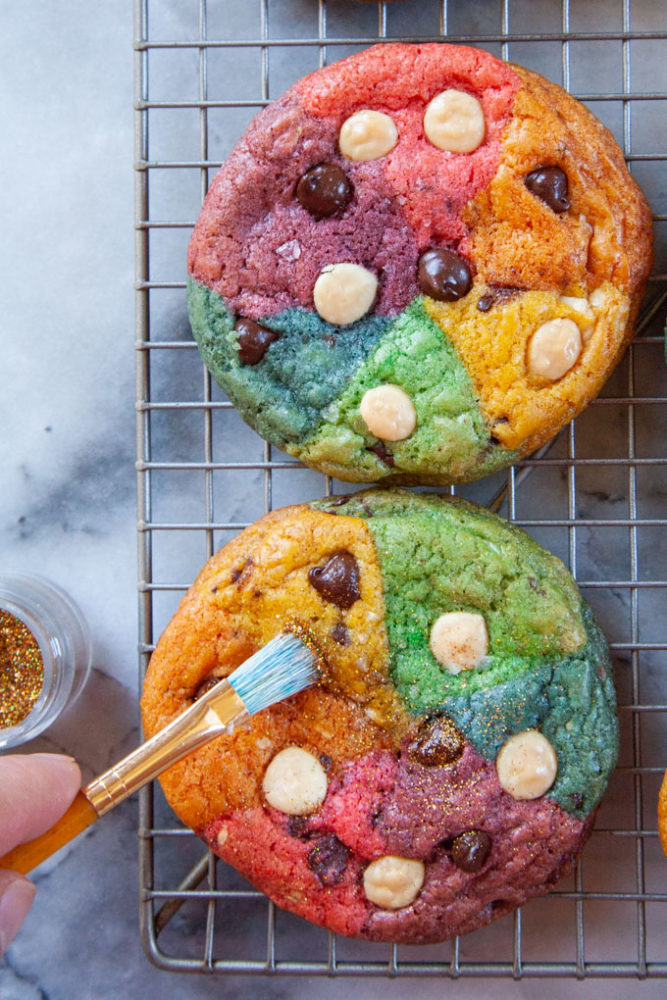
- I brush the final cooled cookie with a little bit of edible glitter. This is totally optional but if you’re extra like me, it gives the cookie that bit of fabulousness!
What is edible glitter?
Edible glitter is exactly what it sounds like. Glitter that is safe to eat. Do not use normal glitter, it is not safe to eat. You must source edible glitter specifically. Edible glitter comes in different forms and names. The most common is luster dust, which is a very fine powder that gives a shimmer but doesn’t have discernible particles. Large particle edible glitter goes by different names like sparkle dust, diamond dust, jewel dust or disco dust. Disco is the biggest “blingiest” dust out there. Use it sparingly!
To use the edible glitter, just dip a small clean brush with soft bristles into the dust and then brush it over the cookie. Make sure to a brush that is specifically reserved for food, don’t use a brush that you’ve been using for your makeup or for your painting projects!
When purchasing decorative edible glitter, always check to make sure it’s edible and food grade. The phrase non-toxic does not always mean that the item is safe for consumption. Edible glitter and dust will state clearly on the package that it is edible. You can find edible glitter online, at cake decorating stores, hobby stores or at well stocked grocery stores.
You can also skip the edible glitter if you wish. It’s not necessary for this cookie to look amazing! It just adds that extra touch of bling.
What sort of food coloring should I use?
I used artificial liquid food coloring, the kind you can find at the grocery store in the spice section, to make these cookies. If you use professional grade food coloring gel or paste, you will want to use a lot less of it as it’s much more concentrated in pigment. Add a toothpick or drop of the professional grade food coloring and then add more if necessary. It’s better to add a small amount at first, as you can always add more but you can’t it take away once added.
For standard liquid food coloring, this is the amount I used for each dough:
- Yellow: 1/4 teaspoon liquid yellow food coloring
- Green: 1/4 teaspoon liquid green food coloring
- Blue: 3/8 teaspoon liquid blue food coloring
- Purple: 1/4 teaspoon liquid red food coloring + 1/8 teaspoon liquid blue food coloring
- Red: 1/4 teaspoon liquid red food coloring
- Orange: 1/4 teaspoon liquid yellow food coloring + 4 drops red food coloring
I don’t recommend using natural-based food coloring for these cookies. I have found that natural-based food colorings work best in frostings, non-baked/non-heated items or food that is cooked quickly (like natural dyed homemade pasta). But once you bake something in the oven, natural color dyes fade to brown. If you do try this recipe with natural-based food colorings and they work for you, please leave a comment! I’d love to know which one works for you.
What chocolate chips should I use?

I use a mix of white chocolate chips and semi-sweet chocolate chips for these cookies. But these cookies are adaptable for whatever type of chocolate chip you like. Though I normally opt for chopped chocolate chips in cookies, for these cookies, I want the chocolate to hold its shape more, as the color of the dough is so important. I recommend chips over chopped chocolate for these particular cookies, purely for aesthetic reasons.
How do I store these cookies and how long will these cookies last?
I recommend storing these cookies in an airtight container or in a heavy-duty resealable bag at room temperature. They should last up to 3 days.
If you want to store them longer, freeze the cookies for up to 2 months. Let them thaw on the counter for about 2 hours to bring them back to room temperature before serving.
Can I make the cookie dough ahead of time?
Yes! This cookie dough can be made up to 3 days (72 hours) ahead of time and stored the fridge. Just make sure to tightly wrap each dough in plastic wrap. I recommend dyeing the dough the different colors first, instead of making the dough and storing it as a whole. Cold chilled dough is firm and hard, which makes mixing the food coloring into the dough difficult. If you must chill the dough before dyeing it, let the dough come to room temperature (about 2 hours on your counter), then mixing the dough in a stand mixer to soften it a bit before adding the food coloring to blend in.
You can also make the cookie dough ahead of time and freeze it. I assemble and make the multi-colored disks and then freeze them, without touching, on a rimmed baking sheet. Once the disks are frozen solid, about 2 hours, I move them to a heavy-duty resealable bag to store long-term. Frozen cookie dough will last up to 3 months in the freezer. You can bake the cookies directly from the freezer by just baking them in a fully pre-heated oven as per the instructions. Add an additional minute or two to the bake time to accommodate the cold dough.
More Cookie Recipes
If you like this rainbow chocolate chip cookie, check out these other great chocolate chip cookies recipes that I have on the blog. All of them would be amazing with Bob’s Red Mill all-purpose organic flour.
- Sourdough Chocolate Chip Cookies
- Crispy Chocolate Chip Cookies
- Butterscotch Cookies with Triple Chips
- Reverse Chocolate Chip Cookies (pan-banging style)
- Chewy (not cakey) Pumpkin Chocolate Chip Cookies

Rainbow Chocolate Chip Cookies
Ingredients
- 1 1/4 cups unsalted butter 255 g or 2 1/2 sticks
- 1 3/4 cups white sugar 350 g
- 1/2 cup packed light brown sugar 110 g
- 1 tablespoon vanilla extract
- 1 1/2 teaspoon baking powder
- 1 1/4 teaspoon baking soda
- 1 teaspoon kosher salt
- 2 large eggs
- 3 1/2 cups Bob’s Red Mill all-purpose organic flour 490 g
- 1 cup semi-sweet chocolate chips 185 g
- 1 cup white chocolate chips 185 g
- Liquid food coloring
To finish
- 1/3 cup semi-sweet chocolate chips. 75 g
- 1/3 cup white chocolate chips. 75 g
- Flaky sea salt
- Edible glitter optional
Instructions
- Place the butter, both sugars, vanilla extract, baking powder, baking soda and salt in the bowl of stand mixer fitted with the paddle attachment. Mix the ingredients together on medium speed until they are creamy and cling to the side of the bowl.

- Add the eggs, one at a time, waiting until the first egg is incorporated before adding the second one. Be sure to scrape down the sides of the bowl before adding each egg. The batter will look “broken” but don’t worry. This is normal.Add the flour and slowly mix it. I like to “pulse” the mixer on and off quickly, until the bulk of the flour has been absorbed in the dough. If you turn the mixer just to on, flour will go everywhere. Just slowly mix it in. Once most of it is absorbed, you can turn the mixer on to slow to incorporate it fully.
- Now add both chocolate chips and mix in slowly. You can do this by hand if you want.
- Now divide the dough into 6 even parts. If you have a scale, this is roughly 285 grams of dough. Place one part of the dough in the mixer and add 1/4 teaspoon of the yellow liquid food coloring. Mix until evenly colored. Remove the dough, pat it into a disk that is 1-inch thick, and wrap in plastic wrap. Place another piece of dough and add 1/4 teaspoon of green liquid food coloring and mix until evenly colored. There’s no need to clean the bowl or paddle at this point.Remove the dough, wrap it. Now wipe out the bowl and the paddle with a damp paper towel. You don’t need to clean it, just remove as much as you can with the paper towel. A little green dough is fine. Repeat the process with another dough portion and 3/8 teaspoon of blue food coloring. Remove and wrap the dough.Don’t bother cleaning the bowl or paddle, just place a fresh dough portion in the bowl and add 1/4 teaspoon red food coloring and 1/8 teaspoon blue food color. Mix until you have a uniform purple color. Remove and wrap in plastic wrap.Wipe out the bowl and the paddle attachment with a new damp paper towel. Again, no need to clean it completely. Just get most of it out. Then place a fresh dough portion in the bowl and add 1/4 teaspoon red food coloring. Mix until uniform, remove and wrap in plastic wrap. Place the last dough to the bowl without cleaning it out and add 1/4 teaspoon yellow food coloring and 4 drops of red food coloring. Mix until an even orange color, remove and wrap with plastic wrap.If you go in the order of yellow, green, blue, purple, red, orange, you will only need to wipe out the bowl and paddle between the green and blue dough and the purple and red dough.
- Place all the wrapped cookie dough in the refrigerator and let it chill for 2 hours or overnight, up to 3 days if you want.Once the cookie dough is chilled, preheat the oven to 350°F. Line 4 rimmed baking sheets with parchment paper or silicon baking pads.Divide each color dough into 4 equal pieces. If you have a scale, that about 71 grams each. Then take each piece and form a disk in your hands, about 2-inch wide by 1-inch thick.
- Take one disk of each color and cut the disk into 6 pieces. Do this by first cutting it in half. Then turning it 33° and cutting across the disk. Then turn the disk another 33° and cutting it again across the disk. You should have 6 even pie pieces. Take a piece from each color and assemble it together into a new disk. Press them together with your hands, making sure to not smear each individual color too much. You should have another 2-inch wide disk that is 1-inch thick made of 6 different colors.
- Place the disk on the baking sheet and repeat with the remaining 5 pieces, making 6 new cookies with multi-colors, placed evenly apart from each other by about 2 inches. Take some of the reserve finishing chocolate and press it all over on top. It will look crowded on top of the cookie but put as much chocolate as you can on there. The cookies spread a lot. Sprinkle the top of the cookies with some sea salt and then bake for 14 to 16 minutes or until the edges of the cookie start to turn light brown.While the first batch of cookies is baking, assemble the second batch of cookies in the same manner as above. Repeat until you’ve assembled and baked all the cookie dough.Let the cookies rest on the baking sheet for 5 minutes before moving them to a wire cooling rack. Cool completely. If you are using the edible glitter, dip a clean brush (one you only use for food decoration) into the edible glitter and lightly brush the glitter over the cookie. Then serve!


Martinez says
My youngest son loves rainbows and was very excited to have rainbow chocolate chip cookies. The recipe came together well, just took a little extra time to cut and assemble, but well worth the effort. Also, these cookies are gigantic! I’ll have to keep chocolate chips aside to place on the dough prior to baking in the future. Thanks for the awesome recipe!
GBW says
It looks absolutely amazing.
Carlo's Bakery says
The RAINBOW CHOCOLATE CHIP COOKIES look delicious. I love the colors and decoration. Thank you for sharing such a wonderful recipe.
Ralph @ Bakell Edible Glitter says
Do you think theses would freeze well? I would like to make them ahead for a birthday party and freeze them so I have less to do when the party gets closer!
Sammy says
There is absolutely nothing else like a chocolate chip cookie! The kids will love the rainbow addition, too. For vibrant food coloring and edible glitter of top quality, I use https://www.thesugarart.com/ … I will have to add some sparkles to my rainbow cookies and add an update! 🙂
Natasha says
Looking forward to trying out this recipe soon. Which specific type of liquid food coloring do you recommend? Would oil-based or gel work well?
Trisha Jive Cariño says
COLORFUL. GOOD. LIKE ASHTON KUTCHER. JUST GOOD.
Luke Cruz says
These Rainbow Chocolate Chip Cookies are pure joy in cookie form! Bright, fun, and way easier to make than they look. Love the added sparkle with sea salt and edible glitter—so festive! deer adventure