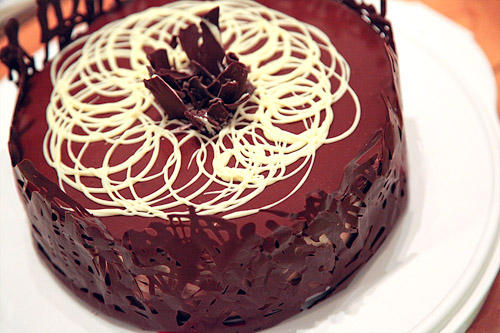
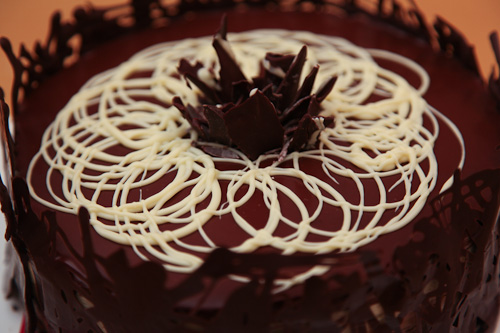
I’ve mentioned before how much I’m kind of a last minute person when it comes to making anything right? Well last month, the February DIY Dessert event that I co-lead with Melanie at 18 Reasons was quickly approaching and the theme was CHOCOLATE! I didn’t want to disappoint (especially with an amazing theme like that) so I started to pull out the numerous chocolate books that I have recently received over the holidays. And though they were all great, I ended going back to my Professional Baking 5th Edition book by Wayne Gisslen for inspiration, as well as a book I had on loan from the library, Unforgettable Desserts by Dede Wilson for a little last minute flourish. I present to you a triple chocolate bavarois with chocolate lattice, one of my Professional Baking Project cakes for the 18 Reasons DIY Dessert event.
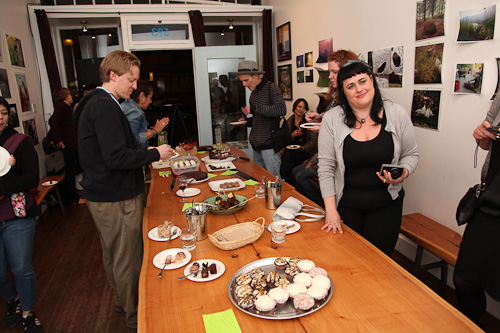
Melanie and I had decided on a chocolate theme for the month of February for all the obvious reasons (Valentine’s Day was around the corner, and chocolate was in the air). Everyone loves chocolate and though the DIY dessert night had moved to the second Wednesday of the month we expected an enthusiastic crowd and they definitely did disappoint!
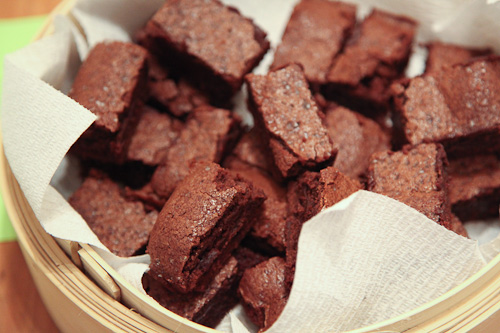
My co-leader Melanie showed up with these awesome salted fudge brownies made from Food and Wine magazine. She confided in me that the brownies have scored her dates in the past and it was her secret weapon. People swooned over them. I’m not sure if she got a date out of the night but I did notice a few people checking her out after they found out she was the one who made them. Or maybe that’s because she’s just naturally alludes attractiveness.
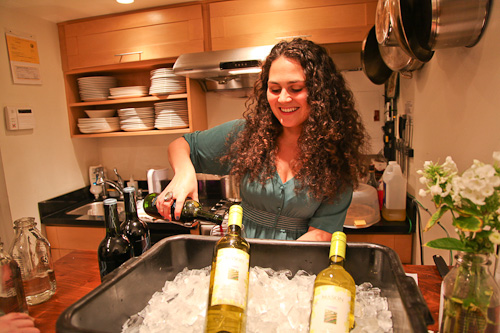
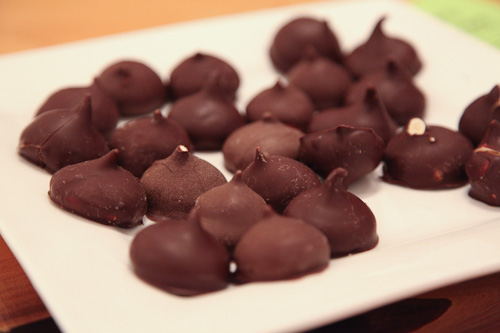
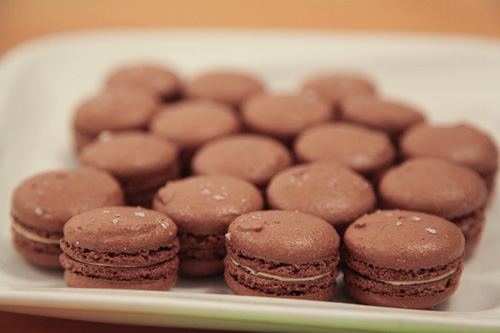
A few former chocolatiers showed up with their modern malt balls, using beer malt and Tcho Chocolate. They were addictive and way better than any candy that would come in a milk carton container (beer + chocolate = awesome). There were Chocolate Macarons with caramel buttercream (gluten free) that tasted as amazing as they looked. I confided in the baker that I had never made macarons before and the baker totally nonchalantly said that they were totally easy to make. She recommended the Italian Meringue method which is what I’ve been eyeing for my first foray into French macarons. One of these days. One. Of. These. Days.
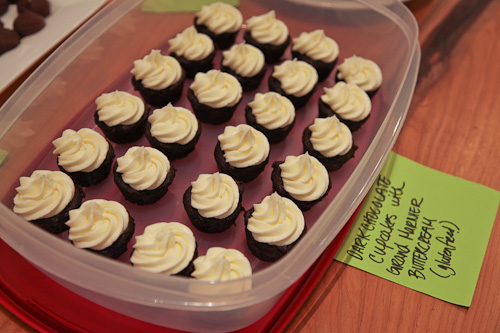
Mary over at Gluten Freed Gourmet made dark chocolate cupcakes with Grand Marnier buttercream that were also gluten free and had an amazing dense (in a good way) chocolate flavor, with just a little bit of Grand Marnier kick to the frosting. Someone at the event loved it so much that she emailed me asking if there was any way I could track down the recipe for her. I pointed her over to Gluten Freed Gourmet and Mary gladly supplied her the recipe. I love it when people connect at the DIY Desserts event!
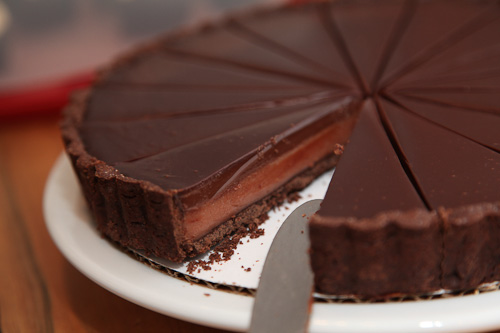
I’m not sure who brough this luscious Chocolate Blood Orange Tart. I had originally thought it was my friend Sabrina, but apparently it wasn’t. Regardless this tart is my new best friend! Look at how amazing it is!
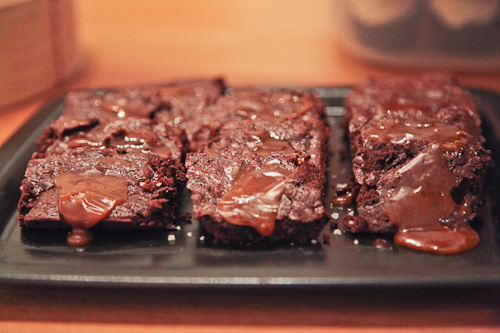
Speaking of Sabrina, I was able to hang out and talk with her, the woman behind The Tomato Tart, who brought these lovely dark chocolate brownies with caramel fleur de sel sauce that someone brought. They just oozed gooey salted caramel goodness. Seriously. Amazing.
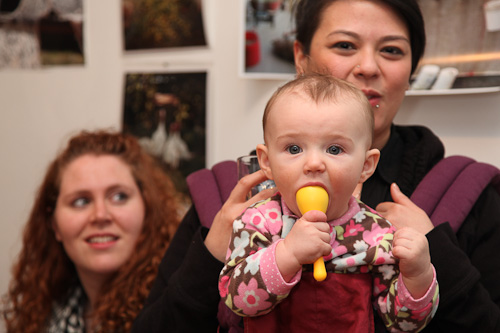
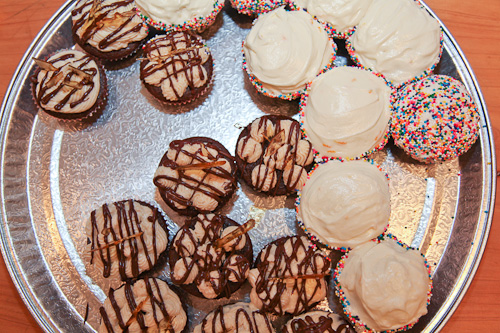
A Seattle pastry chef visiting her San Francisco friend showed up with an adorable baby and a couple of awesome cupcakes, devil’s food cake with Bailey’s buttercream and bubble sugar and devil’s food cake with meyer lemon butter ream and rainbow sprinkles. Both cupcake were utterly adorable, almost as adorable as the baby that accompanied them.
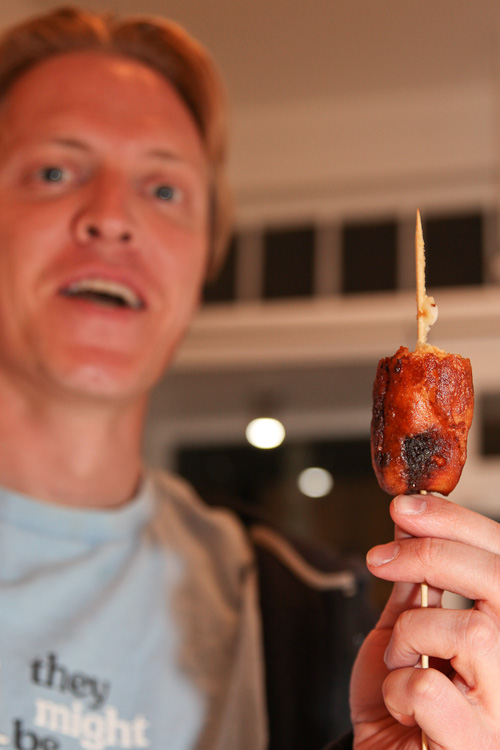
Of course, the surprise of the evening was Scott showing up with his deep fried twinkies with chocolate dip. Everyone exclaimed that they hadn’t had a twinkie in AGES and they were quickly devoured. Who knew that deep frying store bought treats could taste so good?
There were a few other desserts that showed up, like the chocolate pudding with berries, homemade butterfingers, hazelnut squares and chocolate mocha cookies with sea salt or chili powder but sadly I did not get any pictures of them. Total sadness! They were all amazing.
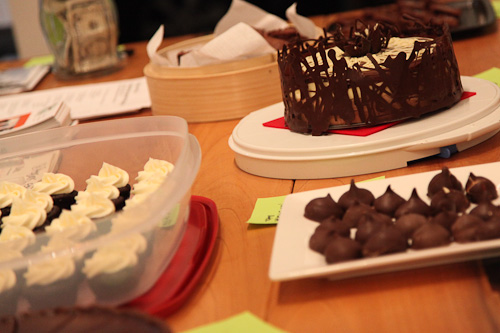
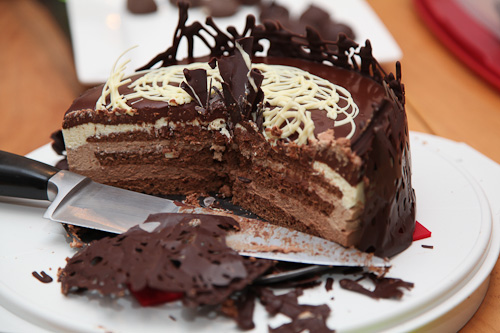
I did eventually cut into my triple chocolate bavarois as I noticed no one else wanted to. I’ve learned early on in my dessert party career that if I didn’t take the initiative, no one wants to be the first to cut into a cake or pie. So I serve up the bavarois with love and people seemed to enjoy it immensely.
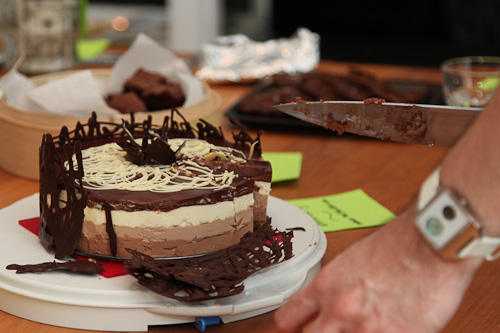
18 Reasons is a pretty great community organization and the DIY desserts night continues to be a pretty fantastic way to hang out, chitchat and meet with other fellow dessert enthusiasts. The upcoming March event (March 9th from 7pm to 9pm at 18 Reasons) focuses on citrus desserts. From the common lemon, lime and orange, to those freaky looking Buddha’s hand and boulder sized pomelos, all citrus inspired desserts are welcome! I haven’t figure out what I’m making yet (see first paragraph) but either way, I know it’ll be super fun. Hope to see some of you guys there!
[Side Note: I just wanted to say thanks to everyone that stopped for my first Wordless Recipes post. The feedback I got was tremendous. This recipe below is the exact opposite of that recipe, as it’s pretty complex. Don’t worry though, I’ll be mixing it up with both easy and complicated recipes and yes, I’ll be doing more Wordless Recipes. Regardless, you guys are the best!]
Triple Chocolate Bavarois with Chocolate Lattice
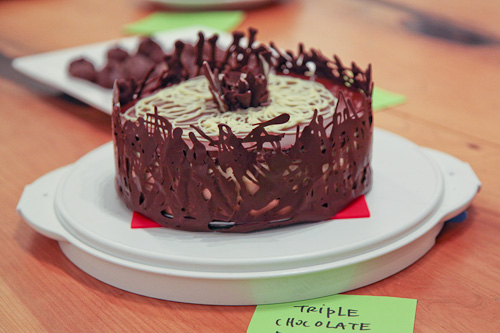
This is one of those ridiculous labor intensive desserts that I do because I’m ridiculous and like to tackle labor intensive projects. I originally was just going to make the bavarois, but the Bavarian cream started to set fairly fast and the layers didn’t look all that great when I unmoulded it. So I made the chocolate lattice to still show off the three layers, but to obscure the imperfections. I’m all figuring out a way to cover up the mistakes (you have no idea how much powdered sugar I go through because of this).
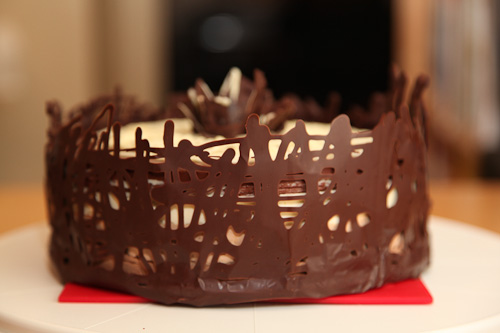
You can easily make the bavarois without the chocolate lattice, or you can use this chocolate lattice to make any cake extra impressive. Feel free to leave a comment below or email me if you have any questions about this recipe as it’s long and involves a lot of steps.
Triple Chocolate Bavarois
Adapted from Professional Baking 5th Edition by Wayne Gisslen
Chocolate Sponge Layers
1/4 cup (30 g) cocoa powder (natural not dutch processed)
1/2 cup plus 3 tablespoons (100 g) all purpose flour
5 large eggs (separated)
Pinch of salt
Pinch of cream of tartar
1/2 cup plus 1 tablespoon (120 g) of granulated white sugar
1. Preheat the oven to 350˚F. Line a baking sheet with parchment paper or silpat.
2. Place the cocoa powder and flour in a medium bowl, and using a wire balloon whisk, vigorously stir until it’s a uniform color.
3. Place the egg whites, salt and cream of tartar in bowl of a standing mixer fitted with a wire whisk. Turn the mixer on to medium until the whites start to foam. Add the granulated sugar and turn the mixer on high until they reach soft peaks.
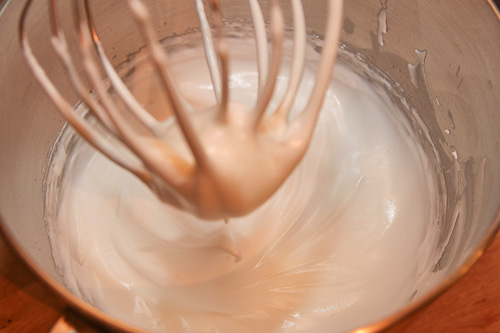
4. Place egg yolks in medium bowl and using a whisk, beat the egg yolks until they light yellow in color. If you are lucky enough to have two bowls for your standing mixer, than you can use that, other wise you elbow grease or a hand mixer is your option.
5. Once the egg yolks are light yellow in color, gently fold them into the egg whites with a large spatula.
6. Sift the cocoa/flour mixture on top of the eggs and then gently fold them into the batter.
5. Pour the batter into a pastry bag fitted with a round tip. Then pipe a circle of batter on the parchment or silpat roughly 6 to 7 inches around. Don’t worry if you go to big, as you can always trim the circle down.
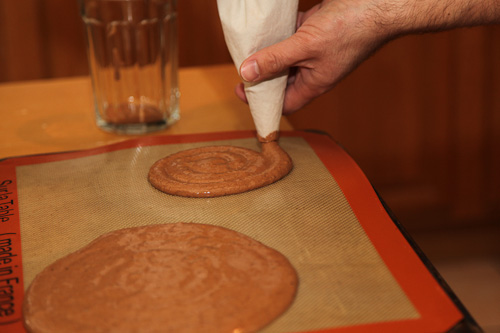
6. Place in the preheated oven and bake for about 13-15 minutes. Let cool on the silpat for five minutes before moving them to a wire rack to cool completely.
Makes four or five chocolate sponge layers.
Cocoa Vanilla Syrup
1 1/2 teaspoon of vanilla extract
1/4 cup plus 1 tablespoon (60 g) of sugar
2 tablespoons cocoa powder (15 g) cocoa powder (natural, not dutch processed)
1. Place 1/4 cup of water, vanilla, sugar in a medium pot and bring to a boil, until the sugar has dissolved. Sift in the cocoa powder, a little at a time while whisking the syrup until all the cocoa powder is dissolved. Cool to room temperature.
Chocolate Bavarian Creams
1 1/2 teaspoon of gelatin powder (1/2 package of Knox gelatine)
8 large egg yolks
1/4 cup plus 3 tablespoons (85 g) of granulated white sugar
1 cup whole milk
2 2/3 cups heavy cream, divided
1 tablespoon of vanilla extract
2.75 oz (80 g) of dark chocolate, finely chopped
2.75 oz (80 g) of milk chocolate, finely chopped
2.75 oz (80 g) of white chocolate, finely chopped
1. Place 3 tablespoons of cold water in a small bowl and then sprinkle the gelatin powder on top of the water evenly. Place asid.
2. Place a large pot of water filled 1/2 way up on the stovetop and turn it on to boil. Once it has reached boiling, lower the heat to simmer.
3. Combine the yolks and the sugar in the bowl of a standing mixer fitted with a wire whisk. Turn the mixer on to medium high and whip until the yolks are thick and light yellow in color.
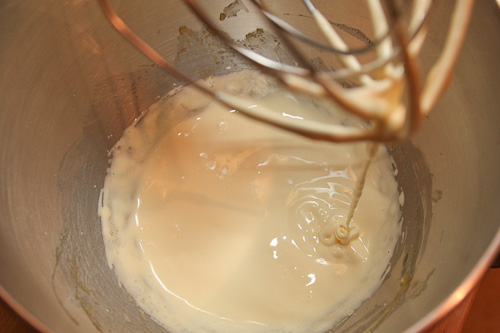
Note how light in color the yolks get.
4. Place the milk and 1 cup of the cream (reserving the other 1 2/3 cups of cream for later) in a small pot and heat the mixture, swirling it in around to make sure the heat is evenly distributed occasionally until small little bubbles start to form near the side of the pan. Do not boil the milk, you want it scalded – just below simmering, but not boiling. Once the milk is heated, remove immediately from the stove top.
5. Go back to the mixer and turn it on to low. Slowly drizzle the hot milk into the beaten egg. Turn off the mixer and remove the bowl.
6. Place the standing bowl in the large pot of simmering water. Constantly whisk the milk until it reaches 185˚F or coats the back of a spoon and when you drag a finger across it, it doesn’t fill in. Immediately remove the bowl from the water. Stir in the vanilla extract. Congratulations, you’ve now made a rich crème anglaise!
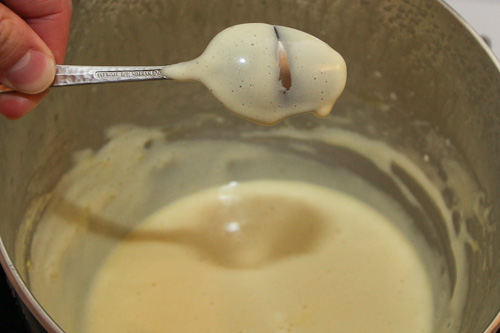
7. Stir the softened gelatin into the hot crème anglaise until it is completely dissolved. Now divide the crème anglaise into three metal bowls while it is still hot. Add the dark chocolate to one bowl, the milk chocolate to the next bowl, and the white chocolate to the third bowl. Stir each bowl until the chocolate melts thoroughly.
8. Now fill a large bowl with water and a tray of ice cubes. This is going to be your ice water bath.
8. Place the reserved 1 2/3 cups of cream in a standing bowl and turn to high. Whip the cream until you have soft peaks.
9. Take the dark chocolate and place it in the ice water bath. Stir with a spatula until the cream starts to set. Remove from the water bath and fold in 1/3 of the whipped cream. Repeat this process with the milk chocolate and then white chocolate cream.
Assembling the Triple Chocolate Bavarois
3 1/2 oz bittersweet chocolate, finely chopped
1/2 cup of heavy cream
1 oz of milk chocolate, finely chopped (optional for decoration)
1 oz of white chocolate, finely chopped (optional for decoration)
2. Line the inside sides of an 8 inch springform pan with parchment paper or food grade acetate. I used food grade acetate because I’m fancy that way (and recently bought some at the art supply place for another project) but a long piece of parchment paper should work too. Make sure to trim it so it only just fits inside the springform pan and doesn’t stick up over the top of the pan. Place at the bottom of the springform pan one disk of the chocolate sponge layer. The layer should be smaller than the 8” springform pan, leaving about 1/2 inch room all the way around. If the disk is too big, trim it down so it fits comfortably in the middle of the pan without touching the sides. Brush the disk with the cocoa vanilla syrup.
3. Evenly spread the dark chocolate Bavarian crème on top of the chocolate sponge layer, with the dark chocolate crème filling in the gap at the bottom of springform pan. Try to make the crème as level as possible (a small offset palette knife comes in handy if you have one). Then place another chocolate sponge layer on top of the dark chocolate crème. Again make sure the disk is smaller than the springform pan.
4. Brush the disk with the cocoa vanilla syrup and then repeat with the milk chocolate crème by spreading it evenly on top of the sponge layer. Place another sponge layer on top of that, brush it with the cocoa vanilla syrup and then spread the white chocolate crème on top of that.
5. Place the Bavarois in the freezer for an hour to firm up. 10 minutes before taking it back out, heat the heavy cream in a medium pot, swirling occasionally to distribute the heat, until small bubbles start to form near the side of the pot. Remove from the heat and add the finely chopped chocolate to the cream, and stir until melted. Pour the hot chocolate ganache onto the cold Bavarois quickly and spread to the sides. Place back in the freezer for another hour to firm up.
6. If you are using the optional milk and white chocolate for decoration, melt the milk chocolate while you are waiting for the Bavarois to firm up, by microwaving it in a medium bowl for 30 seconds. Stir and microwave for another 30 seconds if not melted completely. If you aren’t comfortable or don’t have a microwave, feel free to melt it with a double boiler.
7. Spread into a thin layer on a clean baking sheet with an offset spatula or btter knife and put it in the refrigerate. When the chocolate has firmed up, take a flat metal blade (I use a pastry cutter) and scrape the chocolate into shards. Depending on how long you let the chocolate firm up, the chocolate shards will be really brittle and small, or they will be larger or they may bend. If they bend, they aren’t firm enough, though you can make chocolate curls and waves which are pretty too. For my bavarois I wanted small shards that I could put in the middle of it, so I let the chocolate firm up in the refrigerator for awhile. The more you play with chocolate, the better feel you will get for making curls, shards, waves or whatever else you want to make.
8. Take the shards and put them back in the fridge while you melt the white chocolate. White chocolate is notoriously hard to melt. I use a microwave for melting dark and milk chocolate because it’s super easy and convenient. For white chocolate, because it overheats so fast, I prefer the an adapted double boiler method. Take a medium pot and fill it with a small amount of water. Bring the water to a rapid boil and then place another metal bowl over the pot. Make sure the bowl is NOT touching the water. Then turn the heat off. Place the chopped white chocolate in the metal boil and the residual heat from the trapped steam of the water will be enough to melt the white chocolate.
9. Take the white chocolate and pour it into a small ziplock sandwich bag and close it. Snip a small hole at the corner of the bag. Take the Bavarois out of the freezer and then squeeze in a circular motion the white chocolate over the Bavarois to create a spirograph pattern (remember Spirograph?). Leave an area in the center open. Take the shards of milk chocolate out of the refrigerator and stick them in the middle of the Bavarois. Then place the Bavarois back in the freezer to firm up.
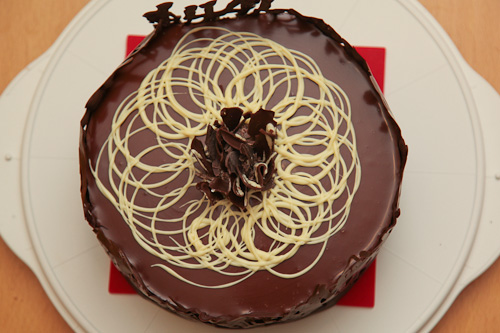
Chocolate Lattice
This was adapted from Unforgettable Desserts by Dede Wilson
3 oz of good quality bittersweet chocolate, finely chopped
1. Pull out a 27 inch length piece of thin (don’t use the heavy duty stuff) aluminum foil. Fold it in half lengthwise (meaning it’s still 27 inches long, but now half at tall). Measure how tall your Bavarois is (mine was 2 1/2 inches tall) and add 1/2 inch to the height. Now, using a pencil, draw an indention in the aluminum foil all the way across the 27 inches, at whatever the height is you determined (mine was 2 1/2 inches plus 1/2 inches to be a total of 3 inches tall). Now smooth and place the aluminum foil on a flat surface.
2. Now melt the bittersweet chocolate. I used a microwave and put the chocolate in a microwave safe bowl for 30 seconds, stirred and microwaved it again for 30 seconds more and stirred. It took me 3 times to melt it completely. If you are more comfortable using a double boiler feel free to melt it that way. Pour the melted chocolate into a small ziplock sandwich bag. Close it and snip a small hole in the corner of the bag.
3. Squeeze a thick lacy design on the aluminum foil in the marked area, all the way across all 27 inches and as high as you marked it. Zig zag up and down and sideways and diagonally with the chocolate. The more the chocolate overlaps, the more structurally solid the lattice will be.
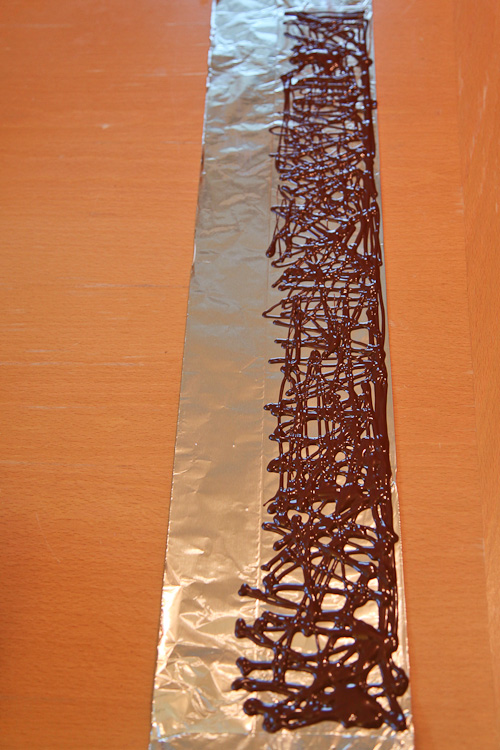
4. Once you’ve used up the chocolate, let the chocolate firm up until it starts to look matte (don’t wait too long though, you still want it pliable and slightly tacky). Then pull out the Bavarois and unmold it from the springform pan. First remove the sides of the springform pan (which should be easy as you have already lined it with parchment paper or food grade acetate). Then slowly, carefully peel away the parchment paper or food grade acetate.
5. Now place the Bavarois on whatever serving platter you will be using, as once you place the lattice on it, you won’t be able to move it. Now pick up the aluminum foil by the sides and carefully place one side of aluminum with the lattice chocolate on the inside, on the cake and slowly wrap the foil, chocolate side in, pressing slightly to make sure the lattice adheres to the Bavarois. Try to keep it as even as possible as you wrap it around the cake.
6. As you get to the end of the aluminum strip, you’ll notice that there is an overlapping piece. Don’t wrap that end tight to the cake, but leave it sticking out about an inch or so. You’ll fix that later.
7. Stick the Bavarois in the refrigerator this time and let it sit in there for about 30 minutes or so. Then take it out and slowly, carefully, peel away the aluminum foil starting with the part that is sticking to the cake. Be extra careful when you get to the other end where the lattice is not touching the cake. Once you peel the foil off that piece, place your hand on the chocolate and let the heat of your hand slowly warm it up. This could take 10 or 15 seconds so be a little patient. But once the chocolate has warmed up, it should be more pliable and you should be able to bend it in and press it to the Bavarois.
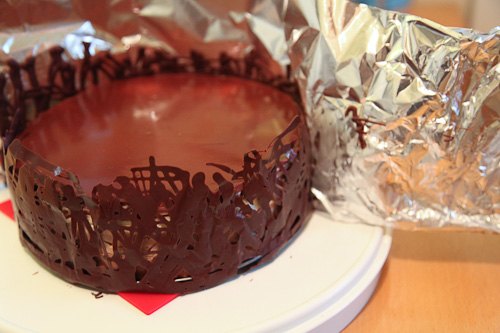
8. Now if the lattice cracks when you are peeling the aluminum foil off, don’t worry about it. Just go ahead and intentionally crack it every 2 or 3 inches and press the pieces to the Bavarois. It will look intentional and everyone will still be super impressed with it regardless.
Brian @ A Thought For Food says
You always make such stunning cakes and you (almost) make it look easy too. Maybe one of these days I’ll try this one out. It just looks too darn good to pass up.
Irvin says
LOL. This one wasn’t insanely hard, but it was probably the most complicated of all the cakes I’ve made! If you ever make it, let me know how it turns out for you!
kellypea says
Dessert party! What a great idea. So many incredible desserts in that spread. Loving your Bavarois and its gorgeous decoration.
Irvin says
The DIY dessert event happens every month with a different theme. They are super fun. We just had our last one with the theme Citrus and next month should be super fun as well, as the theme is BOOZE, desserts with alcohol as a component. WHoo hoo! Happy hour at 18 Reasons DIY Desserts!
And thank you for the kind compliments!
Orly @yumivore says
Chocoholics should be warned before viewing! Mouth-watering. It looks like it was a lovely event; beautiful post and your cake looks divine!
Irvin says
Thank you so much! It was chocolate overload, but in a good way. One of these days you should stop by.
S. B. Hadley Wilson says
I love your life.
Irvin says
Well hopefully soon you will be out here, and you will be a more integral part of my life, making my life that much awesome. 😉
Faith says
Beautiful!!! I totally would of been the one to cut into that chocolatley goodness, beauty or not!! Yum!
Irvin says
Ha! I need more people like you in my life. People are always so scared to cut into my desserts. I make them to be eaten!
Dina Avila says
Pretty sure that is the longest recipe ever…and absolutely fabulous! I love the lattice. It looks like a silhouette of little people. I was salivating through this entire post. Next year I want to spend V-day at your house!
Irvin says
I know! As I was writing it out, I realized the recipe was ridiculously long, and I don’t think ANYONE would do it. Ah well. I doubt I would even make it if I ran across it on a blog! Ha! But I’m glad it turned out the way that it did.
And you are more than welcome to come hang out with us during Valentine’s Day! There’s bound to be chocolate creations around the house just waiting to be eaten.
Sabrina Modelle says
Oh my goodness, I had almost forgotten how delicious everything was. I loved your cake so much, but of course, not as much as I loved hanging out. Thanks for a super fun evening.
X
Sabrina
Irvin says
I had forgotten how amazing the night was as well, until I started write up my recap of it all. Thank goodness for the photos to remind me of everything!
And, of course, it was awesome to hang out with you as well. Can’t wait to do it again!
Jennifer (Delicieux) says
Dessert party…sounds like my kind of party! So much deliciousness there! Looking at it all is making my mouthwater.
I love your step by step instructions to your recipe and your photos too.
Irvin says
Thank you! The step by step instructions seemed key as the recipe was so elaborate, more than I realized!
Emmie says
What Hadley said.
Irvin says
What I said back to Hadley.
Rachelino says
Loving the shard explosion and process photos, my friend.
Irvin says
Why thank you! Who doesn’t love it when chocolate explodes?
Nimisha says
I can’t believe I missed this DIY Desserts. Your cake looks like something from the old Citizen Cake.
Irvin says
Thank you! I haven’t had a chance to go to the new Citizen Cake yet. Well, I poked my head in, but I didn’t get anything. We should make a work date there!
Nimisha says
It’s nice, but a little stiff. Not a casual working place at all. But we could get something sweet there, and then go right next door to Jane to work. 🙂
sweet lover says
Im a 13 year old baker and I love looking at this stuff! Thanks for the cool tricks I will defintly use them!!
shalini says
wow..
Looks super impressive and awesomely complicated..and with all that chocolate it must be too..
I’m going to try this one…
fingers crossed
cheers!
shalini says
hey…I did try this…but without the sponge and the lattice. shortage of time…
The bavrois was AMAZING !!!! but with 25% cream I think one needs more gelatin…do you think i could fold in some egg whites??? Next time i am also going to splash some vodka…
cheers!
Irvin says
Hi Shalini.
So glad you liked it! The sponge really does help with the stability of the bavrois, as it gives a solid layer between each Bavarian cream layer and helps each layer “float” on top of the bottom one.
If you aren’t using the sponge, you can try to add more gelatin, but I haven’t done that, so I’m not sure how much more to add. Perhaps I’d experiment and use 25-50% more and see how it firms up. You don’t want it too firm, because the cake should still be soft and silky. The addition of the egg whites will fluff the layers up, but again I haven’t don’t that so I can’t tell what the results would be. If you do make it again with your adaptations, please come back and let me know how they turn out!
shalini says
hi…my blog post linked to yours…and I am going to go all the way…sooner rather than later and I hope my dessert looks like yours….and I’m going to bloom my gelatin in vodka next time…chocolate shots all the way.
thanx for an amazing dessert
cheers!
shalini says
hi…my blog post linked to yours…and I am going to go all the way…sooner rather than later and I hope my dessert looks like yours….and I’m going to bloom my gelatin in vodka next time…chocolate shots all the way.
thanx for an amazing dessert
cheers!
http://baketitude.blogspot.in/2012/08/triple-chocolate-bavarois-and.html
Sarah Kennedy says
I love food, and I also love the challenge of a complicated dessert. I’m holding a 50-shades-of-chocolate party this week, and your bavarois will land in the center of my very full table. I plan to create short segments of lattice, in order to simplify serving. Thank you for sharing!