
You need these in your life.
Have I mentioned how much I love my food blogging friends? I’m not talking about the ones I chit-chat with on Twitter late at night but haven’t met in real life yet (though I love them as well, and I hope that we can all meet sometime soon). I’m talking about the ones that I go and get brunch with here in San Francisco, scheming about taking over the world, one sugary treat at a time. Take, for instance, my friend Shauna Sever. She and I immediately bonded over our love of cake, cookies and brownies back when I was just a newbie blogger, barely a month old and crashing the First San Francisco Food Blogger Bake Sale. So when she told me that she was writing a cookbook called Marshmallow Madness!, I immediately knew it was going to fantastic and I couldn’t wait to get my sticky sweet hands on it. Thankfully her publisher sent me a review copy of the puffilicious publication and I started flipping through the book to figure out what to make. My final ‘mallow creation, which isn’t in her book, but uses one of her techniques, coincidentally would work perfectly with the upcoming Peep™-tastic holiday of Easter. Visualize how awesome your Easter basket will be, filled with these homemade Carrot Cake Marshmallows featuring Carrot Marshmallows and Cream Cheese Marshmallows.
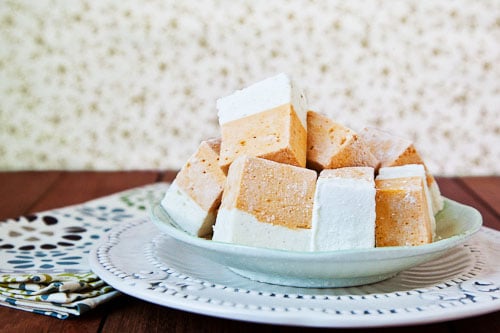
I'm just going to pretend that these are good for me. I mean carrots are good for your eyes right?
It turns out that carrot marshmallows and cream cheese marshmallows are not the easiest thing to make however, which may have been why Shauna did not include them in her book. Not that there aren’t fantastic other recipes in her book, and not that Shauna couldn’t have just whipped these up with her eyes closed. Making marshmallows at home are super duper easy, especially if you follow the methodology that Ms. Sever has developed. But the problem with both the carrot part, and the cream cheese part is that my original test batch fell flat and turned dense and rubbery like a joke chicken pulled out of a top hat. I needed something with more fluff. Enter the egg white.
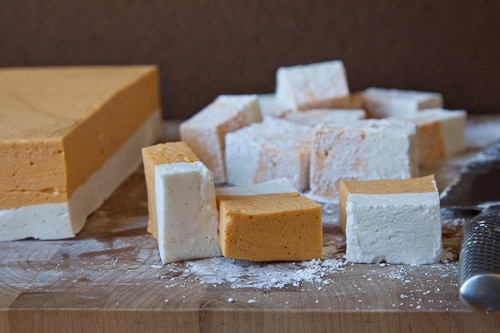
Fluffy bites of carrot & cream cheese love.
Most of Shauna’s recipes eschew the egg white for a couple of reasons. It’s one extra step in making the marshmallows and you have to make sure that you are using quality fresh egg whites, as the egg whites don’t heat up enough to kill any bacteria that might be in them. I’ve never had a problem with egg whites in my marshmallows, and in fact, prefer the extra bounce they give, but if it’s an issue with you, maybe this recipe isn’t for you. Since nearly every other recipe in Shauna’s book is egg white free (including an awesome vegan marshmallow) by all means, don’t let my silly carrot cake marshmallow stop you from wading (or waddling as the case may be with my expanding waistline) into the m’mallow madness.
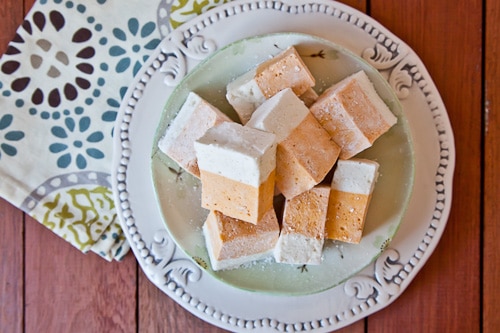
I can't stop eating these. Someone help me out please.
Of course, if you aren’t scared of the egg white (or you want to use pasteurized egg whites, which don’t quite fluff up but will work) I definitely recommend these. Though Shauna doesn’t have my carrot cake marshmallow recipe in her book, it’s definitely keeping in the spirit of her book, which includes some pretty tasty little gems like Key Lime Pie, Fuzzy Navel Marshmallows and Maple Bacon Marshmallows. Turns out marshmallows are a pretty blank slate in which you can impress all sorts of fabulous flavors onto. of course, once you taste fresh made marshmallows, in the myriad of varieties that you can make them in, you’ll never go back to the grocery store kind. With this book, I expect marshmallow expert Shauna to have taken over the world sooner rather than later. You have been forewarned.
Special thanks goes to Quirk Books for sending me a review copy of Marshmallow Madness. Though I received a complimentary review copy of the book, all opinions stated above are my own and I was not compensated for this post.
By Irvin Lin
By reducing carrot juice down in concentration, you intensify the flavor of the carrot and get a brighter orange than you would with just out-of-the-bottle carrot juice. Unfortunately you have to cool the carrot juice down to at least room temperature or colder, so make sure to allow for enough time in making these marshmallows. Make sure to use room temperature cream cheese and room temperature egg whites, as you’ll get more bounce and fluff that way. If egg whites are a concern, you can certainly use pasteurized egg whites, but you won’t be able to whip them as fluffy as raw egg whites.
By the way, the recipe looks really long, but keep in mind that you need to make two batches of marshmallows, the carrot and the cream cheese, which is why it really looks twice as long as a normal marshmallow recipe would be. Don’t be scared off of the length. And yes, these marshmallows really do taste like carrot cake.
Loosely adapted from Marshmallow Madness by Shauna Server.
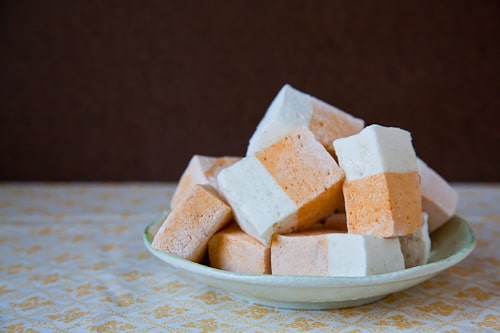
Carrot Marshmallow ingredients
2 cups (475 mL) carrot juice
4 1/2 teaspoon (2 packages) unflavored powdered gelatin
2 large egg whites, at room temperature
pinch of cream of tartar
200 g (1 cup) granulated sugar
1/2 cup (120 mL) light corn syrup
1/4 teaspoon sea salt (or kosher salt)
2 teaspoon vanilla extract
1/2 teaspoon ground cinnamon
Cream Cheese Marshmallow ingredients
115 g (4 oz or 1/2 brick) cream cheese, at room temperature
1 teaspoon vanilla extract
1 vanilla bean
3/4 cup (180 mL) water, divided
4 1/2 teaspoon (2 packages) unflavored powdered gelatin
2 large egg whites, at room temperature
pinch of cream of tartar
200 g (1 cup) granulated sugar
1/2 cup (120 mL) light corn syrup
1/4 teaspoon sea salt (or kosher salt)
Coating ingredients
30 g (1/4 cup) confectioners’ (powdered) sugar
30 g (3 tablespoons) cornstarch
1. Make the carrot marshmallows by pouring 2 cups of carrot juice into a large skillet. Turn the heat to high until the carrot juice starts to boil, then reduce the heat until the juice is just barely simmering. Cook the carrot juice down to 3/4 cup (about 15 to 20 minutes) being careful not to let the carrot juice boil. Once reduced, let the juice cool to room temperature (do not try to use it when it is warm, you want to have cooled it first). You can also refrigerate the carrot juice overnight if you wish.
2. Once the carrot juice has cooled, pour 1/2 cup of the carrot juice (reserving the 1/4 cup for later) in a small bowl and sprinkle the powdered gelatin over it, and put it aside for five minutes to let it hydrate and soften. Lightly spray a 9 x 9 inch square baking pan with cooking oil.
3. While the gelatin softens, place the egg whites in the mixing bowl of a standing mixer fitted with the wire whisk attachment. Sprinkle a pinch of cream of tartar over the egg whites and then whip on medium high speed until the whites are opaque and hold soft peaks, about 2 or 3 minutes. Stop the mixer while you prep the syrup.
4. Place the sugar, corn syrup, salt and the remaining 1/4 cup reduced carrot juice in a small pot. Heat on medium high heat until the sugar has dissolved and it starts to boil. Bring the sugar syrup up to 240˚F (somewhere between the soft ball stage and firm ball stage). Take the sugar syrup off the heat, and quickly scrape the softened gelatin into the hot sugar syrup and stir with a whisk to incorporate and melt the gelatin.
5. Turn the standing mixer on to medium high speed, and slowly drizzle a little bit (couple of tablespoons) of the hot sugar syrup into the egg whites, warming them up. Then drizzle the remaining syrup into the egg whites in a slow stream, trying to get the syrup in the egg whites, and not on the side of the bowl. Be careful with this, as the sugar syrup is super hot, and if it hits the wire whisk, it can be flung out and burn you (it’s not as scary as is sounds, just be alert). Keep drizzling and pour the syrup until all of it is incorporated into the egg whites (use a heatproof spatula to scrape it all out). Then continue to beat on medium high speed for five more minutes. Then increase the speed to high and beat for another 5 minutes or until the marshmallow fluff has tripled in volume. Add the vanilla and cinnamon and beat for another 15 to 20 seconds to incorporate.
6. Quickly pour and scrape the marshmallow fluff into the greased baking pan and smooth the marshmallow fluff out evenly and flat to the edges of the pan with an offset spatula or butter knife.
7. Make the cream cheese marshmallows by placing the cream cheese in a clean, dry bowl of a standing mixer fitted with the wire whisk attachment. Turn the mixer to high and beat the cream cheese until it has fluffed up, about a minute. Add the vanilla extract and split the vanilla bean in half lengthwise and scrape the seeds into the bowl. Beat for an additional minute to incorporate. Scrape the entire vanilla cream cheese into a medium sized mixing bowl.
8. Place 1/2 cup of cold water (reserving 1/4 cup of water for later) in a small bowl and sprinkle the gelatin over it to let it soften. Clean the standing mixer bowl and make sure all cream cheese is removed, then dry the bowl. While the gelatin softens, place the egg whites in the mixing bowl of a standing mixer fitted with the wire whisk attachment. Sprinkle a pinch of cream of tartar over the egg whites and then whip on medium high speed until the whites are opaque and hold soft peaks, about 2 or 3 minutes. Stop the mixer while you prep the syrup.
9. Place the sugar, corn syrup, salt and the remaining 1/4 cup water in a small pot. Heat on medium high heat until the sugar has dissolved and it starts to boil. Bring the sugar syrup up to 240˚F (somewhere between the soft ball stage and firm ball stage). Take the sugar syrup off the heat, and quickly scrape the softened gelatin into the hot sugar syrup and stir with a whisk to incorporate and melt the gelatin.
10. Turn the standing mixer on to medium high speed, and slowly drizzle a little bit (couple of tablespoons) of the hot sugar syrup into the egg whites, warming them up. Then drizzle the remaining syrup into the egg whites in a slow stream, trying to get the syrup in the egg whites, and not on the side of the bowl. Be careful with this, as the sugar syrup is super hot, and if it hits the wire whisk, it can be flung out and burn you (it’s not as scary as is sounds, just be alert). Keep drizzling and pour the syrup until all of it is incorporated into the egg whites (use a heatproof spatula to scrape it all out). Then continue to beat on medium high speed for five more minutes. Then increase the speed to high and beat for another 5 minutes or until the marshmallow fluff has tripled in volume.
11. Stop the mixer momentarily and scoop out about 1/4 of the mixture (don’t worry about being too precise) and add it to the vanilla cream cheese bowl. Turn the mixer back on to medium high and then quickly stir and fold the cream cheese and marshmallow fluff together by hand with a large spatula. Once the cream cheese seems to be incorporated into the marshmallow fluff, scrape it into the mixing bowl, while the mixer is still on, and beat until just incorporated, about 15 seconds. Don’t overbeat, or it will deflate the marshmallow fluff too much.
12. Quickly pour and scrape the cream cheese marshmallow fluff over the carrot marshmallow in the greased baking pan and smooth the marshmallow fluff out evenly and flat to the edges of the pan with an offset spatula or butter knife. Let sit overnight for 6 to 8 hours in a cool, dry place.
13. Once the marshmallows have cured, mix the confectioners’ sugar and cornstarch together in a medium sized mixing bowl with a balloon whisk. Lightly dust a cutting board with some of the coating powder, and then invert the marshmallow onto the cutting board, using a butter knife to help loosen it. Lightly grease a chef’s knife (I just lightly spray it with cooking oil) and cut the marshmallow into 6 rows, then each row into 8 pieces. Toss in the coating, patting off any excess.
Store in the refrigerator for up to 7 days. Bring to room temperature before serving (or serve chilled). Makes 48 marshmallows.
Lora says
These are so fabulous. I love the beautiful color.
Averie @ Love Veggies and Yoga says
I was part of the west coast competitors in Marsh Madness and clearly, you are extremely stiff competition because these look…ridiculously good.
Amazing job & gorgeous photography!
Irvin says
No worries about me being competition, I’m not part of the Marsh Madness. In fact, I didn’t even know about it until you left a comment. That’s how out of it I am! But good luck with representing the west coast. Your ‘smores bar looks out-of-this world.
Belinda @zomppa says
These are the COOLEST marshmallows ever!! They are perfect and so creative – you need to get these to market.
Irvin says
Ha! I don’t know if I’m cut out to be a small batch artisan food creator. I do it every now and then but it’s WAY too much work, and I’m WAY too lazy for that…
tracy says
and the salivation begins!!!!!!!!!!!!!!!!
Maria says
These look absolutely amazing!
Garrett says
I think this is one of the most creative things I have ever seen ever.
Irvin says
Awwww. Thanks Garrett! Coming from you, that’s a great compliment.
Fil says
Hey Irvin! I was just thinking about making some passion fruit marshmallows with passion fruit syrup I got from Kauai… but I love carrot cake so this really has my mouth watering, so I think I’ll try these too!
Irvin says
Hey Fil! Passion fruit syrup sounds FANTASTIC. Oh, how I miss Hawaii. Darn it. Now you have me mentally visualizing hanging out on a beach. *sigh*
Maggie @ A Bitchin' Kitchen says
Whoa. I’m not going to lie – the length of this recipe TERRIFIES me, but they sound absolutely amazing. If I could have just 10% of your creativity I’d be a happy lady!
Irvin says
Ha! Yeah, after I wrote out that recipe I was all WHOA. That’s why I put that little disclaimer in my header, about the fear factor of the length.
BUT… don’t be scared! Don’t be. It’s that long because you have to make two batches of marshmallows. But each batch is pretty easy to make. The first one requires you to reduce the carrot juice. The second batch requires you to whip the cream cheese. Otherwise, they are both pretty standard marshmallow recipes. If you have any problems or questions, just holler. Happy to help out!
Rachel @ Not Rachael Ray (Soon to be Rachel Cooks) says
Amazing!
Jonathan says
Let me be the first to mention how much I love your opening photograph. Larger-than-life food couture editorial. Thank you for sharing, Irvin!
Irvin says
Yay! Thanks Jonathan. I decided I wanted to give the opening photo a big “HERO” shot of the marshmallows. Then everything else fell into place. Glad you liked it!
thelittleloaf says
This post is so much fun! LOVE the idea of two tone marshmallows, and making them carrot cake flavoured? Amazing.
Ken┃hungry rabbit says
You and these bouncy marshmallows makes me smile from ear to ear. I MUST get my hand on Shauna’s book to make my own marshmallow madness.
vanillasugarblog says
fabulous my dear, just freaking fabulous!
Valerie says
Irvin
My boyfriend and I tried making these by spitting up the tasks. Little did I know that he didn’t read the 1/4 tsp of salt and added instead 1/4 cup. 🙁 so we had to toss the batch and try again another time.
I do have a question about the vanilla bean. Could you use extract instead of the bean and get the same effect because those suckers are freaking expensive !?!
And thank you for sparking our need to bake with these fun recipes
Irvin says
OMG! Man 1/4 cup of salt. Crazy!
And yes, vanilla beans are crazy expensive. I like the look of the tiny specks of vanilla beans floating in the white cream cheese marshmallow, as well as the extra dimension that fresh beans give the marshmallow, but you can certainly either skip it or add an extra teaspoon of vanilla extract in it’s place.
Good luck and let me know how it turns out!
Brandie (@ Home Cooking Memories) says
I will so be making these! Such a fun idea! Beautiful photos.
rachel jane says
What an incredible concept. My mouth is watering!
Lesley says
I cannot wait to make these, what an inspired idea!!!!
Shila says
My first task upon getting Shauna’s book will be to make a Titanic, a poorly-but hilariously named coffee drink that my local barista makes with a latte and vanilla bean marshmallow.
I am so so excited for the vegetarian marshmallow recipe, as making veggie marshmallows would be a dream come true
Candace says
Hi! I have tried my hand at several variations of marshmallows and would love to try incorporating the cream cheese marshmallows you made into some new variations, but I was wondering about the food safety factor of using cream cheese? Do you refrigerate these?
Irvin says
Oh good question! Actually I DO refrigerate them. I went ahead and added a note about that at the end of the recipe. Thank you for pointing that out.
I actually did serve them to people after they had been sitting out on the counter for four hours and there was no issue, but if you have them around for a few days, I would stick them in the fridge.
Sandra Veeremaa says
How much is 2 packages gelatin in grams? And can i use gelatin leaves?
Irvin says
1 package of gelatine is roughly 7 g, so two packages would be 14g. That said, converting to gelatin sheets is a hard question. Depending on the gelatin sheet strength bloom (usually it’s gold, but sometime it’s silver or platinum) it can be anywhere from 3 to 5 sheets per package. I know David Lebovitz usually finds 3.5 sheets per 1 package of gelatine works for him. You can bounce over to his post on gelatine for more information about conversations.
Peta Steyn says
I made these for halloween this year and oh, my word! Amazing! My husband who doesn’t particularly like marshmallow even approved. I will definitely be making these again. I did however find that with a Kenwood major it works best if making a double batch. Nothing quite like making more than enough to share the love!
Also, I’ve realised it is better to only toss them in the coating mix just before serving them as the icing sugar absorbs moisture in the fridge and they become a bit gooey. In warmer countries a tad more gelatine may also be a good idea, particularly for the cheese layer as it is quite soft, but oh, so yummy! Thanks for sharing this with us all!