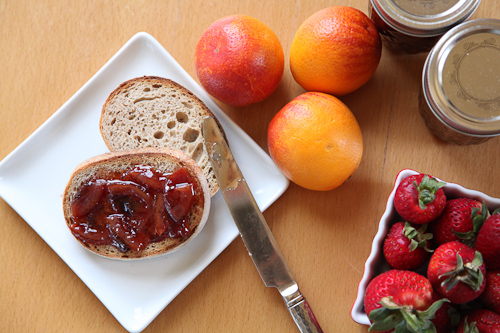
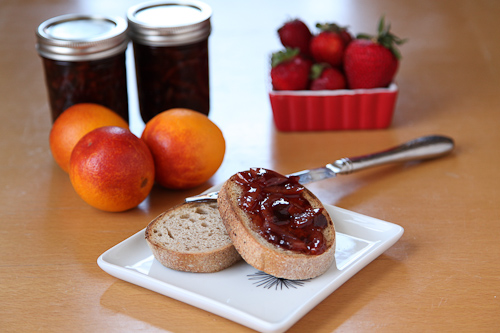
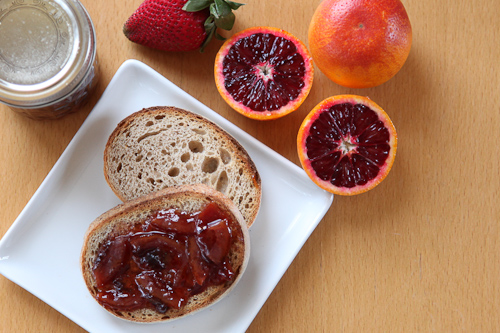
Awhile ago my friend Shila, who tweets under the name “Shilantro” and who I met at the first annual Food Blogger Bake Sale last year, ended up emailing me out of the blue asking me if she could interview me for her cool start up company Foodia. Flattered, I said OF COURSE and then we proceeded to have a lovely chit chat where I then babbled about my love of the pastry chef Sherry Yard (Executive pastry chef at Wolfgang Puck’s Spago and author of the amazing Secrets of Baking and my personal pastry idol) and kitchen scales. Thankfully Shila did her magical editing and made me sound somewhat normal in the interview. After it was all over with, I made her invite me to her apartment to teach me how to make preserves and properly can (yeah, I can be bossy that way). We ended up with this lovely blood orange strawberry marmalade.
The recipe comes from the gorgeous Blue Chair Jam Cookbook by Rachel Saunders. Shila and I had bantered back and forth about the book and how every single page of the book made you basically want to live and breathe fruits and preserves. I think the sentence “I want to live in this book” may have come out of my mouth when I was talking about it. So I was thrilled that Shila told me she had picked a recipe out of that book to make for our canning date.
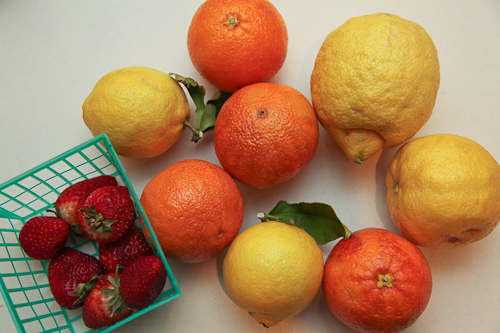
The recipe sounds a bit complicated, but really it wasn’t too bad. It just requires some upfront prep time. Thankfully Shila had taken care of that before I arrived. She had also scavenged some rosemary from the neighborhood (there apparently was a rosemary bush near her house), I had brought some backyard lemons for the marmlade and the blood oranges and strawberries came from the farmers’ market. You really can’t get more local or organic than that right?
I’ve made jams and marmalades and curds before. In fact, one of my favorite marmalades to make is a kiwi lime marmalade (I use it to put in muffins, but truthfully it’s pretty amazing on its own, as well as on fresh cornbread) and I can make in 15 minutes with a microwave, start to finish. But I’ve never bothered to can before. It all seemed so fussy and complicated. But Shila showed me that you can use the dishwasher/oven method and it was super easy. [EDIT: I’ve been informed that the oven method isn’t considered safe by the USDA. More on that in the notes below]. Sadly I don’t have a dishwasher at home, but with summer coming up, I might have to start figuring out a way to sterilize and can all the summer produce that is soon to arrive at the farmers’ market in basketfuls. Because I LOVE my summer fruit.
Or maybe I’ll just start hanging out with more with Shila. She’ll do the canning, I’ll just reap the benefits. I mean does she really need six cans of the same preserves in her pantry? I’m sure she won’t miss just one….
Blood Orange Strawberry Marmalade with a hint of Rosemary
Adapted from the Blue Chair Jam Cookbook by Rachel Saunders. Full disclosure, Andrews McMeel sent me a review copy of the book. But I say this without any bias, it’s an amazingly beautiful cookbook. Rachel sometimes teaches classes on jam making, but if you can’t make it to any of her classes or you don’t live in San Francisco (she also sometimes travels and does workshops in other cities, so check the website), the cookbook is the next best thing.
This excellent Spring marmalade (make it now, when the citrus season is ending and the strawberry season is just taking off and the two fruits overlap) takes two days to make but don’t let that scare you off. Day one is mostly just easy prep work and is walk away time, meaning you just let the fruit cook on the stove for an hour while you do other things. By the way, a marmalade is a preserve that uses the peel of a citrus fruit. So now you know.
2 1/4 lbs halved and hulled strawberries (hulled means removing the flavorless white inside part of the strawberry attached to the cap)
1 1/2 lbs Moro blood oranges
2 sprigs of rosemary (around 8 inches in length)
2 lbs 10 ounces of white cane sugar
2 to 4 ounces of fresh squeezed lemon juice
Day 1
1. Place the strawberries (and any juices that occurred while slicing and hulling them) in a medium sized non-reactive pot and add cold water to just cover the top of the fruit. Place on the stove and turn it up to high heat until boiling and then reduce to low heat, so the water is just simmering. Cover and then let it boil for 1 hour to 1 1/2 hours until the strawberries look brown and start to lose their firmness and shape. The liquid should be syrupy.
2. Line a colander with cheesecloth (or use a fine mesh colander) and place in a larger heatproof bowl. Pour the strawberries and strawberry juice into the colander and then cover with plastic wrap and and refrigerate overnight to let the strawberries drain.
3. While the strawberries are simmering, cut the oranges in half lengthwise. Then place the orange half, flat side down, and slice in half again. Then cut each quarter orange into medium thin slices (we went with about 1/4 inch to 1/8 inch slices). Place the oranges in a nonreactive pot and then pour room temperature water over the oranges to about an inch above the oranges. Place the cover over the pot and let it sit overnight on the counter.
Day 2
4. Place the pot of oranges and water on the stove and turn it up to high heat until boiling and then reduce to medium low heat, so the water is actively simmering. Cook the oranges until they very tender, about 30 to 60 minutes. If the water level gets too low, add a little more water.
5. While the oranges are simmering, take five small metal spoons and place them on a small plate and stick them in the freezer. You’ll need these to test the marmalade. Then rinse and pat dry the rosemary. Take out the strawberries from the fridge and discard the fruit, leaving the drained juice. Strain the strawberry juice though fresh cheesecloth if there are still solid bits in it.
6. Once the oranges are very tender, drain them and place them in a large nonreactive pot with the strawberry juice, sugar and 2 ounces of the lemon juice and stir to combine. Taste to see if you can detect the lemon juice. You want to be able to taste the lemon juice but not have it overpower the marmalade. If you can’t taste it, keep adding more lemon juice until you can. We ended up adding 4 ounces total but your taste may be different than ours.
7. Bring the mixture to a rapid boil and then cook for at least 35 minutes (the book said 35 minutes, but we found it took more than an hour). As the mixture initially cooks you’ll see large bubbles. As the marmalade cooks down the bubbles will start to get smaller and it will start to foam. Don’t stir the marmalade until it starts to foam. Once it starts to foam you can gently stir it with a wooden spoon or heatproof silicon spatula every now and then. As it cooks down more, stir more frequently, increasing the stirring to once a minute or two to keep the bottom of the marmalade from burning. You can also turn down the heat to prevent scorching but, of course, this will make the cooking time longer.
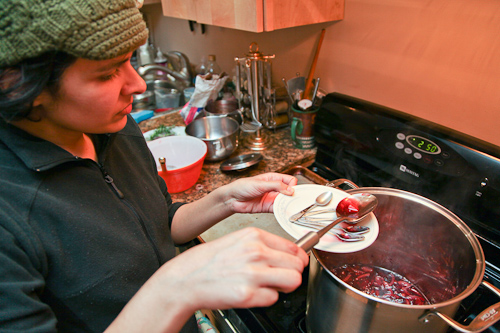
8. Once the marmalade has darken in color and the bubbles are tiny, take a spoon out of the freezer and drop half a teaspoon of the marmalade onto it. Then return it to the freezer for 3 or 4 minutes. Pull it out and feel underneath the spoon. It shouldn’t be warm or cold. If it is too warm, stick it back in the freezer for another minute or two. Once you pull it out and the back of the spoon feels right, tilt the spoon and see if the marmalade is runny. If it is, then you need to cook the marmalade longer. The marmalade shouldn’t be runny and the top layer should have thickened to a jelly like consistency. We found it took over an hour (though the recipe says only 35 minute) and we never did get it to be super runny. But that’s okay. It just meant our marmalade was a little loose, which we were fine with.
9. Once the marmalade reaches the right consistency, turn off the heat but don’t stir it anymore. Take a nonreactive spoon and skim off the foam that may have formed on top of the marmalade. Then throw the rosemary into the marmalade and let it steep in there for about five minutes. You can taste the marmalade and see if you like it as is, or if you need to let the rosemary steep a little bit longer. Keep in mind, when the marmalade is cooler (like right out of the fridge – which is when you’ll probably be using it) the rosemary flavor will be more dull.
10. Once you’re happy with the flavor, pull the rosemary out with clean tongs and then spoon the marmalade into clean sterilized jars and process (instructions are below). Congratulations! You have now spent two days doing what Laura Ingalls Wilder did on Little House on the Prairie. Don’t you feel proud?
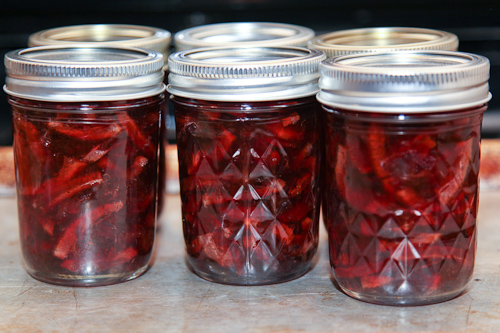
Makes about six or seven 8-ounce jars. Lasts about 1 year on the shelf.
How to Sterilize and Can Preserves
I always thought that sterilizing jars involved boiling jars in water and using sealing wax and involved crazy contraptions like magnet wands and jar grips. But the oven method is what Rachel Saunders uses and what Shila showed me. It’s super easy.
Now Shila had a dishwasher which is awesome in so many ways. First off it means she doesn’t have to do the dishes all the time, like AJ and I do. She can just load up her dishwasher and it does all the work. Secondly she can guarantee that her jars are super clean by just running them through the dishwasher first. If you don’t have a dishwasher, make sure to completely clean your jars by hand in hot soapy water and thoroughly rinse them in the hottest water you tap produces.
Then, after the jars are clean, let them dry on a clean drying rack. Preheat an oven to 250˚ for at least 15 to 20 minutes, or until you are sure the oven is at the proper temperature. If you are unsure about your oven temperature, this is the time to actually invest in those oven themometers you’ve been thinking about getting – they usually will run you about $5 or $10 and trust me, they rock.
Once the oven has preheated, move the jars, without touching the insides of the jars or the top of the jars, and place them right side up on a baking sheet. Also move an equal amount of lids and lid rims to the baking sheet as well (this where that cool magnet wand comes in handy as you don’t have to worry about touching the lids and contaminating them. Or you can just use kitchen tongs or clean gloves I guess, Shila had the cool magnet wand).
Place the baking sheet with the jars and lids and lid rings in the oven and leave them there for at least 30 minutes. Then remove them from the oven, right when you need them and fill them to 1/4 inch from the top. Wipe the rim clean with a damp clean cloth. Place the lids and rings on them and then screw them closed (but not too tight as the lids will contract when they cool and could crack the glass). Then place them back in the oven to seal for 15 more minutes.
Once they have sat in oven for 15 minutes more, pull them out and let them cool to room temperature. You hear a noticeable “ping” as the top of the jars seal shut. This means it worked. If you don’t hear the “ping” that means they haven’t sealed properly. Don’t worry. Just stick this jar in the fridge and use it first. Make sure the jars have sealed after they have cooled by feeling the top of the lid. It should be slightly depressed. If it isn’t and you can press down and pop the lid, then it hasn’t sealed and again you should stick it in the fridge and use it first.
Easy right?
NOTE: A reader commented below that the oven method I described was dangerous and not USDA approved. Often times home ovens are not calibrated to the right temperature (see my note above about getting an oven thermometer) and the jars don’t heat all the way through. Another problem is the glass of the jar is not designed for the dry heat of the oven, especially if they have been used before (ie you’ve been digging into your preserves with a knife, scratching the sides of the glass). Oven heated glass jars can break or (more dangerously) shatter when filling them with hot marmalade/jam.
However, when I checked with the Blue Chair Fruit Company they stated that they only use the oven method for jams and marmalades, which have a high sugar and high acid content making it inhospitable to harmful bacteria. They do not recommend it for any preserves other than jam or marmalade. That said, as it is not recommended by the USDA and there is a danger of the glass shattering due to the dry heat, use the oven method at your own risk.
Jim @ Comfort in Crumbs says
Congratulations on another interview and on marking ‘canning’ off your unfinished business list. I haven’t canned since I was teenager on our farm in Tennessee. There really is no better way to capture the sun and flavor from seasonal fruit. Your marmalade looks gorgeous!
Shawn says
It’s so beautiful! I’ve never canned (being from the south, that’s just sad) but, I’m definitely trying this. The addition of rosemary has me completely intrigued!
tracy says
pretty pretty! I’m taking a class at Blue Chair this month and this marmalade has me even more EXCITED!!! xoxo
Jennifer (Delicieux) says
This looks so delicious! Mmmm blood orange and strawberry…it doesn’t get any better! The rosemary would give it a lovely fragrant twist.
leaf (the indolent cook) says
This looks wonderful – and such a gorgeous flavour combination!
Culinary School: Three Semesters of Life, Learning, and Loss of Blood says
How love marmalade. You can keep your jam – I’ll take marmalade on my toast any day.
Nic@daydreamaboutfood says
I love the orange and strawberry combination. I’ve always gone for the jam sugar option because i’m always petrified that it wont set. Thanks for the recipe.
Jennifer @ Oh Sweet Day! says
I love the idea of the citrus and strawberries in this marmalade- so unique but I can just imagine how lovely it must be!!
Medifast Coupons says
Very nice, we are big blood orange fans, when we see them we buy them, but never thought of doing really anything else with them other than eating. Thanks so much for the recipe, look forward to trying.
Kirsa says
hello there.
I stumbled on your post while looking at foodgawker. I must say if the marmelade does look very good, there is one thing that actually made me come and take 2 minutes to leave a comment.
You advertise that you can use the dishwasher and/or the oven to sterilize the jars for canning. As a regular canner, this part made me go, OMG ! because it is dangerous. Yes, you read it, dangerous.
There is a reason why canners must use the water bath method to sterilize and can: water conducts heat much more efficiently than air. Therefore, if using your oven, or dishwasher, you’re actually heating air, which does not allow for proper temperature acquisition to kill off potentially harmful bacterias. If in doubt, get some info from your government’s food safety dept. Also, popping the jars in the oven can render them brittle: even if intact, at least one of my jars (in my early canning adventures) shattered without warning at the slightest bump. hopefully no one got injured, but it could have been quite a lot of trouble, as the jar was full of scorching marmelade.
please consider this information for canning with sweet or acidic foods. and please for anything outside of that, use a pressure canner (which is the only recognized ways to can non-sweet or non-acidic foods). Botulism is potentially deadly. please think about the people who will be eating it, you – or your family and friends.
Lexie says
@Kirsa… you… you did notice that this post is about making Jam right? Jam being both Sweet and Acidic?
Kirsa says
Yes I have noticed that this is jam. Being acidic and sweet is inhospitable for bacterias and other things alike, but there is still a risk: it depends of the sweetness of the fruit (it changes as the fruit ages and ripens), same for acidic content, it varies. Even if you did everything right, if when you open a jar, you’re unsure (looks weird, smells weird, has some kind of deposit or wathever), don’t take chances and throw it away. Better safe than sorry.
I just had mentionned the bit about using a pressure canner for anything else outside of that because…. because sometimes people get ideas. I’ve seen people try lots of things… and not always the safest kind.
Irvin says
Hi Kirsa. Thanks so much for commenting. I was following the method described in the book Blue Chair Jam Cookbook for the oven method. I have since contacted Blue Chair Fruit Company and they stated that they only recommend the oven method for jams and marmalades as the high sugar and high acid content makes them inhospitable for harmful bacteria.
That said, the oven method is not USDA approved, for the reasons you stated (Shattering glass? Scary!). I have gone ahead and edited my post to let people know the reasons why the oven method is problematic. Thanks so much for giving me the heads up about it!
Kirsa says
USDA, that was the name of the organism I was looking for. I’m not from the states, (actually, Quebec) so it slipped my mind 🙂
The Blue chair Jam cookbook people gave you the right info. I just don’t understand why they would take any chances. It IS inhospitable. tought as I just mentionned to Lexie, fruit is natural and content in acid and sugar changes as the fruit matures and age /ripens.
But I understand why you tried it: it seems easier, it dosen’t require to have a giant pot to sterilize / can, etc. I myself have two books that mentions that way as fine to can…. I tought that bookwriters or editors provided some kind of safe and accurate information… which is what most people assume, and expect, actually. (these are “The River Cottage Preserves Handbook” and “Qu’est-ce qu’on mange ? Volume 5”. They however still offer good info on the water bath.)
Seriously, it dosent really take much more time to do the water bath method. Most jams you set them in only for 10 minutes and sterilizing takes the same amount of time. If you happen to speak / read french (or have a good translator), there is one real good website on canning and preserving, which is http://conserves.blogspot.com/. It’s seriously my go-to reference for any canning recipe: the guy tests everything with lab equipment, and much info is available (including on the three kinds of pressure canner available on the market).
Anyway hope you enjoy your canning experiences, opening one’s own jar is quite the delightful experience 🙂 Drop me a line if there’s anything, I’ll be happy to discuss canning recipes / tips with you 🙂
Joel says
I wish I had read your version of this receipe before I started it two days ago. I don’t think the cookbook mentioned that you needed to drain the oranges before adding the berry juice.
Needless to say it took me well over 4 hours to get any consistency that resembled jam/marmalade texture. Way too much liquid in my batch. Now I want to do it all over again ! Too bad blood oranges are out of season (or at least hard to find) now. I made it with regular oranges and the flavor is still good, just probably not as pretty as the blood oranges would have been.
InPDX says
Wow, such going-on about open kettle. The worst that happens without a water bath is a jar doesn’t seal. Then you stick in in the fridge at eat it first.
Did you get any measurement on the strawberry juice? I’m itching to try this recipe, but it would be good to know how much juice she’s thinking you ought to have at the end of the simmering and straining. I’m guessing you’d want it as concentrated as possible, to keep cooking time down, but I wish I knew a ballpark.