If you’re looking for a simple and easy recipe for how to make gnocchi, check out this two-ingredient homemade gnocchi, complete with step-by-step photos! (Jump directly to the recipe.)
My very first and only other attempt at making homemade gnocchi was an abject miserable failure. I remember distinctly trying to make the potato dumplings in my tiny apartment that I shared with an old boyfriend years ago in St. Louis. I was super proud of the little doughy balls as I rolled and cut them but once I served them up I realized they were somehow both gummy AND hard as a rock. I never bothered to make them again until 15+ years later I found myself in a cooking class at Le Cordon Bleu. For the last day we were to come up with our own menu, using a few specific ingredients that they listed (as well as a variety of other optional ingredients that they had in the school). One of them was potatoes and I knew that I wanted to challenge myself. Thankfully I stumbled onto an easy homemade gnocchi recipe in one of my cookbooks and I knew it was time for me to attempt it again.
Turns out learning how to make gnocchi is pretty darn easy if you know what you are doing. Like ridiculously easy. Like two ingredient easy. In fact, most recipes out there use egg as a binder, but this easy gnocchi recipe makes super fluffy potato dumplings without the egg, which (gasp) means these little puffy pillows of delight are vegan too. What the what?
Even my instructor Chef Dan Fluharty was a little dubious, having always used an egg as a binder in gnocchi. But he said I should go for it and I’m thrilled that I did. The main secret is to bake the potatoes in the oven for a long period of time, which can be rather time consuming but it’s all walk away time, meaning you can do other things while the potatoes bake. Baking the potatoes dry out the potato, which means less moisture to weigh down the potatoes. I was so taken with the homemade gnocchi I found myself making them at home a couple of weeks week for a dinner party I had. My dinner guests were super impressed and nothing makes me happier than when something so easy impresses so much.
I’m sharing recipes and tips I learned from the Le Cordon Bleu Techniques I class all this week. Be sure to come and check them all out!
Homemade Gnocchi, an easy two -ingredient recipe
By Irvin Lin
This recipe, comes from Adam Roberts’ book Secrets of the Best Chefs, an awesome book that had Adam (of the blog The Amateur Gourmet) spending time with chefs in their kitchen learning their secrets. This particular recipe is adapted from Marco Canora of Hearth in New York. He explains that the enemy of light and fluffy gnocchi is too much flour and too much moisture. Baking the potato dries the potato out to remove as much moisture as possible. Sprinkling the flour over the potato lightly means you can control how much goes into the dough. Easy breezy. Even better, this recipe makes a pretty large batch (enough for a generous four main servings or eight side servings) which means you can freeze the gnocchi for a future easy meal if there are leftovers. Instructions on how to freeze the gnocchi is at the bottom of the recipe.
Just barely adapted from a recipe by Marco Canora of Hearth, published in Adam Roberts’ Secrets of the Best Chefs.
Ingredients
6 medium Russet potatoes3 cups of all-purpose flour
extra all-purpose flour or semolina flour to dust
Special Equipment
potato ricer, food mill or box grater
bench scraper (optional)
Directions
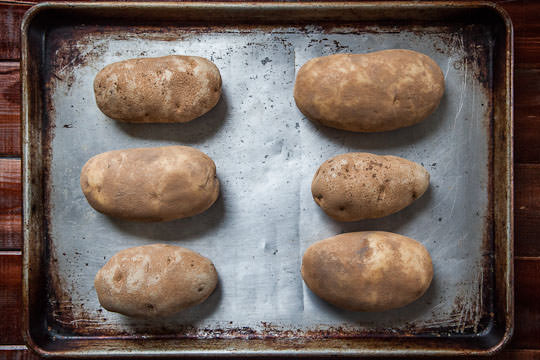
1. Preheat the oven to 350˚F. Take a stiff brush or paper towel and wipe down the potatoes without any water. You just want to brush off any dirt on it. Don’t wash it, as you don’t want to introduce any water onto the potatoes. Prick the potato all the way around with a fork and place on a baking sheet. Stick in the oven for about 1 hour and 30 minutes, or until a knife inserts into a potato easily. You want to err on the overbaking side, so really let the potatoes sit in the oven until they are done.
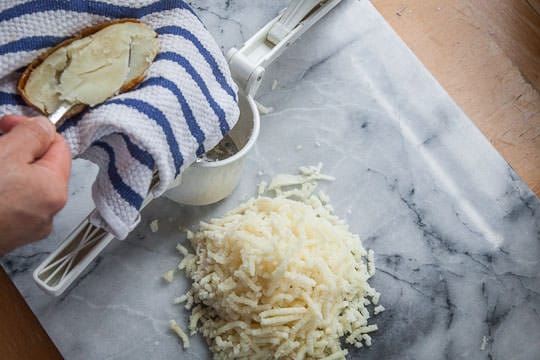
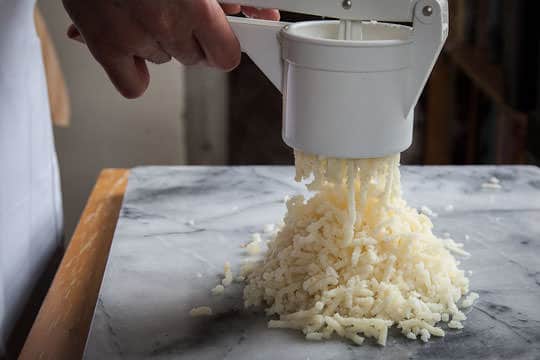
2. The minute the potatoes are done, cut all of them down the middle lengthwise. This will help release even more steam and moisture in the potato. Pick up one half of the potato with a kitchen towel and scoop the flesh of the potato out into a potato ricer (a tool that press the potatoes through small holes, creating gloriously fluffy mashed potatoes) or food mill and process the potato onto a clean surface. If you don’t have ricer or food mill you can also try the method that Smitten Kitchen did by grating the potatoes through a large box grater, but I haven’t tried that method myself but it seems like it would work as well (though it would probably be messier). Either way, you want to get the flesh of the potatoes processed and still fluffy which is what the ricer, food mill or box grater will result in.
3. Once you’ve processed all the potatoes, take a spoon and gently push the potatoes around for a few minutes to cool them down and get them into an even thin layer on the surface. You don’t want to smash or drag the potatoes as that will get them gummy, but you want to sort of cool and dry the potatoes more. Adam says you should do it for 10 minutes and not to be lazy but I’m actually super lazy so I only did for about 5 minutes. I don’t need my gnocchi to be SUPER insanely fluffy, just you know, fluffy enough with a little toothsome bite. But if you want to achieve fluffy nirvana do what he says and move the potatoes around for 10 minutes to release as much moisture as possible.
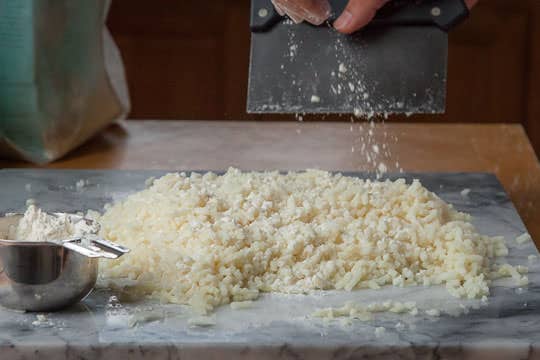
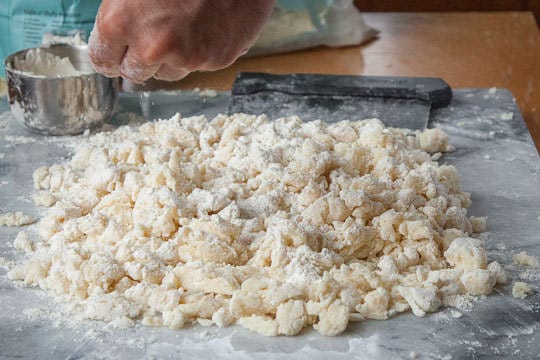
4. Then start sprinkling the top of the potatoes with the flour. Sprinkle about a cup of the flour onto the potato evenly. Using a bench scraper or a large spatula (like the one you would use to flip pancakes) stab downward and cut the flour into the potato. Once most of the flour is absorbed, fold a third of the potato in from the sides then fold another third of the potato from the other side and press lightly. Sprinkle another cup of flour over the potato and stab downward and cut into the dough. You’ll notice that the dough will start to form. Cut as much flour as you can into the dough and then gather the dough into a mound with your hands, pressing together but don’t knead it.
5. Sprinkle about half a cup of the flour over the dough mound and stab and cut the dough to incorporate. At this point it should be harder to incorporate the flour. Fold and press the dough down cutting and folding until the flour is absorbed. Inevitably you’ll find yourself kneading the dough a bit to incorporate the flour. Just keep it to a minimum and realize that once you have to start doing that the dough is pretty much done. The dough should be slightly sticky when done but if it feels too wet, use more flour. Once the dough feels pliable and cohesive but still a bit tacky you’re done. Pat the dough into a large round disk and dust generously with flour all over. Wrap with plastic wrap and let the dough rest at room temperature for 30 minutes.
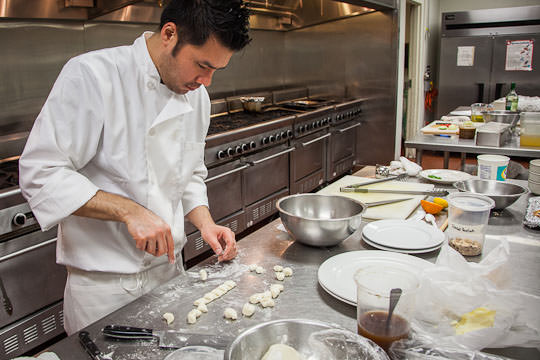
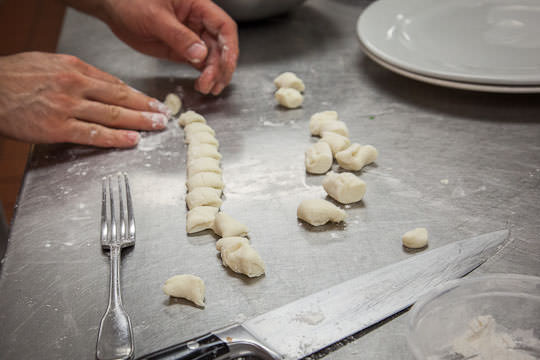
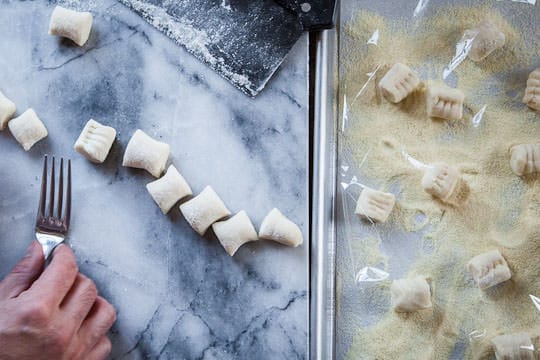
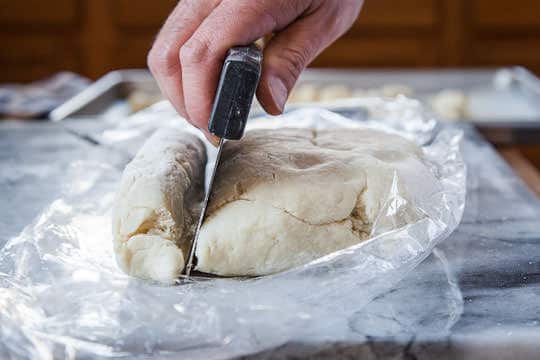
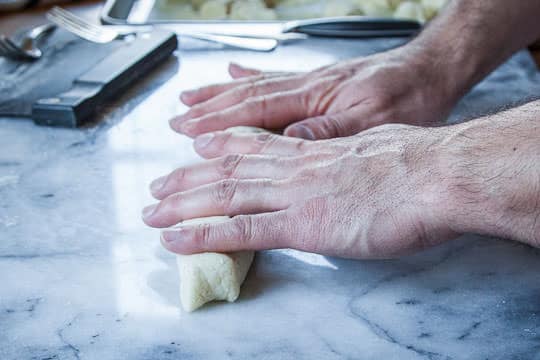
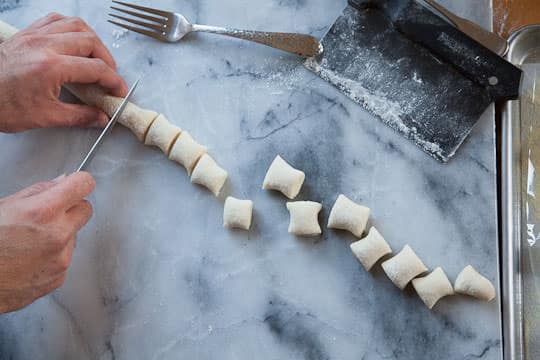
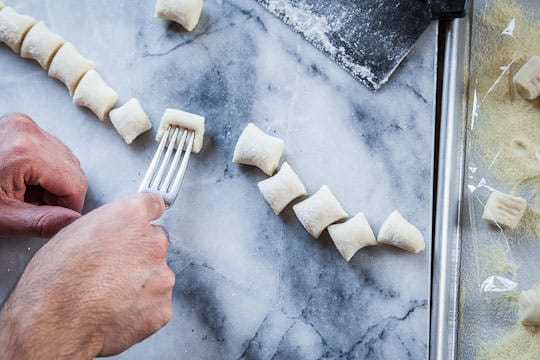
6. Once the dough has rested generously dust a rimmed baking sheet with Semolina flour (if you have it) or all-purpose flour. Unwrap the dough, cut a chunk of the dough off and re-wrap the remaining dough. With the chunk of dough roll it into a rope about 1/2-inch thick. Cut the rope into about 3/4 inch pieces and roll each dumpling with a fork to give them indentions and ridges (this is optional but I did it because it was kind of fun and traditional to do). You might find that the dough doesn’t indent very well, which happened to me. Don’t worry about it too much. Toss the gnocchi dumplings in the dusted baking pan to coat and cover with plastic wrap to keep them form forming a skin. Repeat with the remaining dough.
7. Once you’re ready to cook the gnocchi, boil some water in a large pot with a lot of salt in it. The water should taste salty like the ocean (yeah that sounds like a lot of salt, but remember there’s no salt in the gnocchi). Add the gnocchi once the water is boiling and cook the gnocchi until they starts to float, then cook for an additional minute. Serve immediately with sauce of your choice.
Bonus step
8. If you have made more gnocchi than you can use immediately, freeze the gnocchi by making sure all the dumplings are dusted completely with Semolina or all-purpose flour. Place them in a single layer on a baking sheet and stick them in the freezer uncovered. Once they are frozen, just drop them all into a ziplock bag. You can cook frozen gnocchi directly from the freezer the way you would cook regular fresh gnocchi. It just might take them a minute or two longer to cook.
Makes enough gnocchi for eight side servings or four main servings.
If you like this gnocchi recipe, check out what to do with them! Here are some gnocchi dishes from around the web:
101 Cookbook’s Green Olive Gnocchi Recipe
Taste and Tell’s Baked Gnocchi with Ricotta
Steamy Kitchen’s Pan Fried Pumpkin Gnocchi with Brown Butter Sage
Closet Cooking’s Gnocchi Poutine with Short Rib Ragu
Brokeass Gourmet’s Gnocchi with Pumpkin, Spinach and Goat Cheese



Christine from Cook the Story says
The recipe is amazing and your photography is stellar, Irvin!
Jenni says
No, Irvin. You’re not “lazy.” You’re just “hungry!” =)
This is the same method that the chefs used to make gnocchi at both restaurants I worked at, although they did also drizzle in just a bit of beaten egg yolk. I think those guys learned this from Thomas Keller when they staged at the French Laundry, but I couldn’t swear to it.
I love this no-egg version. Very minimalist and lovely. Thanks for sharing it!
Pat Sayer Fusco says
That’s the same recipe my mother-in-law used. She made them rarely (the family preferred cheese ravioli), usually in the winter around holidays. Wonderful. I love your little tined design, too.
Angie | Big Bear's Wife says
Those look wonderful! I have been terrified to make my own but now I really, REALLY want to give it a try!
Amy @ What Jew Wanna Eat says
Genius! Can’t wait to try this recipe. I won’t tell my friends how easy it is and they’ll all be wowed!
Laura says
No eggs is how my Italian grandmother and mother have made them for years, so you were very traditional…
One tip I learned is to have a little pot of water boiling on the stove to “test” the dough. When I think the dough feels almost right I cook a tester to see whether I need to add a little more flour or the dough holds perfectly. This way I never added too much flour since the water content of potatoes can vary.
Glad you were able to realize how easy it is to make gnocchi.
Belinda @zomppa says
The best is simple. You look like a pro!
Nicole Neverman says
Absolutely fantastic 🙂 I adore gnocchi and homemade is just unbeatable. Looking forward to giving this one a go for myself.
Karen Robertson says
thank you Irvin for a gorgeous post. and I look forward to your other Le Cordon Bleu classes–I am sooo jealous!!!
Laura @ My Friend's Bakery says
I’ve always wanted to try making gnocchi and now I think I will! Thanks for the great pictorial!
Kevin | keviniscooking says
Irvin, I’m taking the plunge myself. I’ve always wanted to try and make these at home. Thanks for inspiring!
Irvin says
Do it! Let me know how they turn out. I love them. I have some in the freezer right now and they make for a really quick meal tossed in pesto.
Kevin | keviniscooking says
Irvin,
These were so much easier to make than I had thought and turned out beautiful. Soft and puffy, too. I added parmesan cheese to the dough as a last minute thought and they were delicious just with some browned butter. It made such a big batch we had it again the other night with a meat sauce and still have some in the freezer for another meal.
Hopefully we will meet someday at a food blogger conference.
Thanks again!
Jocelyn @BruCrew Life says
I love how easy this is to do. Recently I have been all about gnocchi, so I will have to give it a try!
Arthur in the Garden! says
Yummy!
di from the culinary library says
Hi Irvin, thought u might like to try an easier gnocchi recipe (the original version before potatoes were added). I researched them all in 2012 and decided to ditch the potato for ever.
http://www.theculinarylibrary.com/2012/01/ricotta-gnocchi-saffron-cream-sauce-recipe/
Alex says
My dough ended up chewy. I found it really tough to incorporate the flour into the potato without pressing it together. Bummer – was excited about trying this.
rebecca says
I tried this recipe and it worked! Finally. Thank you for your step-by-step, it really turned out beautifully for my daughter’s birthday dinner.