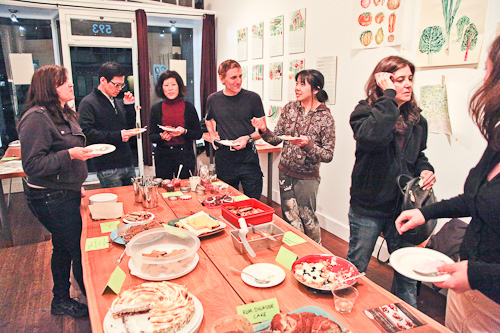
Once a month, the amazing 18 Reasons, a nonprofit community space affiliated with BiRite Market, holds a DIY Dessert evening where they invite people from all over the San Francisco Bay Area to stop by and bring a dessert based on that month’s theme. I’ve been co-hosting the DIY Desserts for the past couple of months and the awesomeness that has occurred there is nothing sort of amazing. This past January’s theme was no different with their New Year’s “Make Something New!” theme where they challenged bakers to bring something they had never made before (good, bad, ugly). I decided it was the chance for me to test out the Professional Baking Book by Wayne Gisslen that I had talked about in on my previous posts. This, of course, was before I had officially declare my Pro Baking Project. But I knew in the back of my head that I wanted to do it. What a better opportunity to start it than for an 18 Reasons event? My resulting product: a Genoise cake with Boysenberry filling and Italian Meringue.
What was completely new to me, wasn’t just using the Professional Baking Book, but also using the baking percentages (I talked about that in my previous post about starting the Pro Baking Project) as well as trying to make a boysenberry filling out of canned boysenberries and pectin, and playing with my kitchen torch, something I’ve only done a few times. Turns out I really like torching thing! I may have to start doing more with meringue because kitchen torches are awesome. Also, have I mentioned how many egg whites I have in my freezer? It’s a little ridiculous.
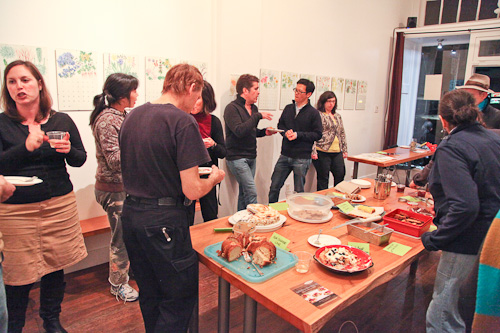
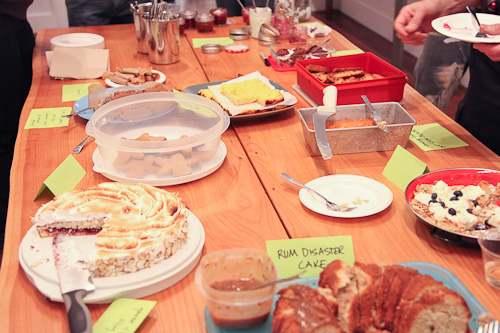
Speaking of ridiculous and awesome, the DIY Dessert evening definitely fit both of those descriptions. I had a chance to sample some ridiculously good desserts as well as meet some awesome people, which is really what the DIY Dessert event is all about. Meeting local bakers and dessert lovers and eating desserts! Don’t you wish you could be there? If you’re in the San Francisco Bay Area you can! It’s the second Wednesday of every month at 18 Reasons.
Take for instance these gluten free crumbles (adapted from a Gluten Free Girl recipe), brought to the event as a test run. The woman was testing them for a final dessert course where the entire meal was served in jars, from appetizer to dessert. I LOVE that!
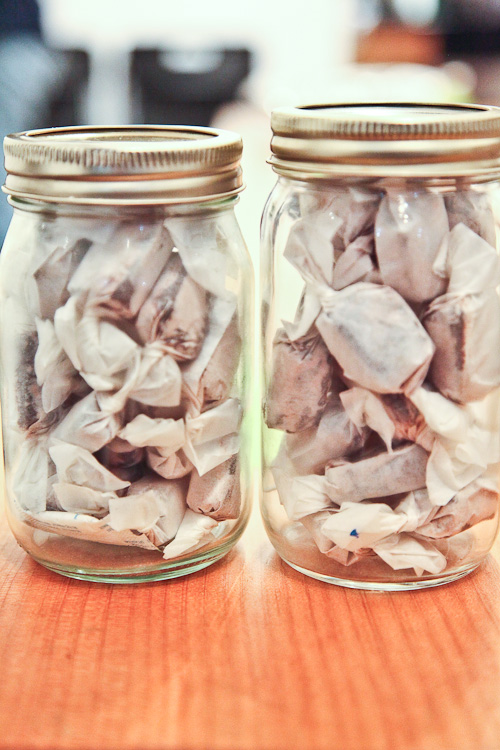
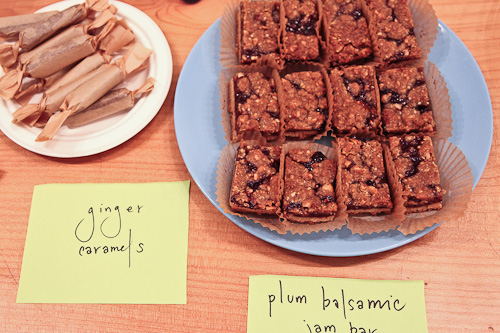
Caramels showed up a couple of times as well. One batch were chocolate caramels, while the other batch were a ginger palm sugar caramel that had a great depth of flavor. I totally snagged a few of both at the end of the night to munch on at home.
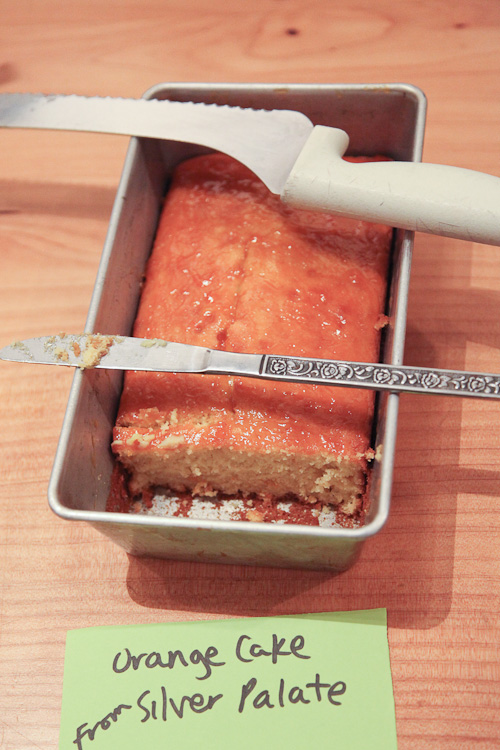
Barbara Koh, who I met at the last DIY event, showed up with an orange cake from Silver Palate that was citrus delicious. I personally LOVE everything I’ve made from the Julee Rosso and Sheila Lukins classic cookbooks series, so I was pleased to see it and even more pleased to take a slice.
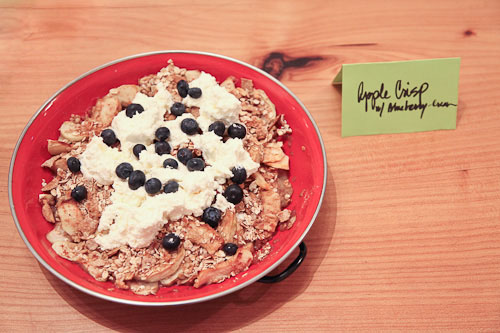
There was an apple crisp with blueberry & sweetened whipped cream on top which totally rocked my socks. I love fruit desserts and this one was a winner all the way around.
These gingerbread cookies with and without orange glaze made me yearn for a glass of milk (but 18 Reasons only had wine on hand). The man who brought them had just graduated from Tante Marie’s Culinary School, where he had only wonderful things to say about the pastry program. Oh if only I had the money and time to go to culinary school!
Tart sweet lemon shaker bars, and tangy plum balsamic jam bars were a great treat to munch on, while whoopies pies totally brought back childhood nostalgic memories. Well, someone’s childhood nostalgic memory, as my childhood memory was of red bean paste desserts and pineapple cakes, but you know what I mean. There’s something whimsical about whoopie pies, even if you didn’t grow up with them.
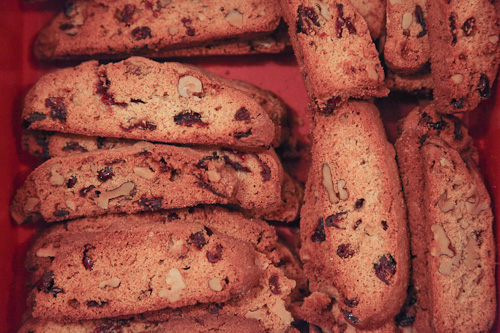
Also impressive were cranberry walnut biscotti. I’ve always wanted to make biscotti but sadly I have never gotten around to it. One of these days I guess. One of these days.
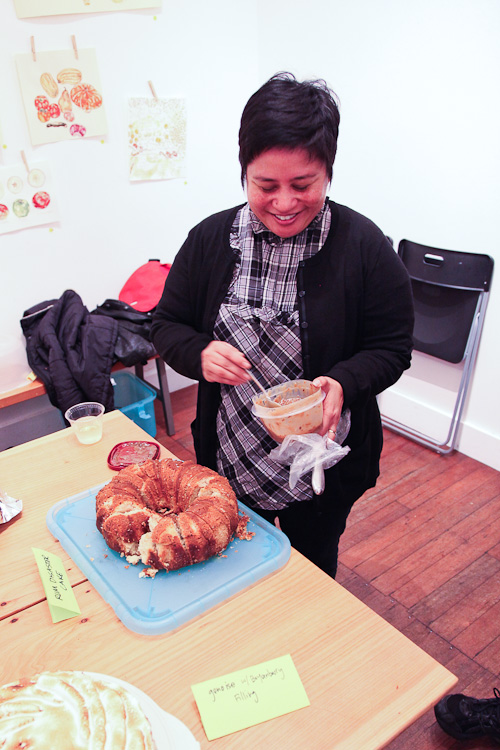
And then there’s Suzie Racho of KQED who showed up with a David Lebovitz‘ Rum Cake which she dubbed “Rum Disaster Cake” because she had a problem unmolding the cake from the pan. I LOVED that she showed up with a cake full of personality, named it the “Rum Disaster Cake” and owned up the fact that not every cake looks perfect. What matters most is how it tastes, and this cake was a winner. Moist and wonderful with tropical coconut and boozy rum flavors married together for an awesome dessert delight.
DIY Desserts is now moving to a new night, the second Wednesday of every month. The upcoming DIY Dessert will be Wednesday, February 9, from 7pm to 9pm. It’s totally a drop in event, so swing by if you can, no reservation required. February’s theme is CHOCOLATE! Bring a dessert that highlight chocolate, basic and simple or fancy schmancy deluxe! $10 for chocolate lovers who are just eating and a sliding scale of $1-$10 for those bringing desserts. Oh yeah, and wine included too! I hope to see you there. I haven’t a clue what I’m going to make yet, but most likely it’ll be decadent. Isn’t that what chocolate is all about?
Genoise Cake with Boysenberry Filling and Italian Meringue
This recipe is adapted from Professional Baking by Wayne Gisslen
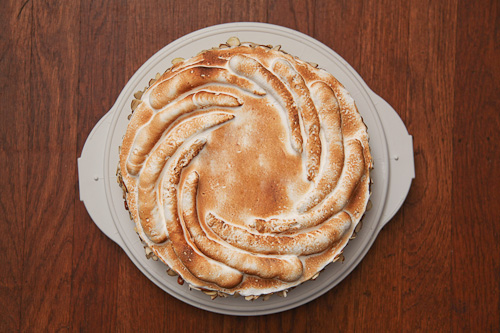
I apologize for all those people who don’t have scales, but when I made this recipe, I was using baking percentages and a scale and I was in a bit of a rush trying to get to the event. I’ve listed the recipe as I made it, and have provided estimated volume measures to accompany it, but it may not be 100% accurate.
Genoise Cake
6 eggs (300g)
1 cup (200 g) white granulated sugar
pinch of salt
pinch of cream of tartar
1 1/2 teaspoon of vanilla
1 1/2 cups (200 g) Cake Flour
5 tablespoons (66 g) unsalted butter, melted
1. Preheat the oven to 350˚F and spray the sides and bottom of a 10” springform pan with a neutral flavored cooking oil. Fit the bottom of the pan with a piece of parchment paper round. Place the pan in the center of a baking sheet for easy removal to and from the oven.
2. Bring a large pot filled 1/3 up with water to a boil. Turn off heat after it’s reached a rapid boil.
3. Place the eggs, sugar, pinch of salt and cream of tartar in the standing mixer bowl. Set the bowl over the hot water to create a hot water bath. Rapid stir the eggs and sugar together with a wire balloon whisk until it reaches 110˚F. Since a genoise cake doesn’t have any chemical leavening (no baking soda or baking powder) the only way it rises is through whipping air into the eggs. Warming the eggs to this temperature will help achieve higher volume.
4. Once the eggs have warmed, moved the mixing bowl to the standing mixer and, using the wire attachment, beat the eggs on medium high until the batter is light in color and thick in consistency, about six to eight minutes. Then beat in the vanilla extract until incorporated. Remove from the standing mixer.
5. Sift the 1/3 of the cake flour into the batter and using a large spatula, fold the cake flour into the batter, being careful not to deflate the foam. Sift another 1/3 of the flour and repeat. Repeat with the final 1/3 of the flour.
6. Carefully pour the melted butter into the batter, and fold with a large spatula. You want to make sure to incorporate all the butter but don’t overmix as it might toughen the cake.
7. Pour the batter into the prepared pan and bake for 25-30 minutes or until a toothpick inserted in the middle of the cake comes out clean. Let cool in the pan until it’s at room temperature.
Boysenberry Filling
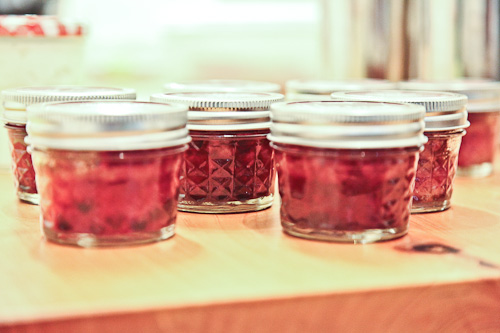
Since boysenberries aren’t in season, I used a can of Oregon Fruit Products boysenberries in heavy syrup. Full disclosure, I met a representative for the Oregon Fruit Products at BlogHer Food back in October and she sent me some samples to play with in my baking. I used their product for my other Professional Baking dessert (the sweet cherry mouse entremet) and it worked pretty well in this recipe as well.
This recipe make more filling than you need, but you can always use the leftover filling on top of toast or a bagel which is what AJ and I did.
1/4 cup (60 g) boysenberry juice from the can
3/4 cup (150 g) white sugar
1 cup (250 g) canned boysenberries, drained with juices reserved
2 tablespoons (25 g) light corn syrup
20 g of pectin (this may vary as to what type of pectin you use – I used Pomona Pectin which required me to add calcium solution as well to it and it really solidified, I probably used too much, but I just thinned the filling with the reserved juices until it was spreadable)
1. In a medium saucepan, bring the boysenberry juice and sugar to a boil so the sugar is dissolved. You are using very little juice and sugar so this will happen fast.
2. Add boysenberries and the corn syrup to the pan and simmer until the boysenberries start to break down and it has thickened. Feel free to use a wooden spoon or heat proof spatula to stir and mash the boysenberries to speed things up.
3. Add the pectin to the boysenberry in the pan and simmer for three minutes until the filling has thickened. Remove from heat and let cool. If the filling is too thick as it cools, thin it with the reserve boysenberry juice. Make sure to leave at least 1/2 cup of the reserved boysenberry juice for the assembly though. If the filling is still too thick and you don’t have enough juice, you can thin it down with water or apple juice.
Italian Meringue
You will have leftover meringue as well with this recipe. I always like to have extra leftover in case something goes awry, but feel free to scale the recipe down. Half the amount of the recipe is probably plenty, but this is what I ended up making, plus I have way too many egg whites and I’m trying to use them up.
2 1/2 cups (500 g) white sugar
1/2 cup (125 ml) water
7 (250 g) egg whites from a large egg
pinch of salt
pinch of cream of tartar
1. In a medium saucepan bring the sugar and the water to a boil. Cook the syrup on medium heat until it reaches the soft ball stage (240˚F).
2. In the meanwhile, as the sugar boils, place the egg whites, pinch of salt and cream of tartar in a standing mixer bowl, fitted with a wire whisk. Beat the egg whites on medium high until they form soft peaks.
3. Once the syrup is at the right temperature, slowly beat the hot syrup into the egg whites in a thin steady stream as the mixer is turned to medium high.
4. Continue to beat until you have added all the hot syrup. Then beat the meringue until the bowl is cool to the touch and the meringue has formed firm peaks.
Assembling the cake
1/2 cup reserved boysenberry juice
2 tablespoons of cointreau, triple sec or grand marnier
1/2 cup of sliced almonds
1. Stir the reserved boysenberry juice with the liqueur of your choice.
1. Remove the cake from the springform pan and flip the cake upside down onto the serving platter. Remove the bottom part of the pan and peel the parchment paper away from the cake carefully.
2. Taking eight toothpicks, place the toothpicks on the side of the cake, halfway up, all the way around the cake. Split the cake horizontally with a large serrated knife, using the toothpicks as a guide to make the layers even. Using a thin cutting board, lift one layer of the cake up and move it to the side.
3. Brush the bottom layer of the cake with half (1/4 cup) of the boysenberry/liqueur mixture. Then spread a thin layer of the boysenberry filling on top. You will have leftover filling.
4. Gently place the second layer of cake back on top of the filling. Brush the top of this layer with the rest of the boysenberry/liqueur mixture.
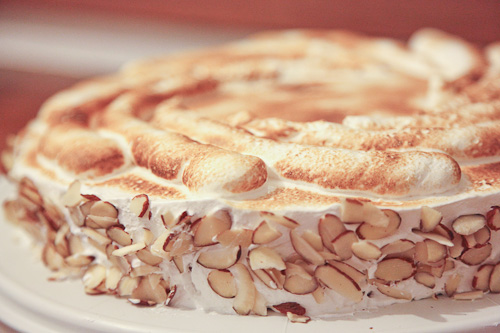
5. With an offset spatula, frost the cake with the Italian meringue. Press the almond slivers on the side of the cake. Pipe decorative swirls of meringue on top of the cake if you want to get all fancy schmancy like I did.
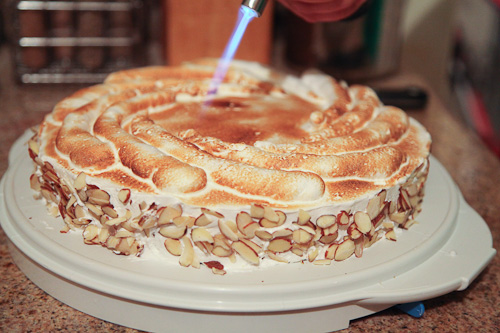
6. Take a kitchen torch and brown the meringue. Take to a gathering of your choice and impress everyone with your accomplishments.
Note. I realize there are a lot of components to this cake. You can easily make the boysenberry filling the day before, or skip making the boysenberry filling and using a decent quality jam or preserve of your choice.



Rachelino says
Merci for putting weights in your recipes. 🙂
Irvin says
Of course! I LOVE baking by weight. It’s not only more exact but it means I have less things to wash!
Christina says
Thanks for sharing your lovely photos and your delicious recipe! I’m so glad we met @ the dessert swap, so that I can now follow your blog and baking adventures on a regular basis! Can’t wait for your next post! 🙂
Irvin says
Yay! It was awesome to meet you too. I hope to see you on Wednesday. If not perhaps the next DIY dessert event. Thanks for checking out my blog!
Sabrina Modelle says
Wow, this is too beautiful. It reminds me of my grandmother’s meringues. Now, this is the biggest compliment I can possibly pay to anyone ever because she and her sister made the most beautiful meringues ever. And aside from the prettiness, it just looks super yummy too.
Love it
Sabrina
Irvin says
Thank you! That is a compliment! Anytime my desserts remind someone of a fond memory is a HUGE compliment!
And everyone seemed to think it was super yummy. I only had a quarter left at the end of the event…
Lil @ sweetsbysillianah says
your cake looks amazing! i think i may have to move to SF just to participate in this event… and try all those yummy desserts! i already have family/friends in SF/Bay area… hmm…
Irvin says
The event is open to everyone, so just coordinate a visit to see family and friends and make sure you’re here in San Francisco on the second Wednesday of the month! Or just move here. 😉
Erika says
Egg whites and kitchen torch? I have two words for you: Baked Alaska!
You know you want to make one…
Irvin says
I like how you think. I’m totally going to put that on my list of things to make. I’ve actually never made a Baked Alaska! Perhaps when the summertime rolls around and I’m making ice cream…
That said, I’ve been going through the egg whites a pretty good rate. I think discovering swiss meringue buttercream was a blessing. Though not for my waistline.
Faith says
What a beautiful dessert! I feel like its a great alternative to something chocolatey for Valentine’s day and sexy to boot!
Irvin says
Thank you! It was super fun thing to make! Torching meringue is always fun!
And yes, it would make a great Valentine’s Day dessert!
Allison says
What?!?! You’ve never made biscotti? Try Dorie Greenspan’s recipe from Baking From My Home To Yours – I’ve made it several times, and everyone for whom I’ve made it loves it. Now I always have to have an extra bottle or two of almond extract in the house for just that reason, because I was going through it so quickly for a while. It’s also great if you substitute the almonds and almond extract with different nuts and extracts – for example, I did one with pecans and orange extract (and dipped it in dark chocolate) and it was very well received. 🙂
Irvin says
Oh, well you can’t go wrong with Dorie Greenspan! She’s amazing.
I think the reason I’ve never done biscotti is the double bake time. It just seems so fussy to me. You bake it as a loaf once, then bake it again. Of course, this is coming from someone who bakes quick batter breads like banana bread or pumpkin bread specifically to make bread pudding. Go figure.
When I get around to making biscotti though, I know what recipe I’m using! I, strangely, have two bottle of almond extract on my shelf and I rarely use almond extract. Now I know what I can use them for! Thanks for the recommendation!
Erin Johansen says
WOW Irvin, this is sooooo beautiful! I want to come to this event and it is a short drive from Sacramento where I live. Thanks so much for showing everyone what a versatile ingredient canned fruit is! We are on the same wavelength with the Italian Merengue and torch! I made mini blueberry lemon merengue tarts using Italian Merengue and just bought myself a torch for that project as well. SO FUN! Check it out at blog.oregonfruit.com if you like!
Susan says
Irvin, you are killing me. I adore meringue, and boysenberries are one of my favorite fruits. That Oregon Fruit stuff is really quite good. When you open the can the product usually looks ghastly, but once you have incorporated it into the recipe everything looks fine, and the flavor is great. It’s a wonderful substitute when fresh isn’t available, or the fresh available isn’t ripe. Their recipes are good too. (Full disclosure; I have not been paid to promote this line, more’s the pity.) About almond extract; try using bitter almond oil instead, just a drop or two is extremely potent, and far superior to any extract I have ever used. Bitter almond oil is a bit costly, but I’ve been using the same bottle for over 15 years, believe it or not, and it is still going strong (and I am very picky about full flavor). That torch business looks like great fun. I picked one up a few years ago but have never used it, which is puzzling, because I do enjoy playing with fire. Anyway, I am dying for a bite of your beautiful and sophisticated Boysenberry Meringue Cake. All of the local stores here carry the Oregon Fruit cans, but they don’t offer boysenberry (the Midwest is something of a hell hole as far as fruit goes). Target carries a boysenberry preserve, so I guess that could substitute. Thanks for sharing the recipe!
ashok says
Guys, Thanks For sharing this Great Recipe. My Family Loved it. I am definitely sharing this recipe and this website with my friend. Hope they also love it. Thank you again for sharing such a great recipe.
4Graces says
I came to this site because I wanted to know how to make the boysenberry cake filling. Years ago, there was a bakery here called THE GOODIE SHOP and they made a dessert called THE DREAM CAKE. It was a chocolate cake with the two layers split and spread with wonderful fruit sauce, and boysenberry was one of them. The best cake I ever ate; however, it was a family business and now is no more. I have never found that cake anywhere else which is a bloomin’ shame. I don’t really remember the frosting. I think it was like a chocolate whipped cream and was also one of the fillings.
Isn’t your meringue a boiled frosting? My grandma used to frost her white cakes with it…and she had to do everything by hand…no stand mixers in those days. Thank you for the recipes.