If you love the classic Hostess™ Cupcake treats, you’ll love this homemade chocolate marshmallow cake, with step-by-step instructions on how to make it! (Jump directly to the recipe.)
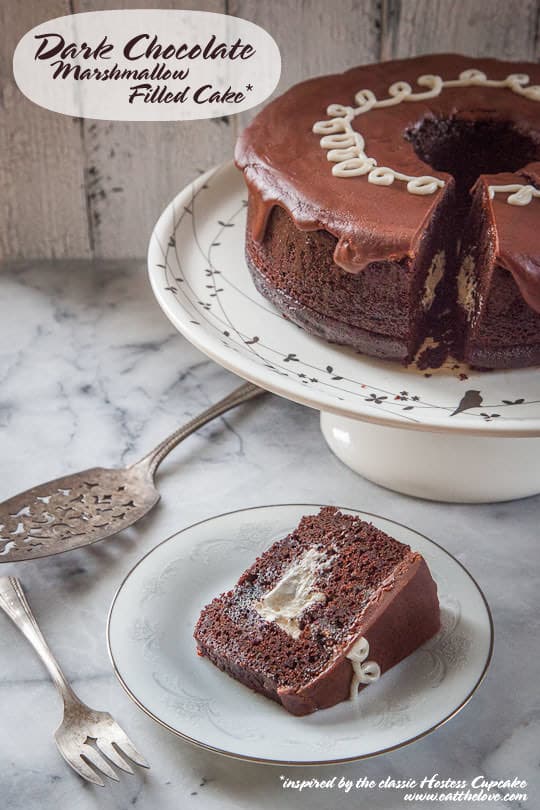
There’s a reason why you don’t see me making cute little cakes and precious little treats here on the blog. I like to pretend it’s because I’m super sophisticated and eschew the trappings of a delightfully dainty decorated pie. But really it’s because I’m a bit of a klutz in the kitchen with very little hand-eye coordination. I have traumatizing memories of junior high gym where I was forced, in front of the class, to free-throw basketballs in my oversized shorts. It did not end well. Thus it comes as no surprise that when I went to make a big chocolate marshmallow cake cake inspired by the old-school Hostess™ cupcake (you know, the ones with the squiggly white doodle on top) I failed miserably at making it look adorable. Instead I got something that looks like a monkey did it; a not very coordinated monkey at that.
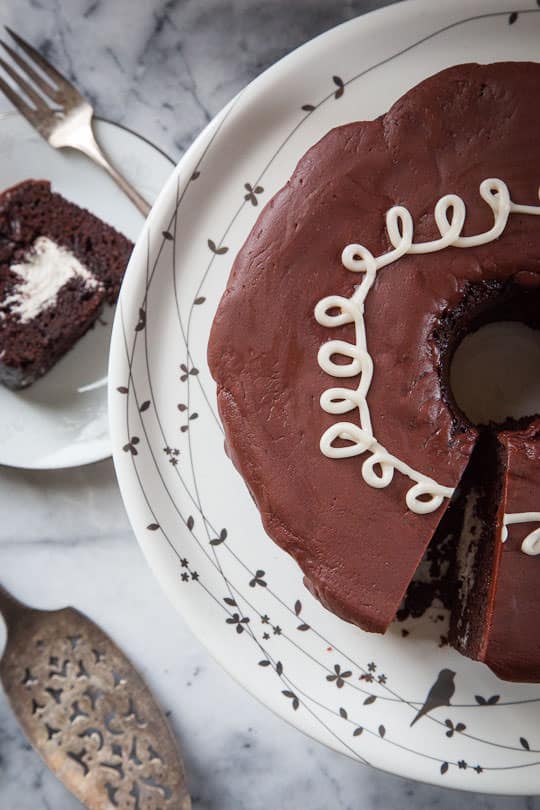
Of course my friend Shauna, of the fabulously blog Piece of Cake, told me she thought it looked rather charming. Or, to be exact, “Kind of vintage adorable” was what she texted to me, after I messaged her a pic of my cake fail. Throw a 50s style housedress on me and some horn-rimmed glasses and all of sudden the cake makes sense I guess. Oh to be a vintage drag queen…I’d lounge about the house, drinking martinis and whipping up cakes just like this, all charmingly quirky and delectably darling.
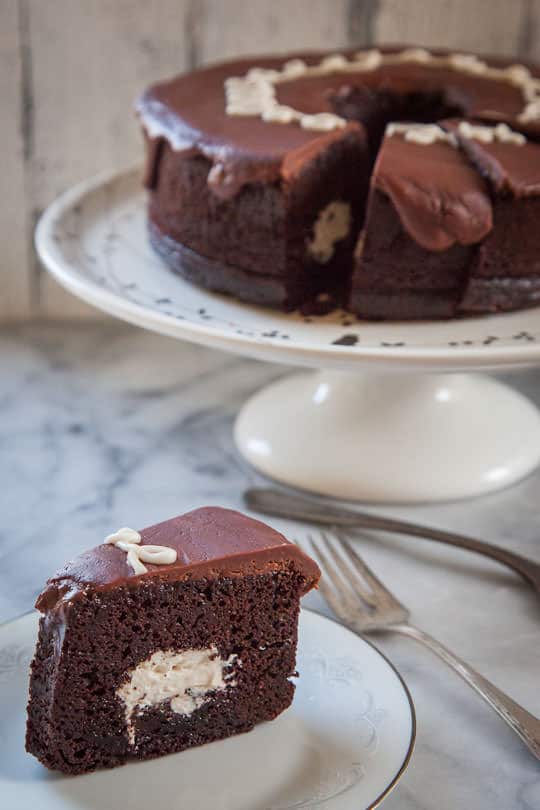
But since I loathe the idea shaving my legs and I doubt I could pull off horn-rimmed glasses, I’ll stick with my jeans and argyle sweater vests. And once I sliced into this cake, with the bouncy happy marshmallow filling, it didn’t look that bad. In fact, it looked kind of cute. And when I asked AJ if it reminded him of a Hostess™ cupcake he shook his head and said “No, this is WAY better than any plastic wrapped cupcake from the grocery store.” Now that feels like jump shot swish to me.
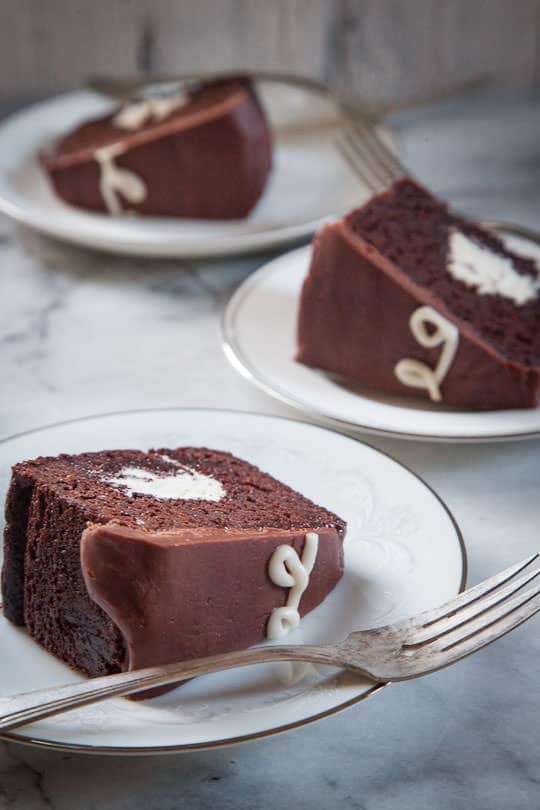
Chocolate Marshmallow Cake, inspired by the Hostess™ Cupcake
By Irvin Lin
Inspired by the classic grocery store devil’s food cupcake with the chocolate frosting made by Hostess™, this cake is sure to impress everyone that slices into it. Filling the cake isn’t hard, though you do have to let the cake cool completely before you fill it (about three hours or overnight) so keep that mind when you are making the cake. I have included step-by-step instructions (complete with photos) to help you with the filling and decorating so don’t panic about doing that (it’s easier than it looks). And though I usually make everything from scratch, including my own marshmallow cream, this time I “cheated” and bought a tub of cream from the store for convenience (plus, you know, it was on sale). Sometimes you just have to pick and choose your battles.
Heavily adapted from a Martha Stewart Cupcake recipe, a Shauna Sever’s Pure Vanilla recipe and Casey Barber’s Classic Snacks Made from Scratch recipe.
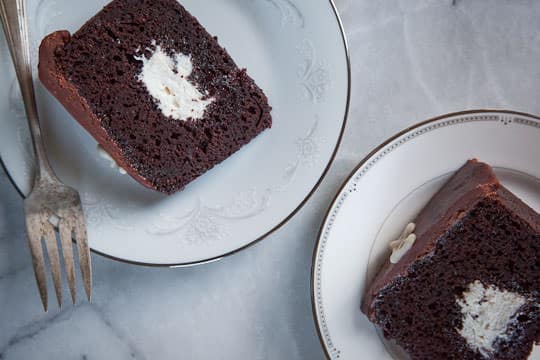
Ingredients
Cake Batter
2 cups (280 g) all-purpose flour
1 cup (100 g) Dutch-processed cocoa powder
1 1/2 cups (300 g) white granulated sugar
1/2 cup (110 g) dark brown sugar
1 3/4 teaspoon baking powder
1 teaspoon baking soda
1 teaspoon sea salt
3 large eggs
1 cup buttermilk
1/4 cup canola oil
1 cup boiling water
1 tablespoon instant coffee
2 teaspoon vanilla extract
Filling
1/2 cup (115 g or 1 stick) salted butter, at room temperature
2 teaspoon vanilla extract or vanilla paste
7 oz (1 tub) store-bought marshmallow cream
Frosting
2 cups (230 g) powered sugar, sifted
2 teaspoon light corn syrup
1 teaspoon vanilla extract
1/4 cup whole milk
3 oz dark bittersweet chocolate (~60% cacao preferred)
White Squiggle Icing
1 cup (115 g) powdered sugar, sifted
2 teaspoon whole milk
2 teaspoon light corn syrup
Special Equipment
Tube pan
Sharp serrated knife
Quart freezer Ziplok bag
Directions
1. Preheat the oven to 350˚F. Spray cooking oil all over the sides, bottom and center of a tube pan with a removable bottom (the kind you would use for an angel food cake). Place on a rimmed baking sheet.
2. Place the flour, cocoa powder, sugars, baking powder, baking soda and salt in a large bowl. Using a balloon whisk, vigorously stir until the dry ingredients are uniform in color and fully blended. Place the eggs, buttermilk and oil in another bowl and beat together with a fork. In a glass measuring cup place the water, coffee and vanilla extract together and beat with a fork. Make a “well” in the middle of the dry ingredients (like you would in the middle of a pile of mashed potatoes for the gravy) and pour the buttermilk into the center. Add the hot coffee mixture as well. Fold together until the cake batter forms. Pour into the prepared baking pan (it should only come up to about 1/3 the sides of the pan). Place in the oven and bake for 50-55 minutes or until a toothpick inserted in the middle of the cake comes out clean.
3. Let the cake cool in the pan for at least 3 hours or overnight (this would be the perfect time to remove the butter from the fridge and allow it to come to room temperature). When the cake has cooled, make the marshmallow filling by placing the butter and vanilla in the bowl of a stand mixer fitted with the paddle attachment. Beat the butter until the vanilla is incorporated, it becomes creamy and sticks to the side of the bowl. Add the marshmallow cream and beat until well blended.
4. Assemble the cake by first remove the cake from the pan and place it with the rounded side up (the way the cake baked in the pan). Cut a 2-inch by 1-inch rectangle about 2/3rds deep in the middle of one of the sides of cake, following the curve the of the cake. Using the knife lift the rectangle out from the cake. If not enough cake is pulled out, just use the knife to cut and scrape some of it out. You don’t want to cut all the way to the bottom, just about 2/3rds deep. Repeat around the cake, placing the cake pieces right next to where you cut, so you can put them back when the time comes. When you’ve gone all the way around the cake, creating a “moat” or “tunnel” in the cake, spoon in the marshmallow filling about halfway up the carved out center.
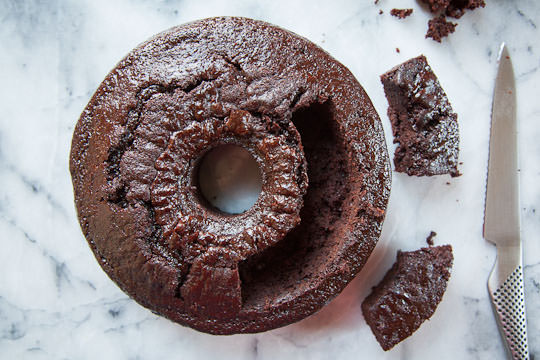
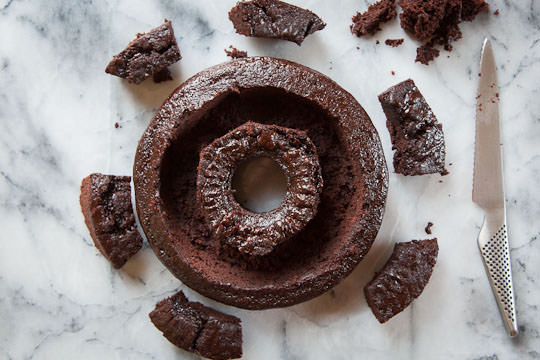
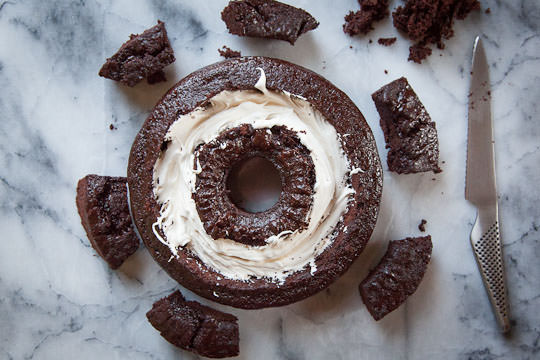
5. Turn the pieces of cake you cut out sideways and cut about 1/2 off of rough side of the cake (the inside part). Use the outside part to “plug” back the cake by placing it over the marshmallow filling. Repeat around the cake until all the cake pieces are placed back. Nibble on the inside cake pieces if you wish (I did).
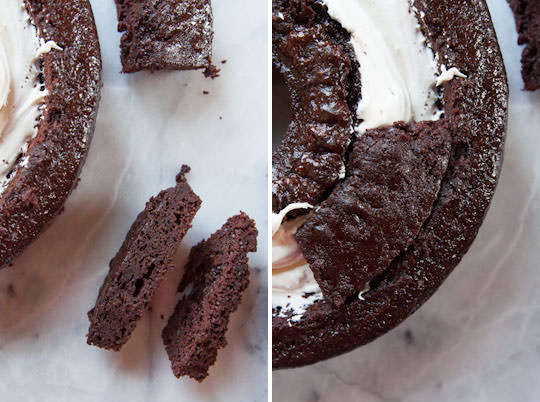
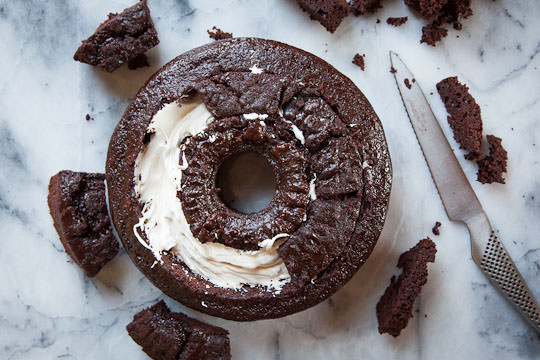
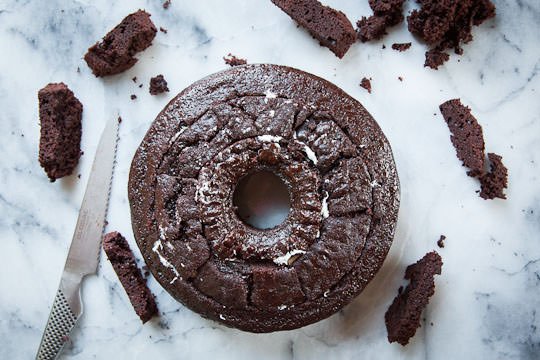
6. Turn the cake over, with the “flat” side of the cake on top and the “plugged” rounded side down, and place on a cake stand or serving plate. Make the chocolate frosting by placing the powdered sugar, corn syrup, vanilla and whole milk in a medium pan. Cook on medium heat, stirring constantly, until the sugar dissolves and the frosting starts to bubble on the sides of the pan. Reduce the heat to low and add the chocolate, stirring until the frosting is smooth. Now quickly spoon the warm frosting over the cake. The frosting is a bit finicky and starts to crust immediately as it cools. If this becomes a problem, spoon as much as you can, getting it where you want it, then wet your fingers and smooth out the frosting with the water on your fingers. I did this a few times, running to the faucet to wet my fingers and smoothing the frosting.
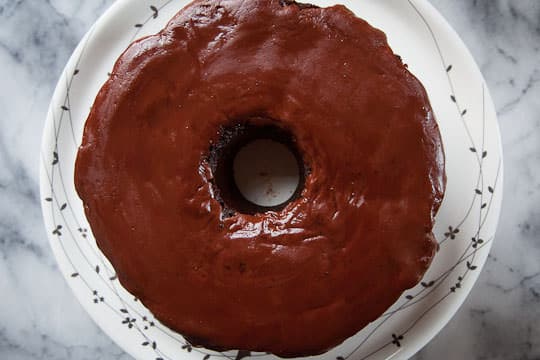
7. Make the white squiggle icing by mixing all the ingredients together to form a thick paste. Scrape it into a Ziplok bag (be sure to use a freezer bag as the thinner plastic in the sandwich bags don’t work as well) and seal it. Clip the tiniest corner of the bag and then squeeze little squiggly doodle curly-cues over the top of the cake. There’s plenty of white icing, so if you want to you can practice on a piece of paper first to get the feel of it. Or just go for that vintage adorable look and go at it with out practice like I did.

Makes 1 cake, serves 12 people.
If you like this chocolate marshmallow cake recipe inspired by the Hostess™ Cupcake, try my other chocolate cake recipes:
Marble Cake with Meyer Lemon and Chocolate
Chocolate Cake & Jealousy
Chocolate Cupcake Cones (with a cherry on top!)
Chocolate Rolled Cake with Pistachios and Brown Sugar Buttercream
Molten Chocolate Lava Cake
If you like marshmallows, check out some of my other homemade marshmallow recipes:
Carrot Cake Marshmallows
Red Velvet S’mores with Cream Cheese Marshmallows
Strawberry Marshmallows which are used in my Peanut Butter S’More with Strawberry Marshmallows & Bacon Peanut Brittle
And check out some of these awesome chocolate cake recipes from around the web:
101 Cookbook’s No Bake Chocolate Cake
David Lebovitz’ Chocolate Idiot Cake (gluten free)
Shutterbean’s Earl Grey Chocolate Cake
Gimme Some Oven’s Guinness Chocolate Cake with Cream Cheese Frosting
Sweetapolita’s Six Layer Dark Chocolate and Strawberry Buttercream Cake
The Suzzzz says
I just had left over chocolate cake for breakfast, it didn’t look nearly as cute as yours. I think this is the one and only time reading your posts before 8am hasn’t made me hungry…but it does make me want to try this recipe.
Katrina @ Warm Vanilla Sugar says
The filling in this is unreal! LOVE this!
Belinda @zomppa says
You’re a bad, bad, bad man who I adore almost as much as I adore this bad, bad, bad cake.
merry jennifer says
What a beautiful cake, Irvin. I love the creativity that went into it.
Lauren at Keep It Sweet says
Your step-by-step filling pictures make it looks so much easier than I would have expected. Love this!
Jennie @themessybakerblog says
Now I have this image of you wearing horn-rimmed glasses and an argyle sweater. The marshmellow cream would have reluctantly made it into the innards of this cake if I were making it. It’s hard to resist sweet cream. Your cake is gorgeous.
Maggie @ A Bitchin' Kitchen says
I think your coordination is better than you think, because this is adorable! I love homemade versions of childhood faves!
Pat says
I would love to throw a vintage housedress on you — and you could wear tights, if necessary. This is a great post; I love the idea. Moon Pies next?
tracy says
kinda freaking out over this one!! YOU ARE A GENIUS.
Miss Kim @ behgopa says
I’ve been having a sweet tooth since last night. This looks fabulous! I wish I could have some right now with my coffee. All of your creations that I’ve seen so far look beautiful. I find it hard to imagine that you made something that looked like a monkey did it lol.
Aimee @ Simple Bites says
Okay, I’ve never had a Hostess Cupcake, but after seeing your cake, I can ONLY go for the homemade version now. 😉 Looks amazing!
Averie @ Averie Cooks says
Such a genius cake! Love all the step shots and what I wouldn’t give for a bite! pinned
Helen @ Scrummy Lane says
Oh wow! So impressive! It’s chocolate surprise cake!
Sarah @ Sarah Cooks the Books says
Wow. That’s SO COOL! I’d like to try this with different colored creams on the inside. Could make for a really happy cake!
Liren says
Slam dunk, indeed, Irvin – this cake looks fantastic! Baking beats high school gym class ANY day. I shudder at some of the memories!
Shauna says
Huzzah! Nailed it. xxoo
Toni | Boulder Locavore says
Aren’t you the most clever baker?! This looks fantastic and everyone will love the surprise in the middle. Beautifully done my friend.
Nice and Clean Camden says
This looks absolutely delicious! And so creative! Pinning it for later!
Brian @ A Thought For Food says
Danger. Danger. Danger. I’m not even a Hostess cake fan but I wouldn’t think for a second before digging into this gorgeous cake. I like how perfectly you nailed that squiggly icing (and that it’s called squiggly icing :-)).
Jocelyn @BruCrew Life says
Whatever! It looks amazing!!! I wish there was a slice of it here with my coffee! Love the step by step shots of putting the filling in! Genius!
Lauren says
This cake is GENIUS! My kids (not not mention my husband) will go crazy for this cake with the surprise inside!!
Kim Beaulieu says
This has to happen in my kitchen stat. This is such a cool idea. A nice little surprise inside. My daughter would go nuts for this.
Kayla says
My husband loves the Hostess cupcakes so I made this for his birthday. It was Delicious! Everyone who took a bite had something good to say about it. At first I was intimidated by it, but your instructions made it very easy. Thanks for an even better version of a favorite!
nell says
I made this cake for my husband’s workplace. It came out beautifully.
The only changes I made were to use half cake flour, to use 1/2 cup oil instead of 1/4 cup and to use half crème fraiche and half single cream instead of buttermilk because I didn’t have any buttermilk (it is hard to come by here in the UK). So I made it a bit richer. Definitely not a mistake! Though I’m sure it would have been fine as is too.
I am very impressed both by your concept and your execution of the concept! My effort was a bit messier on the bottom – but hey, who cares? I’m now going to try this method on that ‘Hostess Twinkie Bundt Cake’ recipe floating around on the internet. You know what they say, practice makes perfect!
I’m also wondering how this would be with a filling of stabilized whipped cream instead of marshmallow goo. Though the students at hubby’s work love very sweet stuff, we don’t and a filling of stabilised cream or even crème fraiche, barely sweetened, maybe flavoured with brandy, might be really, really good. (Maybe forget the frosting and icing also). What do you think? I know it wouldn’t be true to the Hostess Cupcake concept, but it might be delicious!
Helen says
Made this yesterday – the cake is to die for, I think I’ll be using it for regular chocolate cake in the future. The marshmallow filling came out too runny for my taste. Maybe I beat it too much, maybe it’s my German ingredients, or maybe it’s supposed to be that way, but I think I’ll tinker with it next time. Thanks for the recipe and I love your sense of humor too!
Grey Parker says
Wow! That looks delicious! I want t o try it